This article shows how to use PIX4Dcloud or PIX4Dcloud Advanced for the first time from start to finish.
IN THIS ARTICLE
Project creation
Access the 2D/3D view
Analysis and measurements
Collaboration and sharing
Video: The following video tutorial explains step-by-step how to process a project with images with PIX4Dcloud Advanced.
Project creation
The first step is to create a new project or dataset. A project can consist of processing images acquired with a drone or a mobile device or of uploaded outputs generated by some Pix4D or third-party software.
To access PIX4Dcloud:
- Go to www.cloud.pix4d.com.
- On the top right, click Log in and enter the Pix4D account credentials. The Drive, which will collect your future projects, is displayed.
To create a new project:
- At the top left of the Drive, click + New > New dataset. The New dataset wizard opens.
- In step 1. Dataset creation,
- Enter the Dataset name (for PIX4Dcloud users) or enter the name to give to the site, which will collect projects of the same area of interest in the future (for PIX4Dcloud Advanced users).
- Choose between Upload and process images or Upload processed outputs.
- If Upload processed outputs is selected, click Create and go directly to the following article section. Otherwise, click Next and continue reading.
- In step 2. Image selection,
- Drag and drop the images or click Select images to search for the folder where they are stored.
- Optionally, draw a region of interest.

- Select Next.
- In step 3. Coordinate reference system,
- If the output coordinate system is known and supported in the database, select Known CRS. Then, define the horizontal and vertical coordinate systems and the geoid or geoid height if it is not geoid.
- To define a custom CRS:
- Select Import CRS file: Drag and drop a PRJ file defining the coordinate system.
- WKT2 files coming from site localization are supported.
- In step 4. Processing options,
- Select a processing template (nadir or oblique flight) and define one or more outputs (point cloud, mesh, orthomosaic, or DSM) to be generated during the project processing. By default, all outputs are selected.
- In step 5. CGP automatization (Only for PIX4Dcloud Advanced users)
- It is optional and allows one to include GCPs and checkpoints in the project. PIX4Dcloud Advanced AI algorithms will mark them automatically for you.
- Click Upload file.
- Browse the GCP file in CSV format.
- Define the GCPs coordinate system.
- Click See and edit control points to ensure the control points' coordinates are correct on the Table and the Map. Click Save to confirm.
- The Map displays the geolocation of the GCPs, the checkpoints and the images in the project. if a region of interest has been defined in Step2, it will also be displayed in this view.
- Click Process to finalize the new project creation.

- It is optional and allows one to include GCPs and checkpoints in the project. PIX4Dcloud Advanced AI algorithms will mark them automatically for you.
Access the 2D/3D view
Once the new project is created, the project 2D/3D view can be accessed to visualize the uploaded results or those generated from the input images. The 2D and/or 3D views are available according to the project outputs.
- From the PIX4Dcloud drive, open the project.
- Navigate through the 2D/3D views using the switcher
 .
. - (Optional) Each layer's settings (Name, Description, Tags, etc.) can be adjusted using the left and right panels.
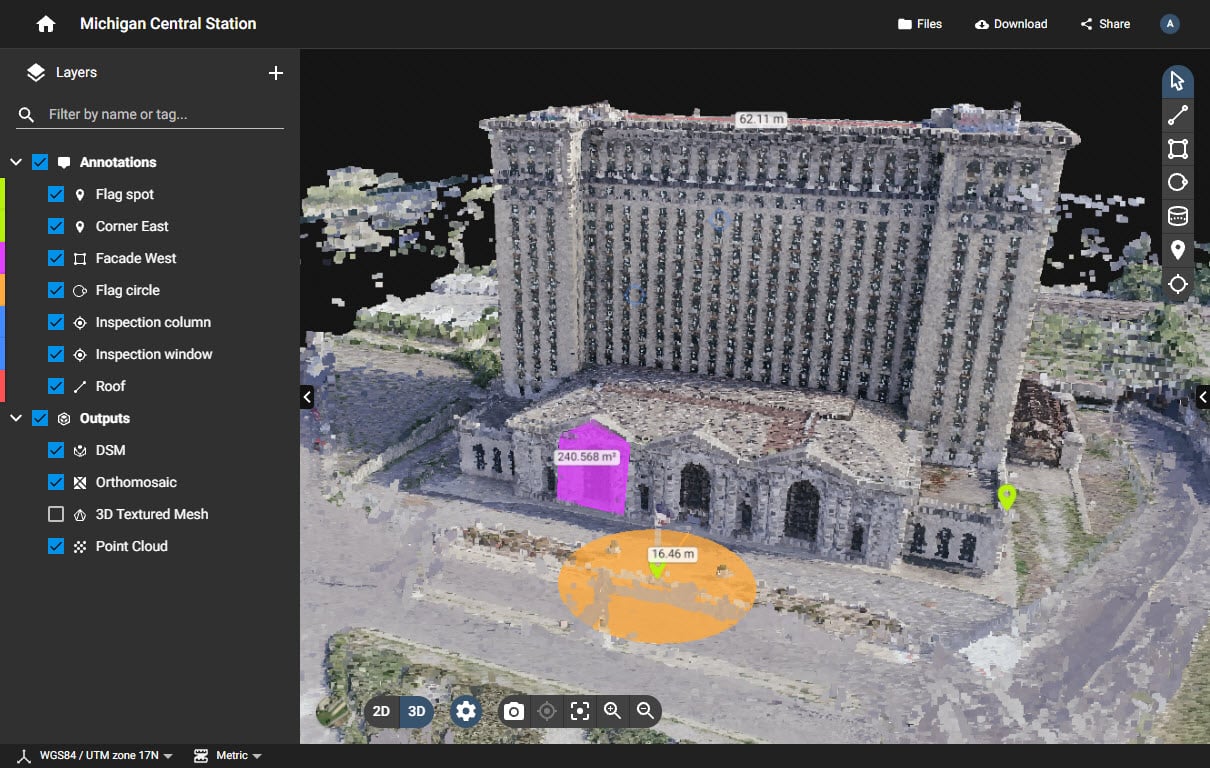
Analysis and measurements
Built-in measurement tools in the intuitive interface let easily analyze the project data. PIX4Dcloud Advanced also allows monitoring and documenting site progress with specific added features.
Tools available for all PIX4Dcloud users are:
 Select and Modify: It allows users to pan the map/model, select and modify an element in the views, visualize its details in the Details panel.
 Measure a distance or elevation: It allows users to draw a (poly)line annotation and extract measurements. An elevation profile can be generated from a distance measurement. More information in: How to generate an elevation profile.
 Measure an area: It allows users to draw a polygon annotation and extract measurements from it.
 Measure a radius: It allows users to draw a circle and extract measurements from it.
 Measure a volume: It allows users to draw a base surface upon which a volume annotation is created and volume measurements can be extracted.
 Add a marker: It allows users to add a point-like marker annotation and extract measurements from it.
 Inspect: It allows users to add an inspection to the project. More information in: What is the Virtual Inspector?
PIX4Dcloud Advanced additional tools include:
- A Timeline to easily switch from one dataset to another.
- A Design Overlay tool that allows superimposing CAD-type data to quickly compare the as-built with the as-designed tool to check progress and identify as-built errors easily.
- A 2D/3D comparison tool to visually compare models and maps of a site in time with a slider.
- The possibility to Compare volumes over time.
Collaboration and sharing
PIX4Dcloud and PIX4Dcloud Advanced are the perfect platforms for collaborating and cooperating on a joint project with colleagues or simply presenting the work done to clients and stakeholders. No need to download and send over big files: with a simple URL, the project can be shared, visualized, and discussed, even being far apart, or displayed on a webpage for displaying maps and models or advertising a business.
With LINK URLs, the project owner can decide whether to give read-only or edit rights.
To share a dataset:
- Open the dataset that is ready to be shared.
- At the top right corner, click Share. Different links are available:
- In the LINK tab, the LINK URLs.
- In the EMBED tab, the EMBED URLs.
3. Copy the needed URL and deliver it to collaborators.
Important: Within the organization management environment, only Owners and Managers are allowed to share a project with someone else. Editors or Readers cannot do it so they will not see the share icon in the viewer.