This article shows how to use PIX4Dsurvey for the first time. In particular, this page will show how to get from a collection of point clouds to the creation of a Triangular Irregular Network (TIN) and Contour Lines.
IN THIS ARTICLE
Download dataset
Preferences
Log in and project creation
Add a second point cloud
Project settings
Create bookmarks
Distant outlier filter
Terrain filter
Vectorize terrain
Grid of points
TIN
Contour lines
Export
Download dataset
To follow the steps described in this guide, you need to download for free* and extract the two exercise point clouds from this link: PIX4Dsurvey_AZ_project.zip (497 MB).
Content:
- Pix4Dsurvey_example_Rivaz_Pix4Dsurvey_Demo_group1_densified_point_cloud.las
- Point cloud created with photogrammetry processing.
- Coordinate System: CH1903+ / LV95 - EPSG:2056, Bessel 1841 ellipsoid
- Pix4Dsurvey_example_Rivaz_Laser_scan_village.las
- Point cloud collected with a laser scanner
- Coordinate System: CH1903+ / LV95 - EPSG:2056, Bessel 1841 ellipsoid
Preferences
Before starting the project right away, we advise taking a look at PIX4Dsurvey's preferences and modifying them if necessary. This might result in a better experience during all future projects.
- Access the preferences:
- Windows user: Click on the menu Edit > Preferences.
- MacOS users: Click on the menu PIX4Dsurvey > Preferences.
- In the General tab, select the Language according to your preference (this guide will use the English version).
- Choose a Default folder path suitable for most of your projects. This folder will be selected by default at every new project creation. Make sure you have read/write privileges in this folder and that you have enough disk space available. If possible, avoid network drives or cloud-shared folders such as Google Drive, OneDrive, Dropbox, or other.
- Click Done. The preferences selected are saved and kept for a future project.

Log in and project creation
This section describes how to log in and how to create the actual project in PIX4Dsurvey.
To log in to PIX4Dsurvey, sign-up for a Pix4D account or use the existing Pix4D account to login to the software.
- Click the
 icon or Log in on the top right side of the screen.
 - Enter the Email and Password.
- Click Login.
Once you are logged in, there are mainly three ways to create a project in PIX4Dsurvey:
- Drag and drop input files into the home screen.
- From the home screen
- From the menu bar
For this exercise, we will use the first method: Drag and drop input files into the home screen.
- Make sure you extracted the PIX4Dsurvey_AZ_project.zip compressed file found in the download dataset section.
- Open PIX4Dsurvey.
- Open the PIX4Dsurvey_AZ_project folder:
- Windows users: Open a File explorer window and navigate to the PIX4Dsurvey_AZ_project folder.
- MacOS users: Open a finder window and navigate to the PIX4Dsurvey_AZ_project folder.
- Drag and drop the Pix4Dsurvey_example_Rivaz_Pix4Dsurvey_Demo_group1_densified_point_cloud.las file from the folder to the PIX4Dsurvey home screen.

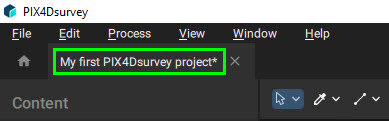
- Choose a Project name such as "My first PIX4Dsurvey project". The path will be the one chosen in the preferences section.

- Click on Start.
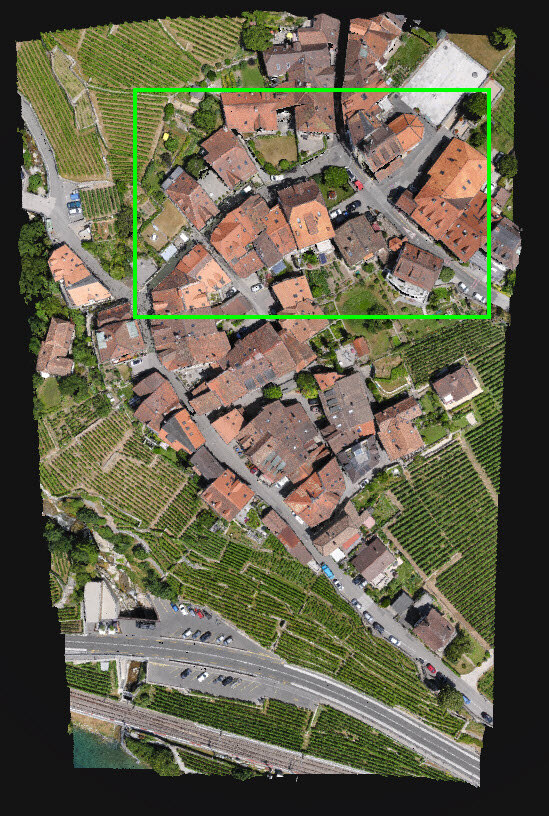
- PIX4Dsurvey imports the point cloud LAS file. At the end of the import, the point cloud will be displayed in PIX4Dsurvey. Note on the bottom-left side, PIX4Dsurvey detected the coordinate system of the point cloud automatically: CH1903+ / LV95 - EPSG:2056.

Add a second point cloud (optional)
PIX4Dsurvey can import and handle more than one point cloud in a single project if necessary. If the added point clouds are in a different CRS, PIX4Dsurvey will proceed with a transformation. In this exercise, the newly added point cloud has the same CRS as the PIX4Dsurvey project created in the previous step.
- If not already open after the last exercise, open the "My first PIX4Dsurvey project" project.
- Drag and drop the Pix4Dsurvey_example_Rivaz_Laser_scan_village.las file over the open project.
- As the newly imported point cloud has the same CRS as the project, no popup appears, and the new point cloud is directly imported and displayed.
Once both point clouds are loaded into the "My first PIX4Dsurvey project" project, it is possible to turn the visualization on and off for single point clouds or projects.
- Navigate to an area in the project where both point clouds are visible.
- Left-click to pan the 3D view.
- Right-click to rotate the 3D view.
- Use the scroll wheel to zoom in and out on the 3D view.
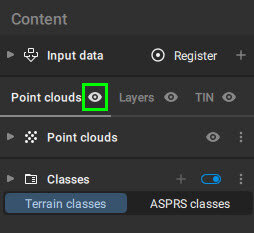
- Locate the Point clouds tab in the Content sidebar on the left side of the PIX4Dsurvey window.

- (optional) If not already expanded, click on the expand button
 to show both point clouds.
 - Click on the Hide all point clouds button
 in the Point clouds tab. Both point clouds will disappear from the 3D view.
 - Click on the Show all point clouds button
 . Both point clouds are displayed again in the 3D view.
 - Hovering with the mouse over the two point cloud names in the Point clouds tab will show the Hide points button . Click on this button to hide or show a single point cloud.

- Show both point clouds again.
- Press the key "7" on your keyboard to display the entire project from the top.
- Save the project:
- Windows user: Click on the menu File > Save.
- MacOS users: Click on the menu PIX4Dsurvey > Save.
- Windows user: Click on the menu File > Save or the shortcut Ctrl + s.
- MacOS users: Click on the menu PIX4Dsurvey > Save or the shortcut ⌘ + s.
A non-saved project will show an asterisk after the filename. The asterisk will disappear once the project is saved.
Project settings
Project settings are settings that are applied to the entire project and not to a specific point cloud, layer or vector.
- Open the Project settings by clicking on the Project settings icon
 , located in the top-right corner of the PIX4Dsurvey window.
 - Modify the Point Size
 using the slider. You can see how the point size is changing for both point clouds. Restore the original size.
 - (optional) To modify the size of a single point cloud, go to the Point clouds tab in the Content sidebar on the left and hover over the names of both point clouds. Click on the Gear icon
 to enable the point cloud options. A slider will appear where it is possible to change the point size for that specific point cloud. The Point size slider will overwrite changes in the point cloud options.
 - Another helpful setting in the Project setting is the Color by elevation
 . This can be helpful in identifying changes in elevation in the profile. Turn on the toggle
  and eventually choose a preferred color scale. All the points will be assigned to a color depending on their elevation.
- Turn off the slider
 .
.
Create bookmarks
Bookmarks allow saving a particular 3D location and camera orientation of the current view. This feature can be useful in many contexts when there is a need for a later revisit or to show particular areas. We will use this feature to inspect the result of the processing leading to a TIN and contour lines.
- Open the Bookmarks tab
 in the status center using the expand button
  .
. - Bookmark of the village:
- Navigate into the main square, making sure that both roads and buildings are visible.
- Click on
 .
. - Click on the "Camera bookmark 1" text in the newly created bookmark and rename it to Bookmark village. Press Enter on the keyboard.

- Bookmark of the vineyard
- Navigate to a vineyard and move the 3D view so that you can clearly see the plants
- Click on .
- Click on the "Camera bookmark 1" text in the newly created bookmark and rename it to Bookmark vineyard. Press Enter on the keyboard.
- Bookmark of the main road
- Navigate to the main road and move the 3D view so that you can clearly see the parking near the bridge.
- Click on .
- Click on the "Camera bookmark 1" text in the newly created bookmark and rename it to Bookmark main road. Press Enter on the keyboard.
- Continue navigating in the 3D view. You will notice that a purple camera was created in the 3D position of the view for every bookmark.

- Click on
 to move the view to the one assigned when each bookmark was created.
- Collapse the Bookmarks tab using the collapse button
 .
. - Save the project with Ctrl + s (Windows) or ⌘ + s (macOS).
Distant outlier filter
The Distant outlier filter detects points that are isolated from the main scene in all point clouds and recycles them.
The removed points are not used in further steps, such as the terrain classification.
- Open the Processes sidebar:
- Click Process
 and expand the Distant outlier filter
  or,
or, - On the Menu bar, click Process > Distant outlier filter.
Tip: For simplicity, only the first method for accessing specific processing will be described. However, all processes can be accessed also using the Process menu. - Click Process
- Click on Detect and delete outliers.
- About 15 points are deleted from the point cloud. You can read this information in the status center. You can learn more about the status center in PIX4Dsurvey in this article: Status center - PIX4Dsurvey.
- It is possible to undo the action
- Go to menu Edit > Undo filter outliers or
- Press Ctrl + z (windows) or ⌘ + z (macOS)
- Run the distant outlier filter again or redo the action using the Ctrl + y (windows) or ⌘ + z (macOS) combination or in the menu Edit > Redo filter outliers.
Terrain filter
The Terrain filter process classifies selected input point clouds into terrain and non-terrain based on the selected processing values. These classes will then be used in future processing steps, for example, to create a grid of points only from the terrain class.
- Click Process and expand the Terrain filter
 .
. - Make sure that both point clouds are selected as Input point cloud
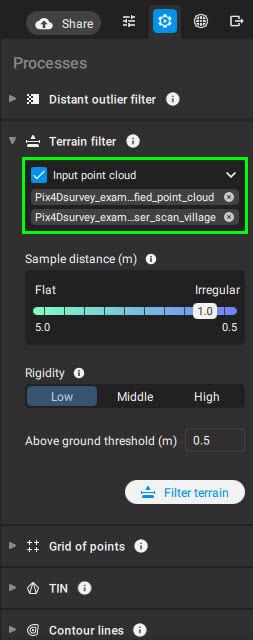
- Click on Filter terrain
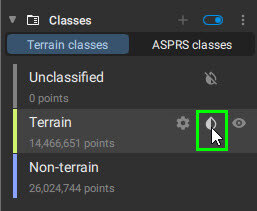
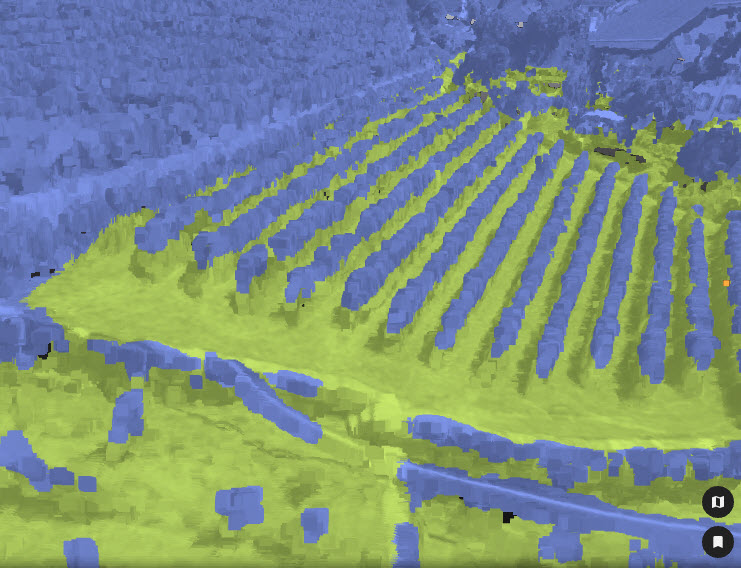
The point cloud in the project has turned into two colors: Green for points belonging to the Terrain group and purple for points belonging to the Non-terrain group. It is possible to re-enable the RGB values for one or both groups by hovering over the Terrain or Non-terrain classes in the Content sidebar on the left and click the Show class in RGB  button. To show the class color again, click on Show class in monochrome
  .
.
Now it is possible to use the bookmarks created previously to assess the quality of the classification.
- Open the Bookmarks tab in the status center using the expand button .
- Click on every different bookmark. The 3D view will change and will show the same areas saved in the previous chapter.
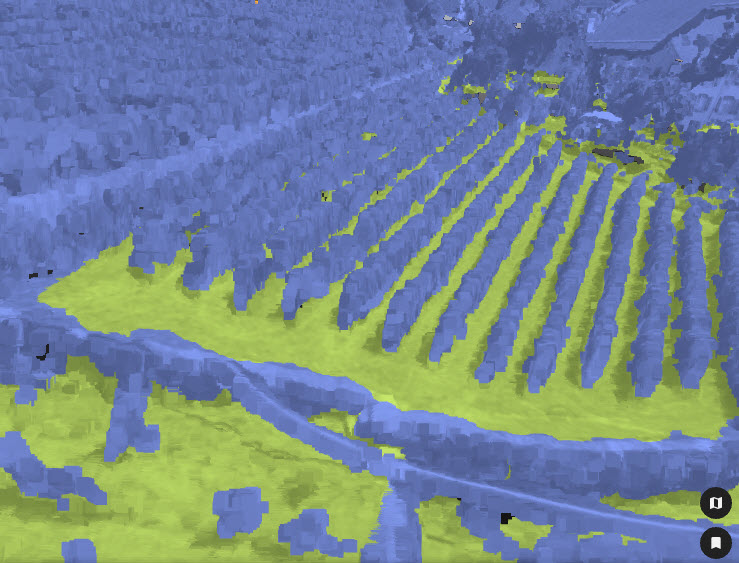
- Visit the Bookmark vineyard and take a look at the classification.
- In the Terrain filter processing panel, change the Above ground threshold (m) to 1m.
- Run the Terrain filter again.
- Verify how the change in the Above ground threshold (m) changed the result.
- Visit the other bookmarks to see the effects in changing the Above ground threshold (m) value.
- Change the Above ground threshold (m) back to 0.5m and run the Terrain filter again.
Vectorize terrain
Not all the points of the grid of points fall on breaklines. This can create inaccuracies in the TIN (Triangular Irregular Network). To improve the quality of the TIN, it is suggested to create polylines at breaklines,
- Click on the Bookmark main road to move the 3D view to this bookmark.
- Enable the RGB view for the point cloud classes using the button in the classes tab of the Content sidebar.
- Select the Polyline
 tool.
tool.
- Vectorize the polyline using the left mouse button along the border of the parking.

- The polyline is found in the Layers tab of the Content sidebar. Click on the gear icon
 and ensure that the Terrain Layer is enabled .
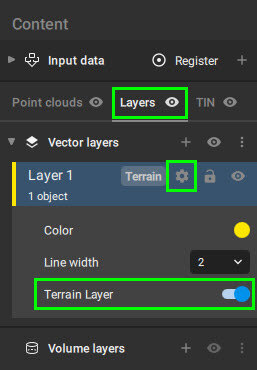
Grid of points
The Grid of points tool helps to automate the creation of spot elevations and allows for drastic simplification of the number of point cloud points. No new points are created; only existing points from the input data are used. It is possible to use the filter in order to take into account only points from a specific point cloud, from a specific class, or a combination of both choices.
- Click Process and expand the Grid of points
 .
. - Make sure both point clouds are selected in the Input point cloud and that only the Terrain class is selected in the filter.
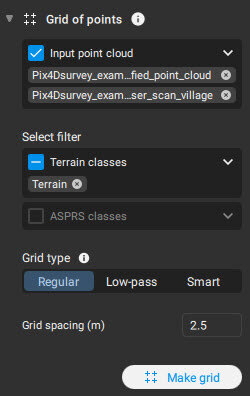
- Keep the Regular grid type selected. Visit the Grid of points - PIX4Dsurvey article to learn more about the other grid types. Keep the Grid spacing (m) 2.5.
- Click on Make grid.
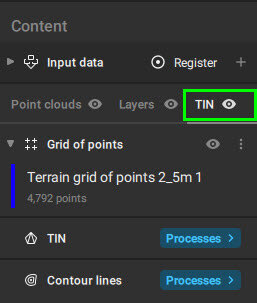
This will create a grid of points with 2.5m spacing based on the Terrain points in both input point clouds. The grid of points are located in the TIN tab in the Content sidebar.
TIN
The TIN process creates a seamless set of triangles representing a surface.
- Click Process and expand the TIN
 .
. - Make sure the grid of points created previously is selected as input.
- Disable Use terrain layer as breaklines .
- Click on Generate TIN.
Only the points of the grid are considered for the creation of the TIN, therefore the border of the parking is not well modeled. Disable all the point clouds with the Hide all point clouds icon in the Content sidebar for better visibility of the TIN.

- If needed, click Process and expand the TIN .
- Enable Use terrain layer as breaklines .
- Click on Generate TIN.
Now both the points of the grid and the terrain polygon were taken into account and the TIN reflects reality better.

Contour lines
PIX4Dsurvey creates contour lines based on the TIN.
- Click Process and expand the Contour lines
 .
. - Keep Interval (m) 1.
- Enable Discard contour lines loops shorter than (m) . Keep the suggested value 10.
- Click on Generate contour lines.
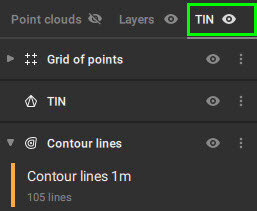
The contour lines are located in the TIN tab in the Content tab.
Export
Once you are satisfied with the results, you can export one or more files generated.
- Open the Export
 tab.
tab. - in the Point cloud section, enable both point clouds and remove the Non-terrain label. Only points from the terrain class will be exported.
- Uncheck Vector layers and Grid of points.
- Select TIN (LandXML format) and Contour lines (in SHP format).
- Click Export.
- Click on Open destination folder.
All the files we selected to export are found in that folder.
 Add timestamp in case you are generating the same output again, and you don't want to overwrite the older exported files.