This article shows how to use PIX4Dinspect for the first time from start to finish.
IN THIS ARTICLE
Project creation
Access the 2D/3D view
Layers, 2D/3D tools, and visualization settings
Collaboration and sharing
Project creation
To access PIX4Dinspect:
- Go to www.inspect.pix4d.com.
- On the top right, click Log in and enter the Pix4D account credentials. The PIX4Dinspect dashboard will be displayed.
After accessing PIX4Dinspect, the first step is to create a new Asset or a new Project.
At the top left of the dashboard, click  and select New project or New asset. The New project or New asset wizard opens.
Define the asset's properties in the New Asset wizard.
- Location: WGS84 (EPSG:4326) coordinates that identify the location of the asset.
The coordinates can be defined by:
- Manually inserting them in the Location field, with the format [latitude, longitude] in degrees.
- Selecting the asset's location on the map. The address of the location can be inserted in the search bar for faster focusing on the map.
- Asset name: univocal name given to the asset.
- Asset type: category of the asset. Available options are:
- Telecom (for inspect-telecom licenses only, contact sales for more information): Self-support, Monopole, Guyed tower, Rooftop, or Watertower.
- Generic: Transmission tower, Rooftop, Building, Bridge, Cooling tower, Energy utility, or Other.
- Asset Description (optional): a short description of the asset.
Click Save to finalize the asset creation.
The asset is now created and visible on the dashboard. Projects can be added to the asset.
1. Inputs selection: Inputs can be added via drag and drop or selected from the disk, and they have to meet the required criteria.
- .jpg, .jpeg, or .mp4 files
- For all Asset types: At least 5 images and/or 1 video
- Maximum 4,000 images
- Georeferenced images
- Images with compatible (XMP) camera orientation
2. Project creation: After you have selected your inputs, in the Project creation tab you need to choose between two options, Existing asset or New asset, and provide all the values and details requested.
3. Options: Different options are available to define the intelligent digital twin and to activate the artificial intelligence algorithms for antenna detection (Digital Twin, Area of Interest, Artificial Intelligence plugins...).
Access the 2D/3D view
The project process can be a combination of 2D, 3D, and image viewers. The intelligent Digital twin will be available in the 2D/3D, and image viewers only after the corresponding processing steps have been performed and the outputs optimized for their web visualization.
The user can switch between the 2D and 3D view by clicking ![]() under the Basemap box.
under the Basemap box.
- The 2D view shows the cameras and annotations in 2D and the 2D outputs.
- The 3D view shows the cameras and annotations in 3D and the 3D Model.
The Basemap box allows switching between the Streets and Satellite Maps of Mapbox.
Layers, 2D/3D tools, and Visualization settings Layers
Different tabs on the left navigation bar are available to access the inputs, annotations, and results more effectively (Annotations, Inventory, Measurements, Camera layer, Intelligent Digital twin, and Export).
When looking for an item in the Layers tab, the filter is a helpful tool to narrow the search.
At the top of the Layers tab, type in the name of the item to search.
2D/3D toolsBuilt-in measurement tools in the intuitive interface let quickly analyze the project data.
Tools available for all PIX4Dinspect users are:
 Select and Modify: It allows to pan the map/model, select and modify an element in the views, and visualize its details in the Details panel.
 Measure a distance or elevation: It allows users to draw a (poly) line annotation and extract measurements. An elevation profile can be generated from a distance measurement. More information in: How to generate an elevation profile.
 Measure an area: It allows users to draw a polygon annotation and extract measurements from it.
 Manually add a new inventory item: It allows to add a new inventory item manually and all the extra information needed (weight, depth, width, height, status, etc.).
 Inspect tool: It allows to click on any part of the 3D view and get an image showing that exact point.
Extra Visualization settings can be found at the bottom of the project viewer (North indicator, Viewer settings, Take a Screenshot, Show my current position, Center map, Zoom In, or Zoom out).
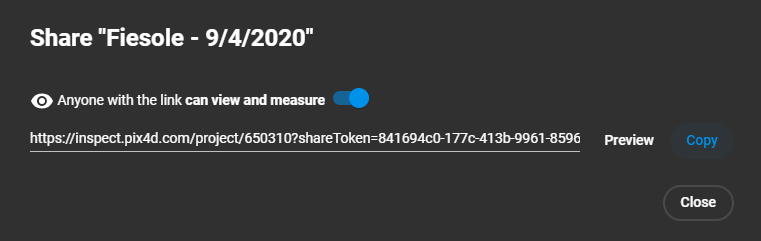
Collaboration and sharing
Projects can be shared for collaboration purposes via unique URLs generated by Pix4Dinspect.
How to share a project- Open the project.
- At the top right corner, click Share.
- Enable the sharing link using the toggle (turning the toggle off will immediately deactivate the sharing link).
- Copy the link.
- Deliver it to collaborators.
While the link is enabled, the collaborators with which the link is shared can:
- Open a dataset as anonymous users.
- Measure.
- Change the properties of each layer (visibility, opacity, background color, etc..)
- Visualize existing image annotations and antenna details.
- After a page refresh, the changes will be discarded.