Access: On the Menu bar, click
Project > GCP/MTP
Manager... The
GCP/MTP Manager window opens. In the
GCP/MTP Editor section, click
Basic Editor...
This section is used to mark the GCPs/MTPs/Check Points on the images.
Important: Each point needs to be marked on at least 2 images to be taken into account in processing. It is recommended to mark each point in at least 4-5 images.
Important: The zoom level at which GCPs are marked has an impact on the GCP error obtained in the Quality Report. Usually the higher the zoom level, the more precisely the GCP is marked. These GCPs will have more impact on the reconstructed model than GCPs marked in a lower zoom level and lower error values are expected for those GCPs. For example, when GCPs are marked without zooming into the images, the GCP error can be 10 times higher than when GCPs are marked by zooming into the images.
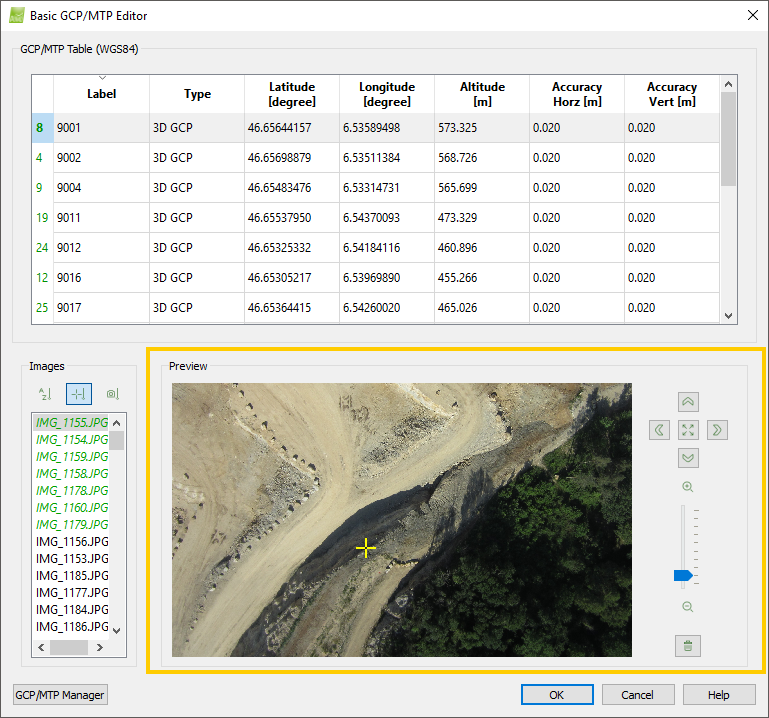
When the Basic GCP/MTP Editor is opened the first time, no image is displayed in the Preview section. Once points are imported from a file or once a new point has been added, the first image is displayed in the Preview section.
The following actions are available:
- Zoom in: Move the mouse scroll wheel forwards.
- Zoom out: Move the mouse scroll wheel backwards.
- Pan: Press the left mouse button and move the mouse.
- Zoom in instantly to a specific point: Hover the mouse on the point of interest while pressing the Alt key.
- Zoom out instantly to zero zoom level: Hover the mouse on the point of interest while pressing the Shift key.
- Mark a point: Left click on the point on the image.
In the right part of the Preview section there is a control panel to navigate in the image:
-
 Left arrow button: Moves to the left part of the image (when the image is zoomed in).
 -
 Right arrow button: Moves to the right part of the image (when the image is zoomed in).
 -
 Up arrow button: Moves to the top part of the image (when the image is zoomed in).
 -
 Down arrow button: Moves to the bottom part of the image (when the image is zoomed in).
 -
 Reset view button: Zooms out to zero zoom level.
 -
 Zoom in button: Zooms in.
 - Zoom slider: Zooms in or out.
- In: Move the slider up.
- Out: Move the slider down.
-
 Zoom out button: Zooms out.
 -
 Remove button: Removes the marked point (if any) from the image displayed in the Preview section. If there is no mark in the image displayed in the Preview section, the Remove button is grayed out.