PIX4Dcatch is a powerful tool for terrestrial data acquisition that combines the following to get the most out of your mobile device:
- Image acquisition.
- LiDAR acquisition*.
- RTK geolocation with RTK-enabled devices
PIX4Dmatic is well suited to process these datasets and has incorporated many features to combine and take advantage of the unique qualities of these sources.
IN THIS ARTICLE
How to import a PIX4Dcatch dataset into PIX4Dmatic
How to process a PIX4Dcatch project in PIX4Dmatic
Calibrate
Depth point cloud
Densify
Depth & dense fusion
Mesh
DSM
Orthomosaic
Exports
How to import a PIX4Dcatch dataset into PIX4Dmatic
With a completed PIX4Dcatch project on a mobile device, it is ready to be exported and processed using PIX4Dmatic.
- From the PIX4Dcatch app,
 open the project to be processed in PIX4Dmatic.
 - Export the project from the mobile device by tapping Export all data
 and save to a local folder.

For more information: Export PIX4Dcatch Data (iOS/Android).
- Extract the project data to a new directory.
- Open PIX4Dmatic
 .
. - To create a new project, import the project data. The _inputs folder contains all the captured data and is aptly named projectname_inputs. Different files will be visible in this folder depending on the device used for capture.
Projects captured with LiDAR capable devices.
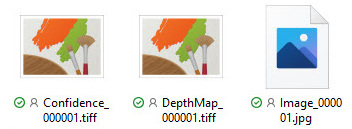
When importing projects taken with LiDAR capable devices, import all Confidence.tiffs, DepthMap.tiffs, and Image.jpgs. The Confidence.tiff and DepthMap.tiff files represent the LiDAR depth data, while the Image.jpg files represent the image content.
Projects without LiDAR data
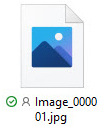
When importing projects captured without a LiDAR capable device, the _inputs folder contains the Image.jpgs reflecting the image content.

Projects with GCPs
Projects with Autotag Detection or manual marking of GCPs can be easily processed in PIX4Dmatic. To do so, the Point Collection and markings need to be imported into the project. Both datasets are available in the ZIP file.
- Click the
 Tie points (0) tab on the lower right of the screen to expand the tab. Click the dropdown menu

- Import GCPs...
Browse for the file: ./GCPs/PointCollection/COLLECTIONNAME-PIX4Dmatic.csv
Select the output coordinate system and the format. For more information, see: How to import tie point files (GCPs and Checkpoints) - PIX4Dmatic - Import marks...
Browse for the file: marks-PIX4Dmatic.csv
Finally, the Tie points tab includes the GCPs, and the marks are loaded on the images.
- Click the
How to process a PIX4Dcatch dataset in PIX4Dmatic
With a new project opened and all the data imported, PIX4Dmatic is ready for processing. In most cases, the default processing options can be used to process PIX4Dcatch projects. There are a few PIX4Dcatch-specific settings to select and are highlighted in each section.
Calibration
Calibration is the first step in processing. A good starting point is to select the PIX4Dcatch template with the Trusted location and orientation pipeline.

Use depth maps are available and activated by default for projects captured with LiDAR depth data. This can be toggled off if desired. When enabled, the depth maps generated with PIX4Dcatch are used for better calibration.
Depth point cloud

The Depth point cloud is generated from LiDAR depth maps. This option is only available for PIX4Dcatch projects captured with a LiDAR-capable device.
Dense point cloud

The Dense point cloud step generates a dense point cloud from the images. Besides the default settings, there are two optional selections to make that can directly benefit PIX4Dcatch projects. They are the Noise and Sky filters.
-
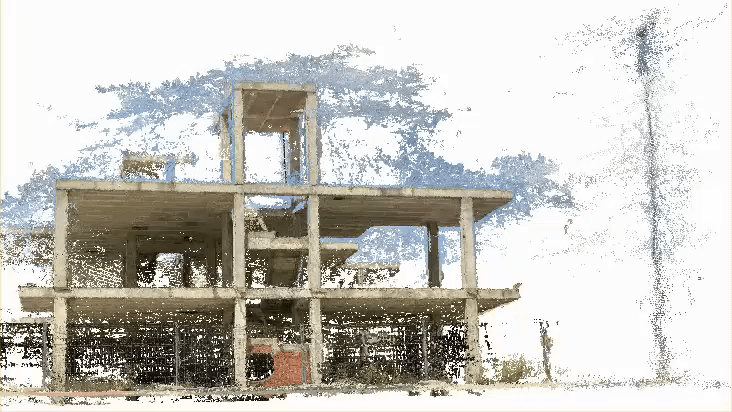
Noise Filter
Noise filter processing option provides a cleaner point clouds for datasets with oblique images.
It filters out points that are generated far away from images for example, features that are visible on images but are far on the horizon will not be reconstructed.
Example: When the Noise filter is enabled for a cell tower project, points that are far away from the images do not get reconstructed.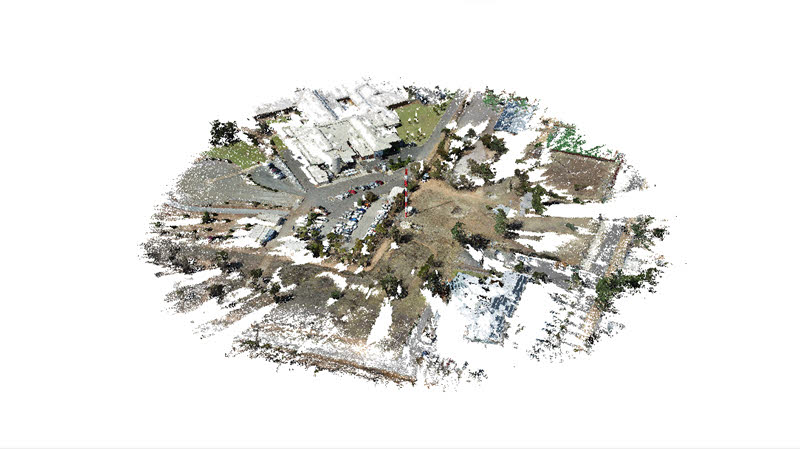

-
Sky Filter
Sky filter processing option removes points in a dense point cloud associated with sky.
The feature is especially useful for datasets that contain sky in images, for example:
- Terrestrial datasets acquired with PIX4Dcatch.
- Inspection datasets acquired with PIX4Dscan.
 Important: The Sky filter processing option significantly increases the processing time. We recommend using it only for datasets that contain a lot of sky in images.
Depth & dense fusion
The Depth & dense fusion option combines the point cloud generated from images with the one generated from LiDAR depth maps.

The fused point cloud is often denser and more complete in areas where traditional photogrammetry may struggle to reconstruct complex geometries or homogeneous textures.
Mesh
Select to generate a 3D mesh. The Input and Template fields have PIX4Dcatch-specific selections to make.

-
Input
When processing PIX4Dcatch data containing LiDAR depth maps, the mesh can be generated with one of the following point clouds:
- Dense point cloud.
- Depth point cloud.
- Depth & dense fusion point cloud.
-
Template
Select the PIX4Dcatch template as this is optimized for terrestrial projects.
All the Mesh settings are outlined in Processing options - Mesh. Select the options that provide the most accurate reconstruction depending on the subject.
DSM
Select to generate a Digital Surface Model(DSM). The Input field has PIX4Dcatch-specific selections to make.

-
Input
When processing PIX4Dcatch data containing LiDAR depth maps, the DSM can be generated with one of the following point clouds:
- Dense point cloud.
- Depth point cloud.
- Depth & dense fusion point cloud.
All the DSM settings are outlined in Processing options - DSM. Select the options that provide the most accurate reconstruction depending on the subject.
Orthomosaic
Select to generate an Orthomosaic. The Oblique and Deghosting toggles can provide PIX4Dcatch projects with improved quality.

All the Orthomosaic settings are outlined in Orthomosaic - PIX4Dmatic. Select the options that provide the most accurate reconstruction depending on the subject.
Exports
Select the desired exports for each processing option plus the Quality report.

When processing PIX4Dcatch data containing LiDAR depth maps, each point cloud .las option will be available for export if the processing option is selected. When exporting the DSM and Orthomosaic, there are further options to consider. These export settings are outlined in their respective articles: Processing options - DSM, and Orthomosaic - PIX4Dmatic.