IN THIS ARTICLE
General
Hardware
Graphics
Shortcuts
Templates
Network - Proxy configuration
Offline license
General
In the General tab, it is possible to change the following settings:

User interface
- Language: select the preferred language for the application. Options are:
- Chinese
- English
- French
- Japanese
- Korean
- Portuguese
- German
- Turkish
- Czech
- Spanish
- Ukrainian
Note: The default language set is determined by OS language.
Project handling
- Default folder path: Select the default folder.
Theme
The application now includes a light theme option designed to enhance accessibility for all users, particularly those who may find it challenging to read or view content in darker color schemes. By selecting the light theme, users can enjoy a brighter interface that improves visibility.Viewer
- 3D: Default background color: Select the default background color.
- 2D: Basemap enabled (requires a network): Toggle to enable and disable a basemap.
Email notification
An email notification will be sent for any action that exceeds the time entered below. Notifications are only sent to email addresses linked to a Pix4D account.

Properties panel
Enable or disable the properties panel to open automatically when an object is selected.
Software updates
- Notify when preview releases are available: Option is disabled by default. To get notified when preview releases are available toggle on to enable the option.
Release notes
- When enabled, a window with the release notes will appear when starting a new version of the application.
Hardware
GPU
- When enabled, hardware acceleration will be used for machine learning algorithms during processing. It is only available on machines with a dedicated GPU.
Graphics
- Mesh rendering: Use compressed textures with hardware decoding.
- Point cloud rendering: Maximum number of points per point cloud. Increasing the slider value will add more detail.
- Gaussian splats rendering: Maximum number of splats per model.
Shortcuts
It is possible to change the shortcut assigned to each action related to General shortcuts, selection edit vectorizing tools, measurements tools, other actions, section, settings, views, 3D viewer, and image viewer, allowing you to customize the keyboard layout to match your preferred workflow.
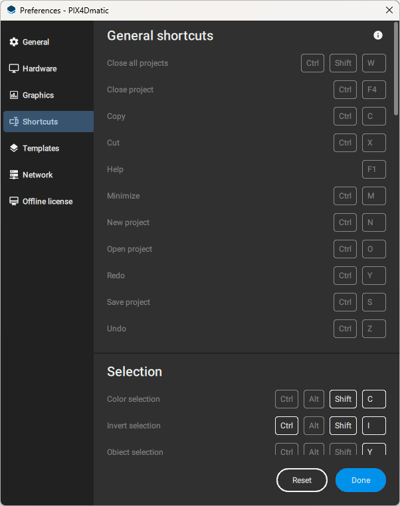
All the shortcuts can be reset to the default configuration. Keyboard shortcuts - PIX4Dmatic
Templates
- Layer templates enable the pre-building and reuse of entire layer configurations.

Layer templates options.
When a new layer is created, it is possible to save this layer as a new template. A save-as window will pop up asking for a name for the new template.
Save as window for layer templates.
Save template: Saves the default template layers, overwriting the current layers.
Apply default template: Applies the default template on the current project. - Processing templates. Select the default template to process the dataset. The templates are: nadir, oblique, and PIX4Dcatch.
Network - Proxy configuration
If a proxy server is used to connect to the Internet, enter the proxy settings, following:
- Open the Proxy window by clicking Network...
- There are three options to choose from:
- No proxy
- Use System proxy
- Manual proxy configuration
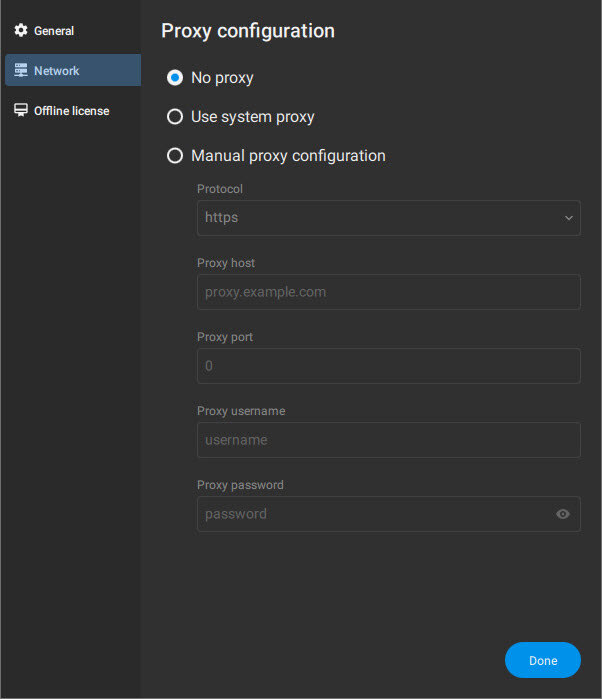
- Ask your system administrator which option to choose from the Protocol drop-down list (http, https, socks4, socks5, ). If you do not know choose Use system proxy.
- Enter the proxy Host name and Port number.
- Enter the proxy Username and Password.
- Click Done.

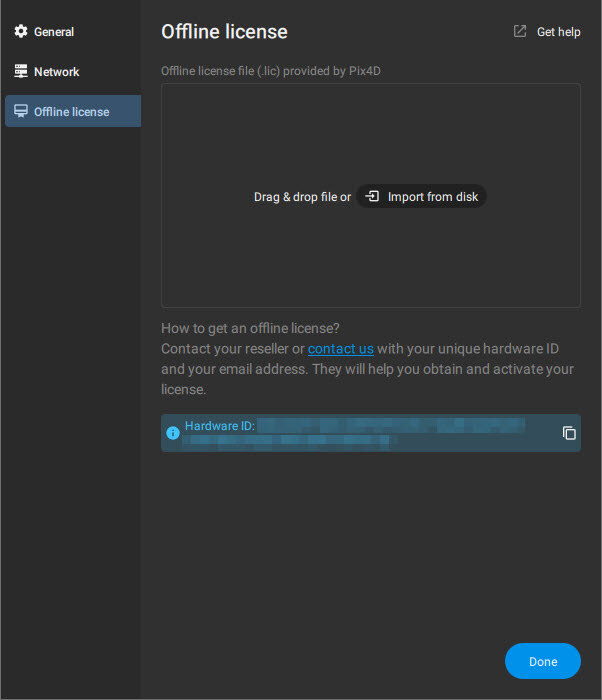
Offline license
The Offline license tab offers the tools to request and activate an offline license.
If you received an offline license file (.lic) from Pix4D, drag and drop it to this window (or click  Import file from disk and select the .lic file).
To request an offline license, contact your reseller or contact us providing us with the Hardware ID. To copy the Hardware ID in your clipboard, click the copy button  next to the Hardware ID.