- The RGB camera and the rig is included in PIX4Dmapper camera database. However, the camera model for the ANAFI Thermal camera is created during project creation, from the EXIF file.
- The ANAFI Thermal is not supported by command line, PIX4Dengine or PIX4Dcloud.
- Pix4D Documentation
- PIX4Dmapper
- How to... (step-by-step instructions)
How to capture and process data with Parrot ANAFI Thermal - PIX4Dmapper
Learn how to process thermal dataset in PIX4Dmapper acquired by Parrot ANAFI Thermal. The processing will only work from version 4.5.4. You can update the software from here.
Important:
IN THIS ARTICLE
How to capture the thermal dataset
How to process the thermal dataset
How to visualize the thermal mesh
- Use the PIX4Dcapture app to plan and fly the mission. For more information: PIX4capture - Getting Started.
- By default, the sensor for the Anafi Thermal is the Anafi 4K. Select the thermal camera in the drone/camera settings.
- The GSD displayed to the user is from the RGB camera.
- Create a new project in PIX4Dmapper. For more information: New project in PIX4Dmapper.
- At the stage of importing the images add Rjpg files to the project.
- In the Processing Options Template, select 3D Maps or 3D Models, not the Thermal Map template as the photogrammetric processing is done using the RGB images.
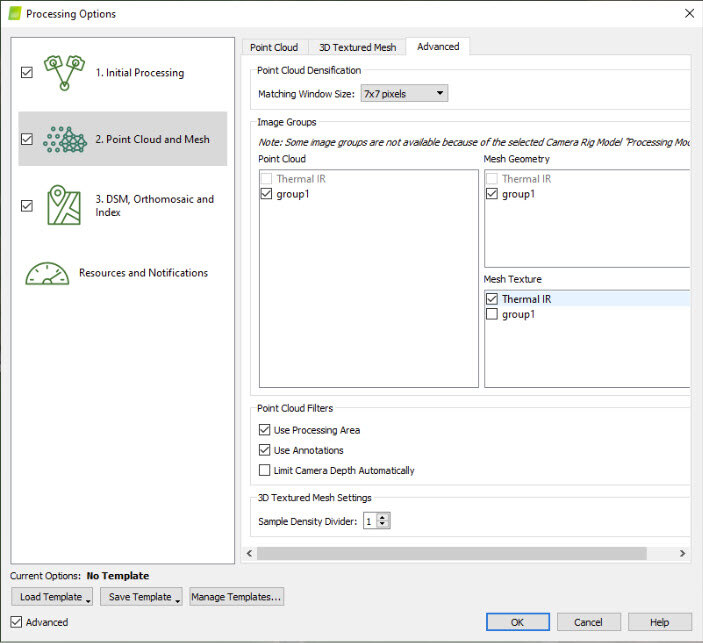
- To generate the thermal 3D Textured Mesh, open Processing Options > 2. Point Cloud and Mesh > Advanced and select Thermal as a source of information for the Mesh Texture.
Note:
- Initial Processing is done using the RGB camera.
- The geometry of 3D Textured Mesh and the dense point cloud is derived from the RGB images.
- The colour and texture of the 3D Texture Mesh and the dense point cloud, respectively, are derived from the thermal camera by projecting the images directly without calibrating them.
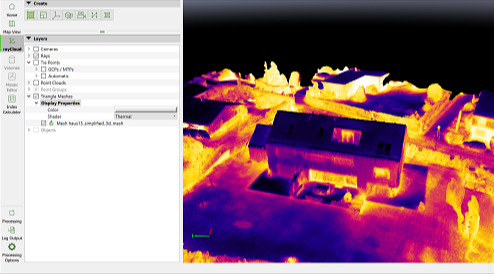
- Click on rayCloud. Go to Triangle Meshes.
- The triangle mesh has a colour and shader dropdown as a part of display properties.
- Select Thermal as the shader.
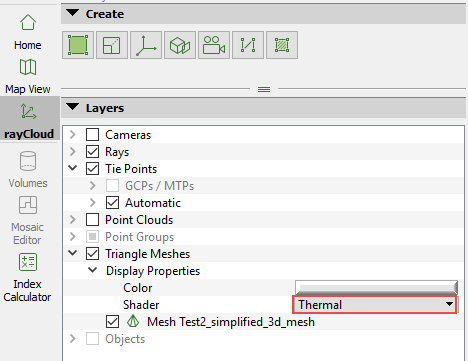
- The mesh will have a thermal texture for visualization.