- Pix4D Documentation
- PIX4Dcloud
- Getting started
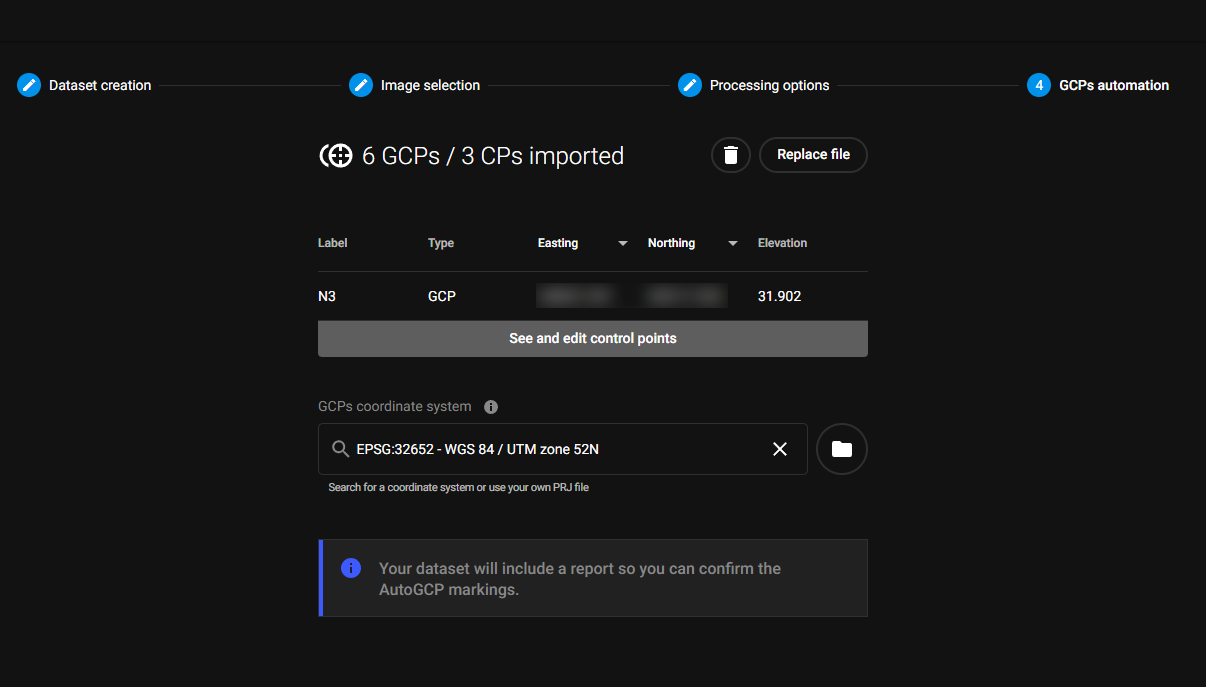
New dataset > GCPs automatization > Processing with GCPs/checkpoints - PIX4Dcloud
Create a new dataset to start processing imagery and create maps and digital twins of the reality or upload outputs to PIX4Dcloud.
Access: This feature is only available on PIX4Dcloud Advanced.
| 1.Dataset creation > | 2. Image selection > | 3.Output coordinate system > | 4.Processing options > | 5. GCPs automation |
| Processing with GCPs/checkpoints / | Processing without GCPs/checkpoints |
To process a project with GCPs:
- Select Upload file.
- Browse the CSV file which contains the GCPs' details and click Open.
- The GCPs are imported.
Note that the CSV file has to be in a certain format before being imported. For more information, Upload the GCP file. - (Optional) Click Replace file to upload a new GCP file.
- (Optional) Click
 to delete the GCP file.
 - Define the GCP coordinate system. Drag and drop a PRJ file defining the coordinate system, or search a coordinate system based on: EPSG code or name of the coordinate system.
Only a projected coordinate system is supported. - (Optional) Click See and edit control points. Switch between the two following options:
- Control point table: the control points table lists the imported control points and their properties.
- Control point Map: When clicking Map, an OpenLayers map is displayed with the GCPs and Checkpoints.
For more information, See and edit the defined control points.
- Click Start processing.
Information: The full instructions list can be found at AutoGCPs detection functionality.