|
|
|
|
|
|


DSM
The DSM step defines the Resolution, enables the Surface smoothing, and enables Interpolation for the digital surface model (DSM) creation.
- Click Processing options
 .
. - On the Menu bar, click Process > DSM...
入力
This processing option defines which input source is used for the DSM generation. The following options are available:
- 高密度点群
- Depth point cloud (PIX4Dcatch projects)
- Depth & dense fusion (PIX4Dcatch projects)
- Automatic tie points (Starting from the 1.69.0 version of PIX4Dmatic). ATPs are intended for quick previews, as they generate low-detailed DSMs, which are suitable for flat areas or preliminary assessments. For optimal quality, use high-resolution point cloud instead.

NOTE: Starting from version 1.79.0, you can select multiple inputs for DSM generation.
Tip: Selecting Automatic Tie Points as the input for DSM generation can be useful for relatively flat projects with minimal 3D structures (e.g., buildings, bridges). This option was introduced to speed up the DSM generation process for such projects while maintaining the same level of absolute accuracy (.i.e the position with respect to the GCPs/Checkpoints).
Important: Starting from version 1.69.0, there is an option to use Automatic Tie Points as input for DSM generation. Since the orthomosaic is created based on the DSM, it will also use the same input.
In case the input is not selected, the start button is not enabled, and a warning message will appear in the processing panel

決議
Defines the spatial resolution used to generate the DSM. The default resolution is determined based on the calculated average Ground Sampling Distance (GSD) of the project.
- 解像度 [単位/ピクセル]: Defines the resolution of the DSM.
- デフォルト: 解像度はプロジェクトの1 x GSDです。
- Custom: Allows to select any value for the resolution of the DSM.
表面平滑化
The surface smoothing is applied to the generated DSM. When using Low values, the final DSM contains sharper features and edges. When using High values, the DSM is smoothed out.
- サーフェス平滑化 (0 - 20, 12 - デフォルト): The radius of the median filter can be selected to determine the effect of DSM smoothing:
- 0: 平滑化は適用されません。
- Low (values closer to 1): Tries to preserve the orientation of the surface and to keep sharp features such as corners and edges of buildings.
- 高(値が20に近いほど):より広い周辺領域に基づいて領域を平滑化しようとします。鋭いエッジは滑らかになります。あまり平坦でない領域は平滑化され、平坦になります。
補間
The Interpolation parameters affect the completeness of the generated DSM:
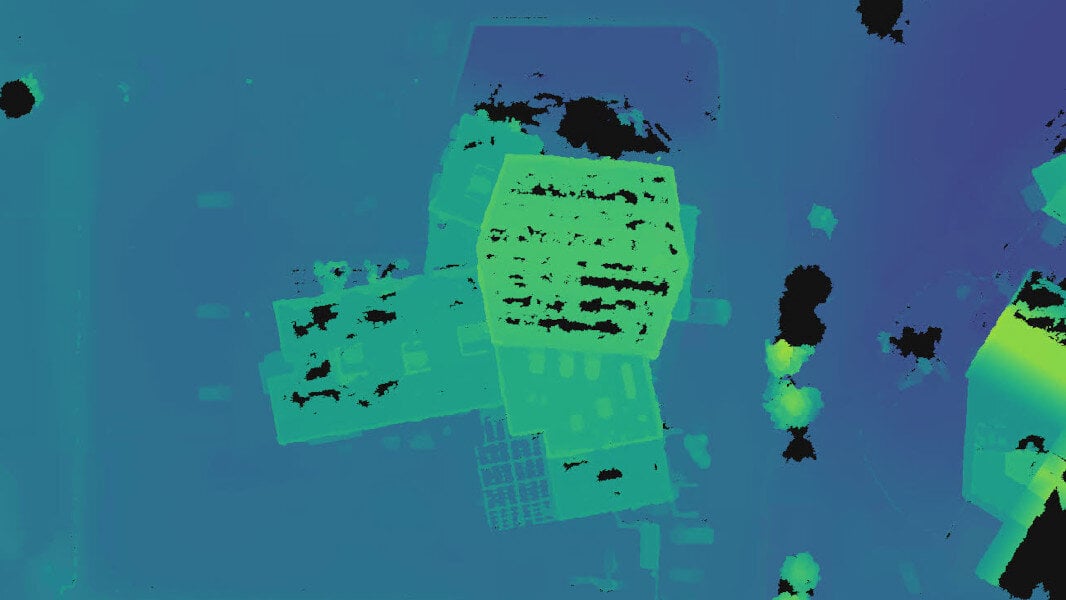
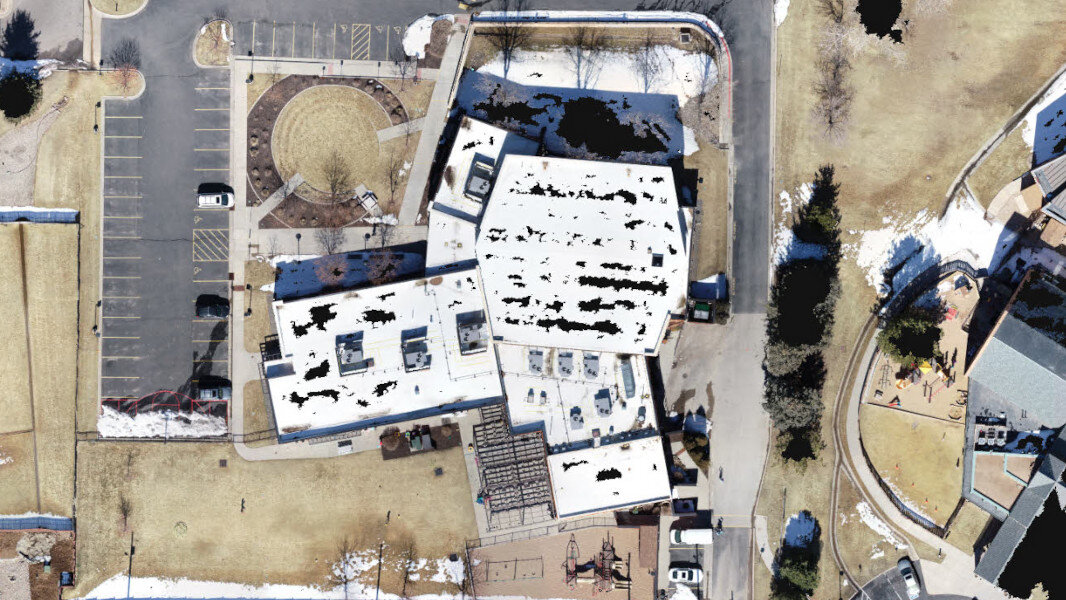
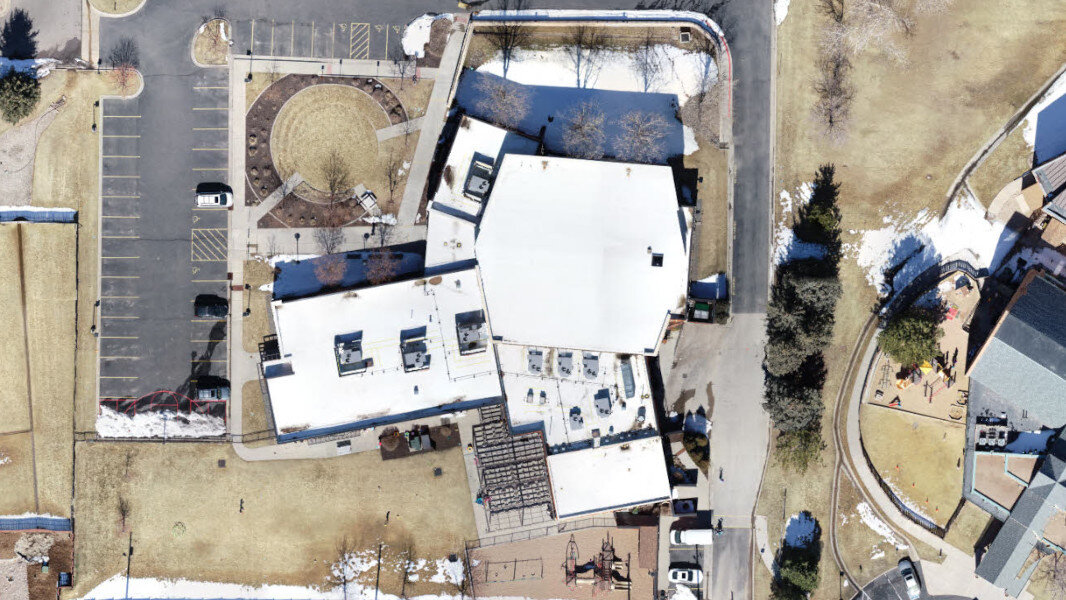
- No interpolation. Only areas where the dense point cloud is generated are reconstructed in the DSM. Where the dense point cloud is not generated or is not dense enough, holes in the DSM appear.
- Interpolate holes. Holes in the DSM are filled based on neighboring data.
- Expand area. The DSM data is extended, attempting to cover the entire area that is visible from the (calibrated) cameras

ポリゴン対応
Use a polygon to fill holes and flatten areas in the DSM.
Mask-aware
Applies masks to exclude elements from the DSM. For detailed instructions on working with masks, refer to the following article: Masks - PIX4Dmatic
輸出
以下のエクスポート設定が利用可能です:
- 圧縮(LZW圧縮、有効 - デフォルト)エクスポートされたファイルの圧縮率を定義します。
- LZW compression - Enabled: No data is lost during the compression of the file and the .tiff is not degraded. This results in a smaller file size of the exported file.
- LZW圧縮 - 無効: エクスポート時に圧縮は使用されません。これによりエクスポートされたファイルのサイズが大きくなります。
- ファイルタイプ(単一 - デフォルト):
- 単一:画像は単一のファイルとしてエクスポートされます。
- タイル(2048 px - デフォルト):画像は、事前定義されたサイズ(1024 px、2048 px、または4096 px)のタイルとしてエクスポートされます。タイルの原点は、プロジェクト境界の左上隅です。
- 画像スケール(100% - デフォルト)エクスポートされたファイルのスケールを定義します。
- 100%: エクスポートされた画像は元のサイズを保持します。
- 50%: エクスポートされた画像は元のサイズの50%に縮小されます。
- 25%エクスポートされた画像は、元のサイズの25%に縮小されます。
例: 元のサイズが10000×10000ピクセルのファイルの場合、エクスポートされたファイルは 画像スケール:
- 100%: 10000 × 10000 ピクセル。
- 50%: 5000 × 5000 ピクセル。
- 25%: 2500 × 2500 ピクセル。
- 名前を付けて保存...:
- 単一:エクスポートされたファイルのパスとファイル名を指定します。
- Tiles: Specifies the destination folder.
To export the DSM automatically after the DSM step:
- In Processing options > Exports, select the DSM GeoTIFF option.
- (Optional) Click ... and specify the export settings.
- Click Start.
- On the Menu tab, click File > Export DSM...
- In the Export DSM dialog, select the export settings.
- Click Export.