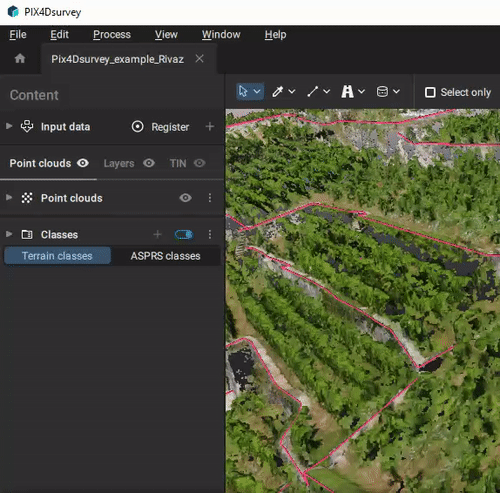
PIX4Dsurvey can be used to measure points, distances, areas, or volumes on a PIX4Dsurvey project. To view the measurements, click on a vectorized object. The Measurements box labeled with the  symbol will appear at the bottom of the Content sidebar on the left.
Points
Points can be measured by vectorizing a Marker object or selecting an existing one by clicking on a point in the 3D view. You can find additional information in the Vectorization article. To measure a point, use the simple selection tool and select a Marker in the 3D view.
Marker
The following measurements will appear in the bottom part of the content sidebar on the left side of the PIX4Dsurvey window.
- Easting [m, ft]: The easting coordinate of the marker.
- Northing [m, ft]: The northing coordinate of the marker.
- Altitude [m, ft]: The elevation of the marker in the case of a geoidal vertical coordinate system or
- Ellipsoidal height [m, ft]: The elevation of the marker in the case of an ellipsoidal vertical coordinate system.
Distances
Distances can be measured by vectorizing a Polyline object or selecting an existing one in the 3D view. Additional information can be found in the Vectorization article. To measure a distance, use the simple selection tool and select a Polyline in the 3D view. The following measurements will appear in the bottom part of the content sidebar on the left side of the PIX4Dsurvey window.
Polylines
The following measurements will appear in the bottom part of the content sidebar on the left side of the PIX4Dsurvey window.
- 3D length [m, ft]: The length of the polyline in the 3D space.
- Height [m, ft]: The difference between the highest and the lowest point of the polyline.
- Min elevation [m, ft]: The minimum elevation of the polyline.
- Max elevation [m, ft]: The maximum elevation of the polyline.
- Min slope [° or %]: The minimum slope of the polyline.
- Max slope [° or %]: The maximum slope of the polyline.
Areas
Areas can be measured by vectorizing a Polygon or Circle object or selecting an existing one in the 3D view. Additional information can be found in the Vectorization article. To measure an area, use the simple selection tool and select a Polygon or Circle in the 3D view.
Polygon
The following measurements will appear in the bottom part of the content sidebar on the left side of the PIX4Dsurvey window.
- 3D perimeter [m, ft]: The length of the perimeter of the polygon.
- 3D area [m2, ft2]: The 3D area of the polygon.
- Height [m, ft]: The difference between the highest and the lowest point of the polygon.
- Min elevation [m, ft]: The minimum elevation of the polygon.
- Max elevation [m, ft]: The maximum elevation of the polygon.
Roof polygon
In addition to all measurements shown for all polygons, the following measurements will appear in the bottom part of the content sidebar on the left side of the PIX4Dsurvey window (only for roof polygons detected with the roof detection tool).
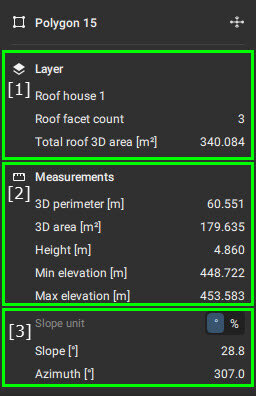
When a roof polygon is selected, this information is shown:
- [1] Measurements regarding all polygons within the same layer:
- [Name of the vector layer]: Name of the vector layer where the selected polygon is located. In this case, the layer name is "Roof house 1".
- Roof facet count: The number of roof polygons in the same layer.
- Total roof 3D area [m2, ft2]: The total area of all roof polygons in the same layer.
- [2] Standard polygon measurements: (see Polygons).
- [3] Measurements regarding the selected polygon:
- Slope [° or %] : The slope of a roof polygon.
- Azimuth [°] : orientation of the maximum slope of the roof.
Circle
The following measurements will appear in the bottom part of the content sidebar on the left side of the PIX4Dsurvey window.
- Radius [m, ft]: The radius of the circle.
- 2D area [m2, ft2]: The 2D area of the circle.
- Elevation [m, ft]: Elevation of the circle, defined by its center.
Volumes
Volumes can be measured by creating a Volume object. For step-by-step instructions for this procedure: Volume measurement - PIX4Dsurvey.
The following measurements will appear in the bottom part of the content sidebar on the left side of the PIX4Dsurvey window.
- 3D perimeter [m, ft]: The length of the perimeter of the volume polygon.
- 3D area [m2, ft2]: The 3D area of the polygon.
- Height [m, ft]: The difference between the highest and the lowest point of the volume polygon.
- Min elevation [m, ft]: The minimum elevation of the polygon.
- Max elevation [m, ft]: The maximum elevation of the polygon.
- Cut volume [m3, yd3]: Volume above the volume base. The volume is measured between the volume base and the surface.
- Fill volume [m3, yd3]: Volume below the volume base. The volume is measured between the volume base and the surface. This value is negative.
- Net volume [m3, yd3]: The total net volume (cut + fill volume).
- Total volume [m3, yd3]: The sum of the absolute values of cut and fill volume (|cut| + |fill volume|).