PIX4Dsurvey allows importing surveyor text files to an existing project. This feature can be useful in many contexts when a surveyor needs to have available any surveyed points and use them to identify a real-world location on the model reconstruction.
- Click File > Import... and select the file from the dialog or,
- Drag and drop a file with formats .txt, .csv, .xyz.
IN THIS ARTICLE
How to import a surveyor text file in PIX4Dsurvey
Import point file dialog
Visualize and export a surveyor text file in PIX4Dsurvey
How to import a surveyor text file in PIX4Dsurvey
The coordinate reference system of the project must be defined before importing a surveyor text file into a project. Once, the project is created and has a reference coordinate reference system then follow these instructions:
- Open a project in PIX4Dsurvey.
- Import the .txt, .csv or .xyz file into the project.
- Click Apply.
Import point file dialog
- Horizontal coordinate reference system: Defines the exact position of the objects in 2D.
- Vertical coordinate reference system: Defines the origin for height or depth values. For more information: How to use vertical coordinate systems and geoids - PIX4Dsurvey.
- Geoid: Refers to the local geoid model that covers the territory.
- Geoid height: Indicates the constant height over the Bessel 1841 ellipsoid that is used as a replacement for the geoid model.
- Column separator: This field defines the character used in the surveyor text file to separate different columns. Values are comma (,), semicolon (;), space ( ), or tab ( ).
- Decimal separator: This field defines the character used in the surveyor text file to define the decimals in a numeric value. Values are period (.) or comma (,).
- Skipped row: it is used to specify at which line to start reading values from the file. This option can be used if the field loses focus on the table.
- Column format: It is the format for reading the point locations in a file.
- PNEZD: Point#, Northing, Easting, Elevation, Description.
- PENZD: Point#, Easting, Northing, Elevation, Description.
- PNEZ: Point#, Northing, Easting, Elevation.
- PENZ: Point#, Easting, Northing, Elevation
- NEZ: Northing, Easting, Elevation.
- ENZ: Easting, Northing, Elevation.
- XYZ: Latitude, Longitude, Elevation.
- YXZ: Longitude, Latitude, Elevation.
- Custom: Indicates that the format field is entered manually.
- Horizontal accuracy: Refers to the precision with which the X/Y or easting/northing values were captured.
- Vertical accuracy: Refers to the precision with which the elevation values were captured.
- If the imported text file is not georeferenced in the same coordinate system as the project, the text file is transformed on import.
- It is possible to enable the Use project CRS option to indicate that the files are also in the same coordinate system as the project.
- The file can be imported in a projected or geographic coordinate system.
Visualize and export a surveyor text file in PIX4Dsurvey
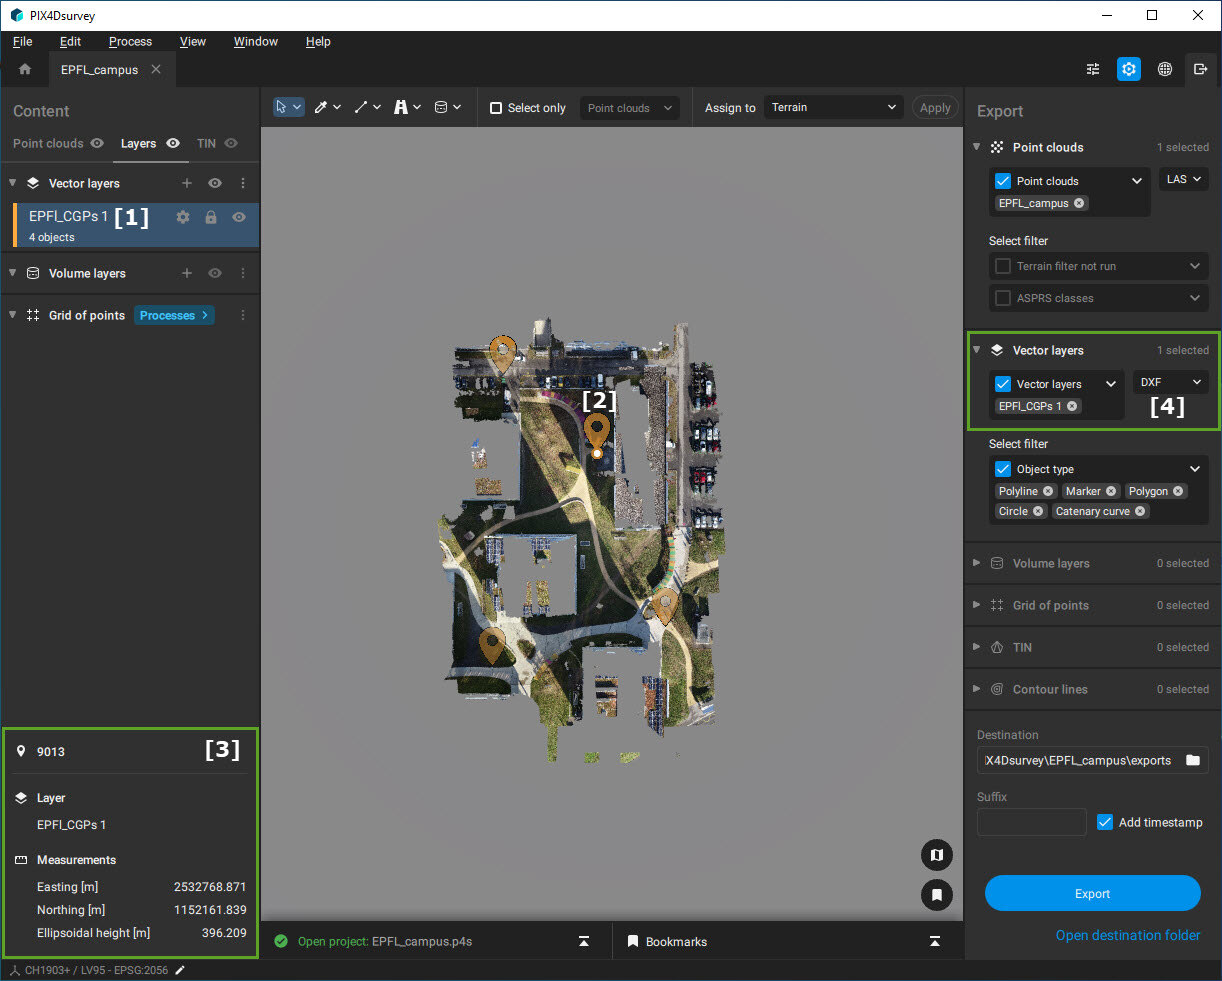
Once the text file is imported, it is visible under the Layer tab in the Content sidebar. [1]
In the viewport, it is possible to visualize each of the imported text points with a ![]() icon. [2]
icon. [2]
By clicking on one of the imported text points, the attributes corresponding to that point are shown, and this information is visible at the bottom section of the Content sidebar. [3]
In the Export sidebar, the text points layer can be exported as GeoJSON, .dxf, .zip (.shp), and .shp extension formats. [4]