PIX4Dsurvey recognizes classes in imported point clouds and supports tools and features to automatically or manually classify point clouds.
More specifically, PIX4Dsurvey supports:
- Import of classified point clouds:
- PIX4Dmapper point cloud classes. For more information see the How to generate the point cloud classification article.
- ASPRS point cloud classes.
- Automatic classification by using the Terrain Filter.
- Manual classification by using Selection tools and assigning selected points to classes.
IN THIS ARTICLE
How to reassign selected points between classes
How to show/hide individual or all classes
How to show classes in monochrome
How to export a single class or all classes
How to assign selected points to a class
Assigning points between different classes is especially useful when:
- The point cloud is not classified and certain points need to be assigned to classes.
- Manual corrections of the Terrain filter process are needed.
- Points are not assigned to the correct point class.
To manually assign points to a class:
- Use the Selection tool to select points.
- Right-click on selected points.
- Click:
- Assign to Terrain class, to assign selected points to Unclassified, Terrain, or Non-terrain class.
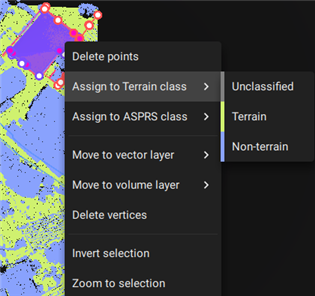
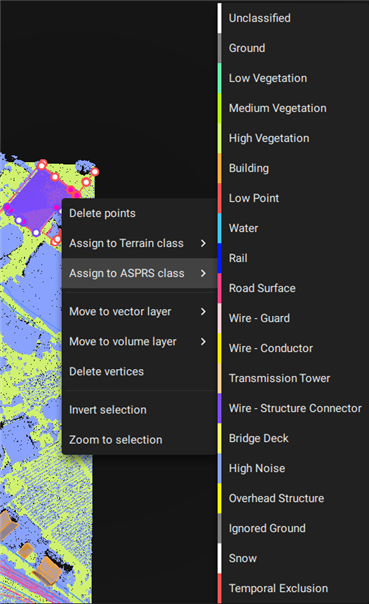
- Assign to ASPRS class, to assign selected points an ASPRS class.
- Assign to Terrain class, to assign selected points to Unclassified, Terrain, or Non-terrain class.
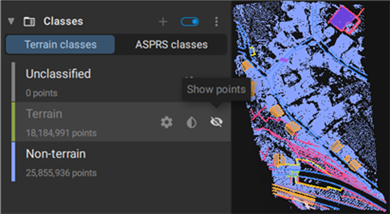
How to show/hide individual or all classes
To display specific Terrain or ASPRS classes, both the Point clouds and Classes visibility (![]() ) need to be selected. If the points are turned off in the Point clouds section, that will overrule the display of the classes.
) need to be selected. If the points are turned off in the Point clouds section, that will overrule the display of the classes.
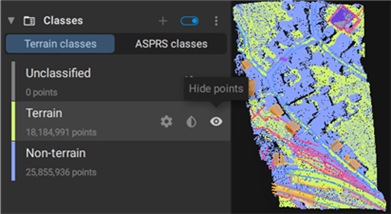
To hide individual classes, visibility (![]() ) needs to be unselected on the control panel.
) needs to be unselected on the control panel.
More information in the Terrain Filter article.
How to show classes in monochrome
To change the color display of each class of the Terrain or ASPRS classes:
- For monochrome (default), click Show in monochrome
 .
. - For RGB, click Show class in RGB
 .
.
To change the color display of all classes of the Terrain or ASPRS classes, in the Content - Classes panel, after selecting which classes to be displayed Terrain classes or ASPRS classes, click on the  and then:
- For monochrome, click Show all Terrain/ASPRS classes in monochrome.
- For RGB, click Show all Terrain/ASPRS classes in RGB.
How to export a single class or all classes
To export an individual class:
- In the Content - Classes panel, right-click on the desired class.
- Click Export. The Export panel opens on the right.
- In the Export panel, select the output format for the Point cloud.
- In the Destination section, navigate to the path where you want to save the file.
- Click Export.
To export all classes:
- On the Menu bar, click File, then Export or in the Content - Classes panel select the and then Export. Alternatively, on the top right corner, click
 Export. The Export panel opens on the right.
 - In the Export panel, in the Point clouds section, select the output format.
- (Optional) Unselect the classes that do not need export.
- In the Destination section, navigate to the path where you want to save the files.
- Click Export.
The exported outputs are now ready for import into your preferred third-party software.