


DSM
The DSM step defines the Resolution, enables the Surface smoothing, and enables Interpolation for the digital surface model (DSM) creation.
Note: since version 2.4.0, processing can be paused and resumed at any time as long as the project remains open. There is no need to cancel and start over. If processing is paused and the project is about to be closed, the following message will appear.

- Click Processing options
 .
. - On the Menu bar, click Process > DSM...
IN THIS ARTICLE
InputResolution
Surface smoothing
Interpolation
Polygon-aware
Mask-aware
Visualization
Applying the Region of Interest (ROI) for cropping
Exports
Input
This processing option defines which input source is used for the DSM generation. The following options are available:
- Dense point cloud
- Depth point cloud (PIX4Dcatch projects)
- Depth & dense fusion (PIX4Dcatch projects)
- Automatic tie points (Starting from the 1.69.0 version of PIX4Dmatic). ATPs are intended for quick previews, as they generate low-detailed DSMs, which are suitable for flat areas or preliminary assessments. For optimal quality, use high-resolution point cloud instead.

NOTE: Starting from version 1.79.0, you can select multiple inputs for DSM generation.
Tip: Selecting Automatic Tie Points as the input for DSM generation can be useful for relatively flat projects with minimal 3D structures (e.g., buildings, bridges). This option was introduced to speed up the DSM generation process for such projects while maintaining the same level of absolute accuracy (.i.e the position with respect to the GCPs/Checkpoints).
Important: Starting from version 1.69.0, there is an option to use Automatic Tie Points as input for DSM generation. Since the orthomosaic is created based on the DSM, it will also use the same input.
In case the input is not selected, the start button is not enabled, and a warning message will appear in the processing panel

Resolution
Defines the spatial resolution used to generate the DSM. The default resolution is determined based on the calculated average Ground Sampling Distance (GSD) of the project.
- Resolution [units/px]: Defines the resolution of the DSM.
- Default: The resolution is 1 x GSD of the project.
- Custom: Allows to select any value for the resolution of the DSM.
Surface smoothing
The surface smoothing is applied to the generated DSM. When using Low values, the final DSM contains sharper features and edges. When using High values, the DSM is smoothed out.
- Surface smoothing (0 - 20, 12 - default): The radius of the median filter can be selected to determine the effect of DSM smoothing:
- 0: No smoothing is applied.
- Low (values closer to 1): Tries to preserve the orientation of the surface and to keep sharp features such as corners and edges of buildings.
- High (values closer to 20): Tries to smooth areas based on a larger surrounding area. Sharp edges will be smoothed out. Areas that are not very planar are smoothed and become planar.
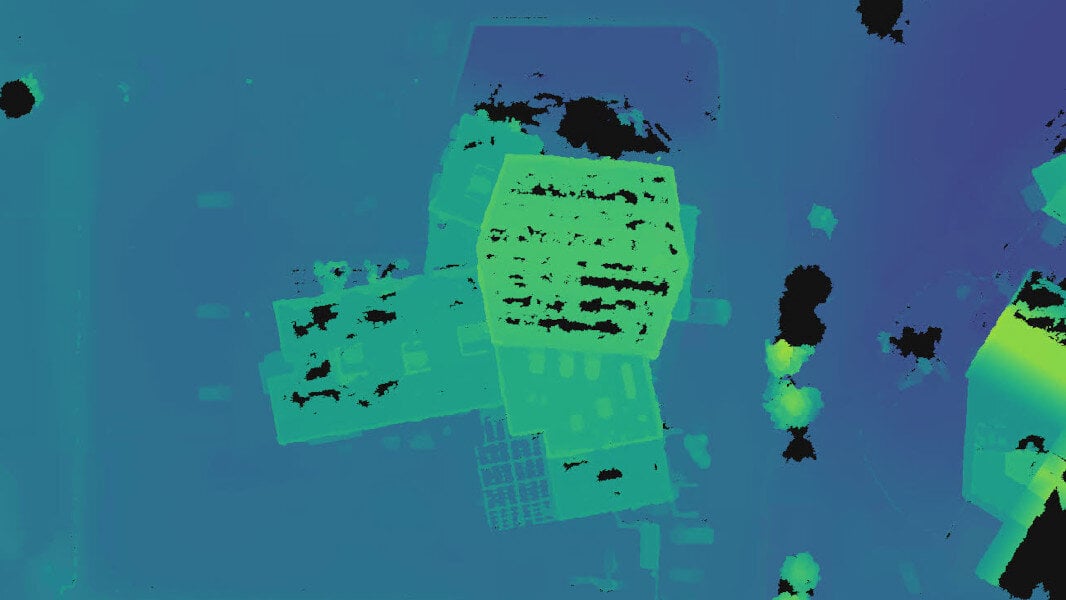
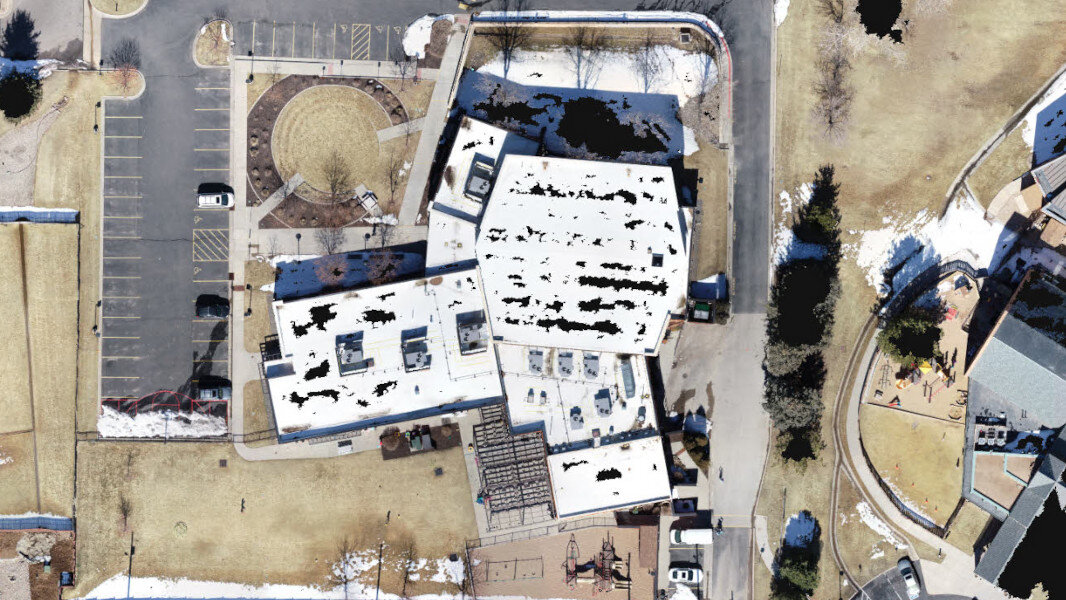
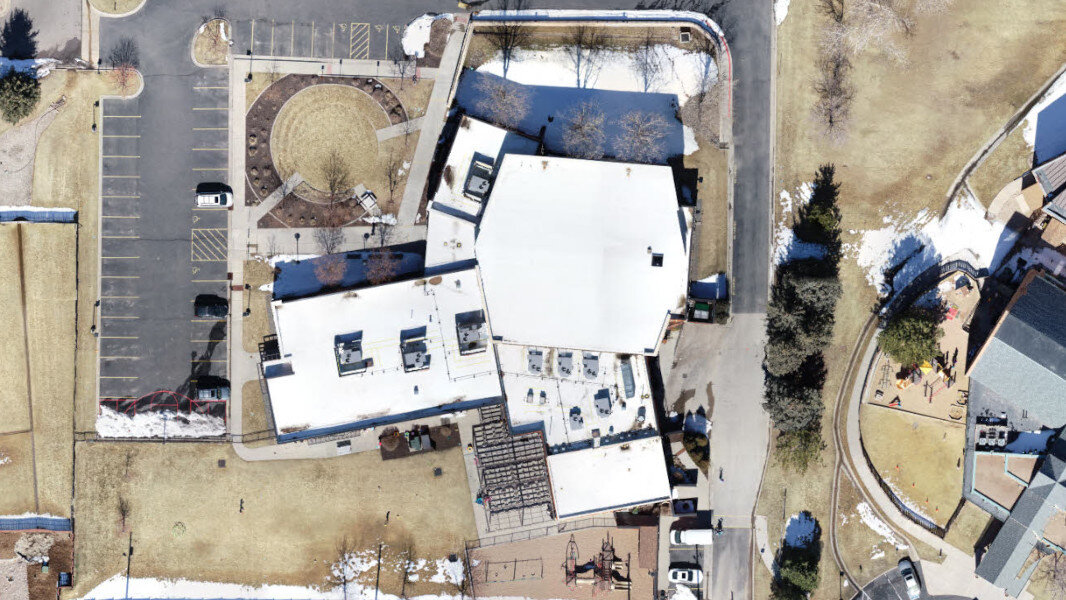
Interpolation
The Interpolation parameters affect the completeness of the generated DSM:
- No interpolation. Only areas where the dense point cloud is generated are reconstructed in the DSM. Where the dense point cloud is not generated or is not dense enough, holes in the DSM appear.
- Interpolate holes. Holes in the DSM are filled based on neighboring data.
- Expand area. The DSM data is extended, attempting to cover the entire area that is visible from the (calibrated) cameras

Polygon-aware
Use a polygon to fill holes and flatten areas in the DSM.
Mask-aware
Applies masks to exclude elements from the DSM. For detailed instructions on working with masks, refer to the following article: Masks - PIX4Dmatic
Visualization
The visualization of this output is available in the 2D view. Since elevation values are represented in each pixel, a visualization can be created by adjusting the height values within the range of heights of the points used to generate the DSM.
Additionally, a shaded mode can be changed between three different modes: Color map, Hillshading (Greyscale), and Combined, and a Z factor for vertical exaggeration slider to control shading intensity.
| Colormap | Hillshade | Combined |

|
 |
 |
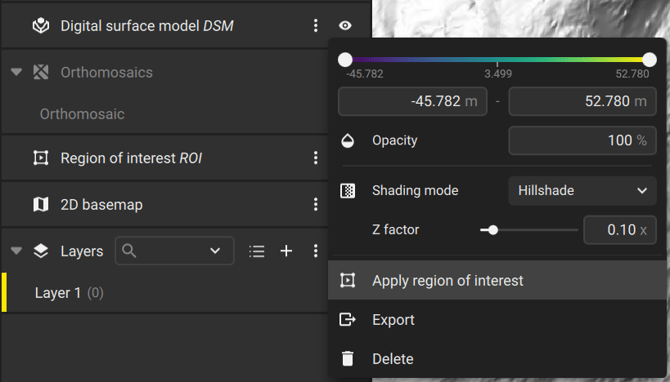
Applying the Region of Interest (ROI) for cropping
After processing the Digital Surface Model (DSM), the Region of Interest (ROI) can be applied to clip the output to a specific area of the project. This reduces the file size and saves time, as reprocessing is not required.
From the content panel, in the Digital Surface Model (DSM) section, the option Apply region of interest becomes available from the three-dot menu after a Region of Interest has been drawn.
Exports
The following export settings are available:
- Compression (LZW compression, Enabled - default): Defines the compression of the exported file.
- LZW compression - Enabled: No data is lost during the compression of the file and the .tiff is not degraded. This results in a smaller file size of the exported file.
- LZW compression - Disabled: No compression is used during the export. This results in a larger file size of the exported file.
- File Type (Single - default):
- Single: The image will be exported in a single file.
- Tiles (16384 px - default): The image will be exported in tiles with a predefined size of 8192 px, 16384 px, or 4096 px. The origin of the tiles is the top left corner of the project boundary.
- Image Scale (100%- default): Defines the scale of the exported file.
- 100%: The exported image will keep the original size.
- 50%: The exported image will be scaled to 50% of the original size.
- 25%: The exported image will be scaled to 25% of the original size.
Example: For a file with the original size of 10000 x 10000 pixels, the exported file with Image scale:
- 100%: 10000 x 10000 pixels.
- 50%: 5000 x 5000 pixels.
- 25%: 2500 x 2500 pixels.
- Save as...:
- Single: Specifies the path and the file name of the exported file.
- Tiles: Specifies the destination folder.
To export the DSM automatically after the DSM step:
- In Processing options > Exports, select the DSM GeoTIFF option.
- (Optional) Click ... and specify the export settings.
- Click Start.
- On the Menu tab, click File > Export DSM...
- In the Export DSM dialog, select the export settings.
- Click Export.