This article describes different ways of creating a project, opening existing projects, and importing external point clouds into PIX4Dsurvey.
IN THIS ARTICLE
New project
Open project
Import point clouds
Import vector files
Import surveyor text files
Content Management
Register
PIX4Dsurvey tutorial: Create and open a PIX4Dsurvey project
New project
New projects in PIX4Dsurvey can be created by drag and drop input files on the screen, using the home screen or the menu bar. New projects can also be created using the Ctrl + N or ⌘ + N shortcut.
Drag and drop input files
- Drag and drop the input file on the screen.
- Specify the Project name and the Path of the new PIX4Dsurvey project.
- Click Start.
A new project is created and is ready for vectorization. To import additional input files use the File - Import... menu or drag and drop them on the screen.
From the home screen
- Click Select from disk (first thumbnail) on the home screen.
- On the pop-up Open File, specify the input file and click Open.
- Specify the Project name and the Path of the new PIX4Dsurvey project.
- Click Start.
A new project is created and is ready for vectorization. To import additional input files use the File - Import... menu or drag and drop them on the screen.
From the menu bar
- Click File on the menu bar.
- Click New...
- Specify the Project name and the Path of the new PIX4Dsurvey project.
- Click Start.
A new empty project is created and is ready to import the input files using the File - Import... menu or by drag and drop them on the screen.
Open project
It is possible to open existing PIX4Dsurvey (.p4s) projects by drag and drop it on the screen, using the home screen or the menu bar. Projects can also be opened using the Ctrl + O or ⌘ + O shortcut.
Drag and drop project files
- Drag and drop the project file in PIX4Dsurvey.
From the home screen
- Click the project's thumbnail on the home screen. Only available for projects that were previously opened and saved on the machine.
Or
- Click Select from disk (first thumbnail) on the home screen.
- On the pop-up Open File, specify the file and click Open.
From the menu bar
- Click File on the menu bar.
- Click Open...
- On the pop-up Open Project, specify the file and click Open.
The project is opened, and a new screen displaying the project opens.
Import point clouds
PIX4Dsurvey can import external point cloud independently by the source, assuming these files are using a compatible file format (Inputs - PIX4Dsurvey).
Import vector files
It is possible to import 2D and 3D vector files that are generated in PIX4Dsurvey or a third-party software. The supported formats are .dxf, .shp and GeoJSON (Inputs - PIX4Dsurvey).
Import surveyor text file
PIX4Dsurvey allows importing surveyor text files to an existing project. This feature can be useful in many contexts when a surveyor needs to have available any surveyed points and use them to identify a real-world location on the model reconstruction.
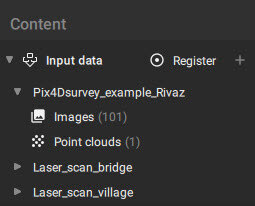
Content Management
Input Data
The visibility of input projects can be turned on and off from the content sidebar on the left. This makes it possible to show or hide an entire project (for example, point cloud and images) with a single click.
- To hide a project, click on the visibility button
 near the data name.
 - To show a project click on the visibility button
 near the data name.
 - To see the elements belonging to the same project, click on the expand button near the project name
 .
. - To collapse the elements belonging to the same project, click on the collapse button
 .
. - To add a new point cloud or a new photogrammetry project, click on the import button
 . Supported files are .las, .laz, .p4m, and .p4d.
Register
PIX4Dsurvey allows for the automatic registration of imported data (point cloud or photogrammetry project in the form of point clouds and calibrated images) to an existing PIX4Dsurvey project. Any data can be taken as a reference. This processing is optional but needs to be performed as the first step before proceeding with other processing (filters, grid of points, ...).
Additional information about this tool can be found in the article Automatic registration - PIX4Dsurvey.