IN THIS ARTICLE
How to create a New volume
Base surface types
How to calculate the Volume
Volume results (units)
How to share or export volumes
Licenses: This feature is available to all PIX4Dcloud licenses.
Roles: Owners, Managers, Editors, and Readers can calculate volumes in a dataset. In the case of the Reader cannot save the results in the dataset.
Volume calculation is not possible, and an error is displayed, under the following conditions:
-
No DSM is available in the project.
-
The volume base surface is outside the area covered by the DSM.
How to create a New volume
To start drawing a new volume:
- (Optional) In the left panel, select the Annotations group where the volume should be added.
- n the 2D or 3D view, select the Volume tool:
- Click
 .
.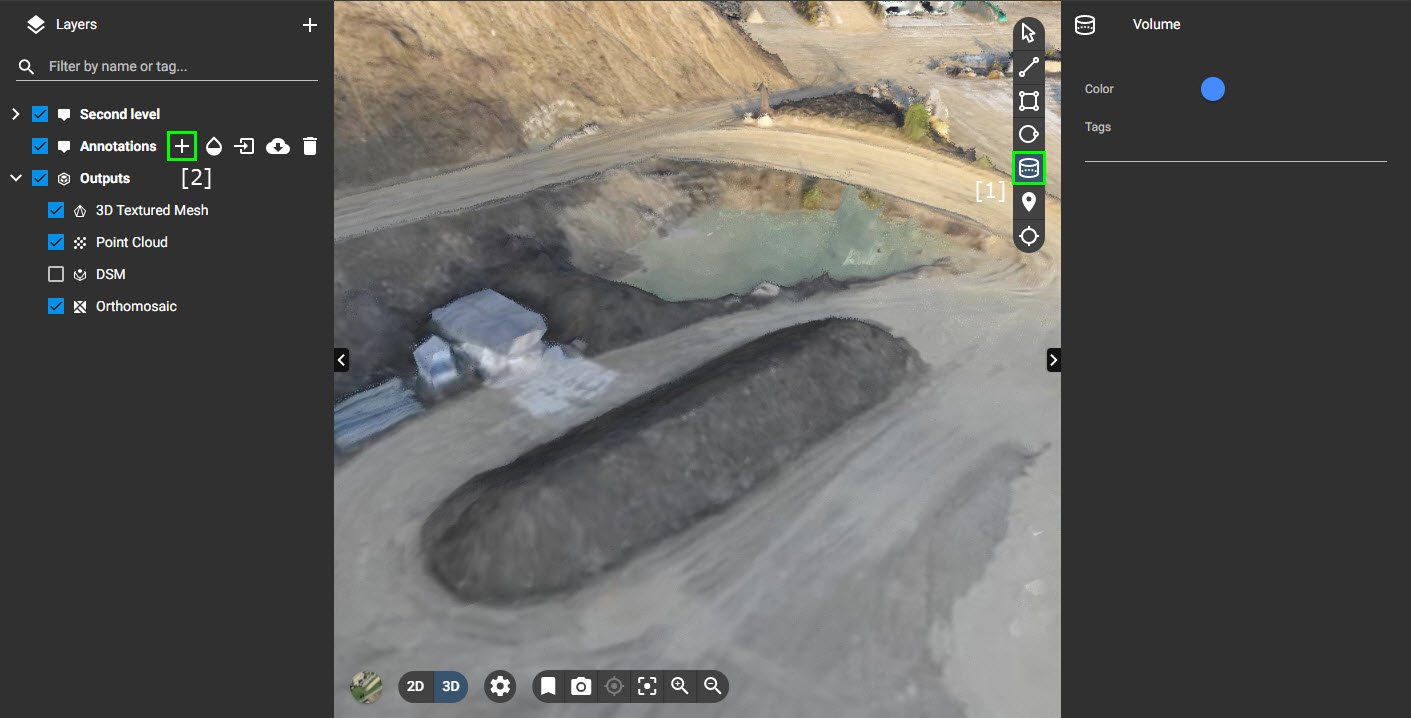
- Alternatively, on the left panel, click
 to add a new annotation to the selected Annotations group and select Volume.
- Click
-
Draw the base surface by left-clicking to place vertices. Each click adds a vertex to the polygon.
-
Double-click to close and complete the base surface.
-
-
(Optional) To refine the geometry:
-
Select the volume from the Annotations list or click
 in the toolbar.
 - Drag vertices to adjust their position, or click the plus sign between two vertices to refine the perimeter.
-
Base Surface Types
The following base surface options are available:
-
Average
The base surface is parallel to the XY plane at the average altitude of all vertices. -
Custom
The base surface is parallel to the XY plane at a user-defined altitude.
Recommended when the stockpile is surrounded by walls and the base altitude is known. -
Fit Plane
A plane is fitted to the vertices so that all vertices are at the minimum distance from the surface.
Recommended when the entire boundary is visible and the base surface is flat or sloped. -
Triangulated (default)
Vertices are connected and triangulated above and below the base surface.
Recommended when the full boundary is visible and the surface is relatively flat. -
Highest
The base surface is parallel to the XY plane at the highest vertex altitude.
Recommended for fill volume calculations such as bunkers, pools, or ponds. -
Lowest
The base surface is parallel to the XY plane at the lowest vertex altitude.
Recommended when part of the boundary is not visible.
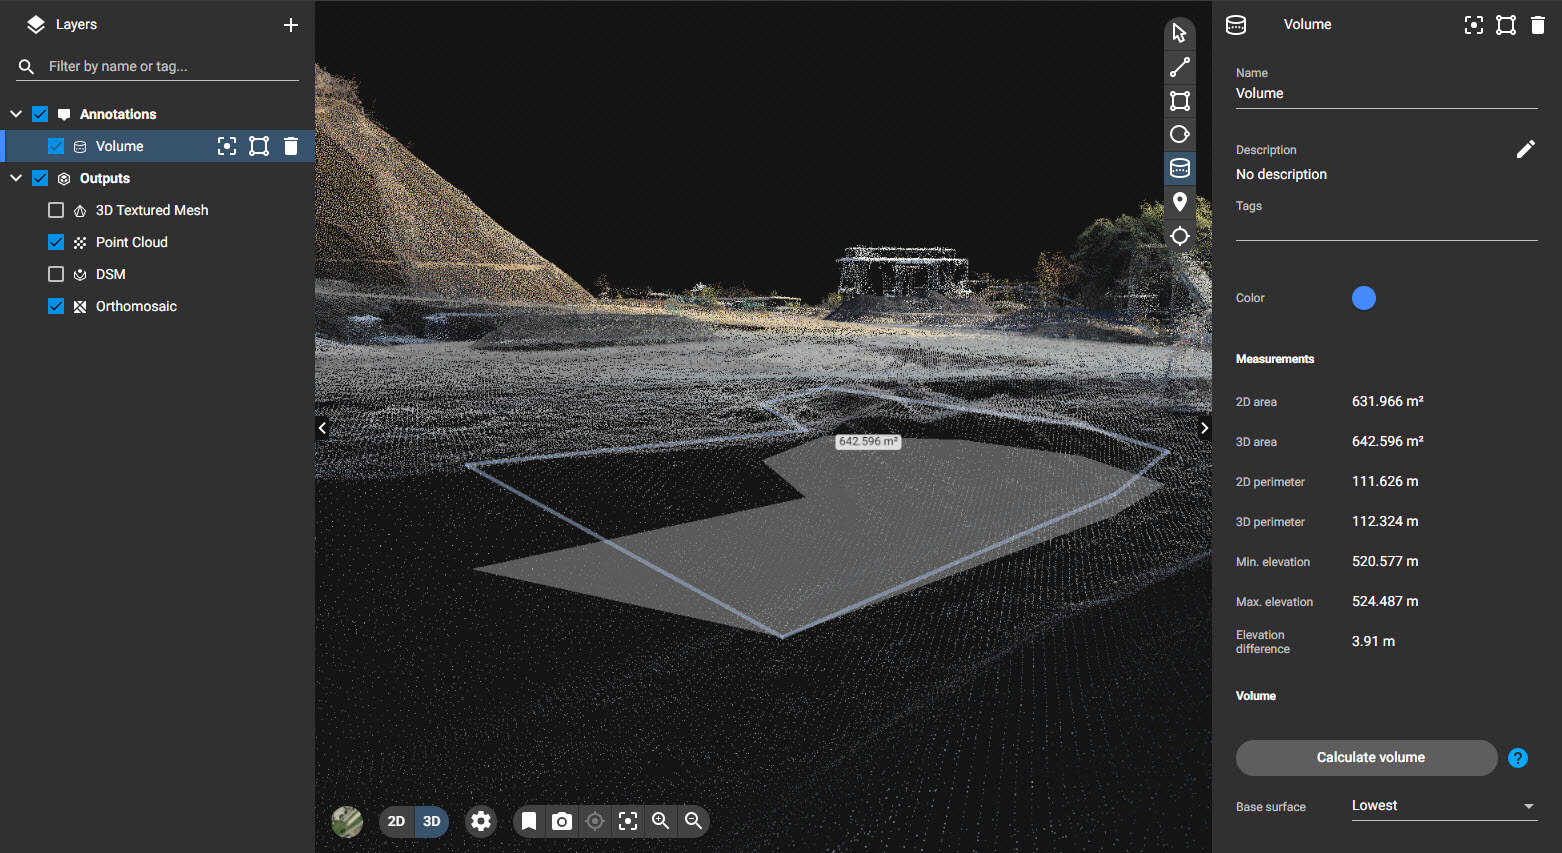
How to calculate the Volume
-
After defining the base surface, click Calculate volume.

-
Once computation is complete, the results are displayed in the right panel.
-
Editing the base surface geometry or changing the base surface type automatically triggers a new calculation.
-
Visualization note
-
Blue areas represent fill volume.
-
Red areas represent cut volume.
Volume Results
The following values are displayed:
-
Cut volume [units³]
Volume above the base surface, measured between the base surface and the DSM. -
Cut error [units³]
Estimated error of the cut volume. -
Fill volume [units³]
Volume below the base surface, measured between the base surface and the DSM. -
Fill error [units³]
Estimated error of the fill volume. -
Net Volume [units³]
Calculated as: Cut volume + Fill volume.
For details on error computation, see: Error estimation in volume calculation.
How to Share or Export Volumes
-
Volume calculations can be exported as Annotation layers.
For more information, see: How to export/import annotations on PIX4Dcloud. -
PIX4Dcloud projects containing volume annotations can be shared using the Share button in the upper-right corner of the interface.
For more information, see: Share.