How to add / import and mark manual tie points (MTPs) in the Basic GCP / MTP Manager - PIX4Dmapper
Adding manual tie points in the GCP/MTP Manager:
1. On the Menu bar, click Project > GCP/MTP Manager...
2. On the GCP/MTP Manager, under the section GCP/MTP Table, click Add Point.
3. (optional) Change the name: Double-click the Label cell of the manual tie point and type the desired name.
4. Repeat steps 1 to 3 for the other manual tie points. For more information about the GCP/MTP Table properties: GCP / Manual Tie Point Table.
Marking the added manual tie point in the Basic GCP/MTP Editor:
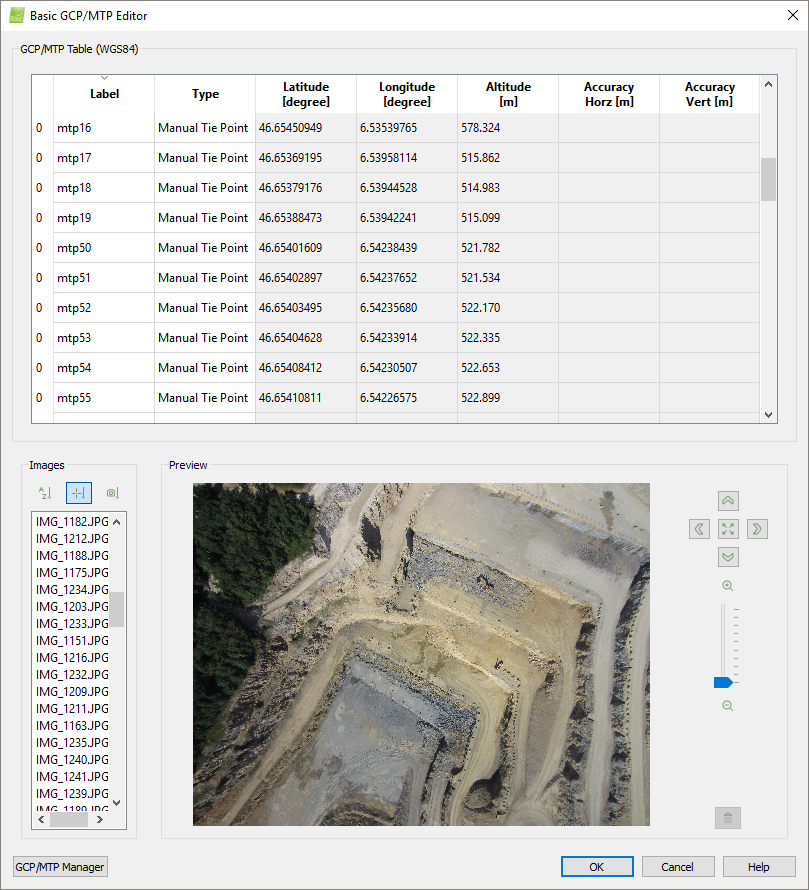
1. On the GCP/MTP Manager, under the section GCP/MTP Editor, click Basic Editor..., the Basic GCP/MTP Editor appears:

2. In the table, click on the manual tie point to be marked.
3. Under the Images section, select the image in which the manual tie point should be marked. After the selection, the image is displayed in the Preview section.
4. Navigate in the image by:
- Zoom in: Moving the mouse scroll wheel forwards.
- Zoom out: Moving the mouse scroll wheel backwards.
- Pan: Using the mouse left click.
- Zoom in quickly on a specific point in the image: point with the mouse the point and press the Alt key. When the key is released, the view returns to the last zoom level.
- Zoom out to preview the zero zoom level: Press the Shift key. When the key is released, the view returns to the last zoom level.
5. Left click on the image to mark the point.
6. (optional) click  to remove a mark.
7. On the Images section, select the next image on which the manual tie point will be marked.
8. Repeat the above steps 2-7 to mark other manual tie points.
9. Click OK.
