When an image is not calibrated during step 1. Initial Processing, it can be manually calibrated using the rayCloud. This article provides step-by-step instructions on how to calibrate uncalibrated cameras (images) in PIX4Dmapper.
In order to calibrate an image, enough keypoints of that image need to be matched accurately with other images of the project. Each keypoint that is matched in at least two images allows the generation of a 3D point. One uncalibrated image is not calibrated because no matches with other images were found or because no matches have been labeled as accurate. Therefore, in order to calibrate this image, new matches between it and calibrated images need to be defined manually.
In order to manually calibrate a camera:
1. On the Menu bar, click View > rayCloud.
2. Click on an uncalibrated camera in the rayCloud.
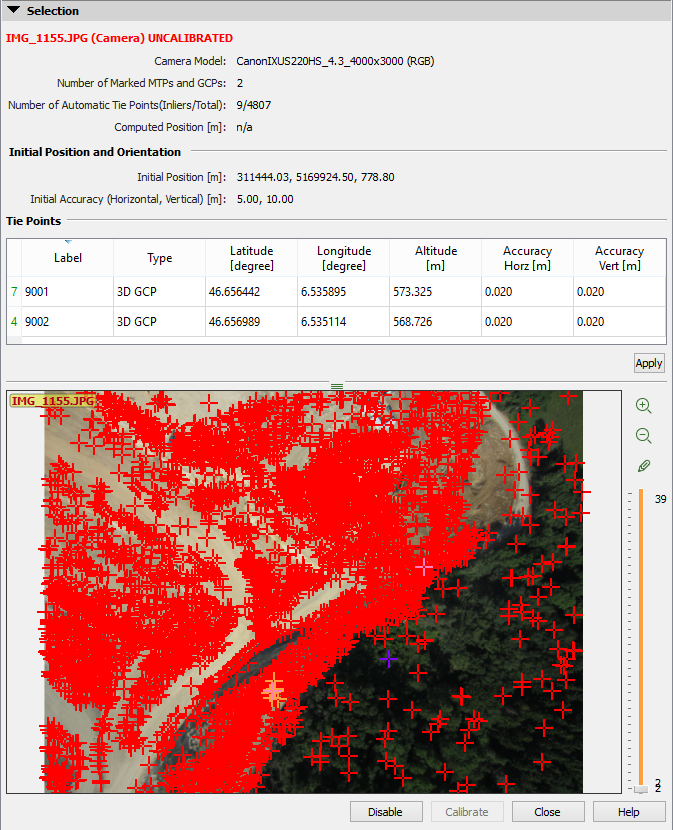
3. On the right sidebar, in the section Selection, the points corresponding to the selected camera are displayed on the image with:
- Red cross: Automatic keypoints that are not matched with any keypoint of other images.
- Orange cross: Automatic keypoints which are very likely to be matched accurately with keypoints of other images.
- Yellow cross: GCPs, Check Points or Manual Tie Points marked on the selected image are considered to be Inliers.
- Pink cross: GCPs, Check Points or Manual Tie Points marked on the selected image but considered to be outliers.
The section Tie Points displays all the tie points that are marked on the selected camera.
4. Double-click a red or an orange cross. The selected cross becomes purple.
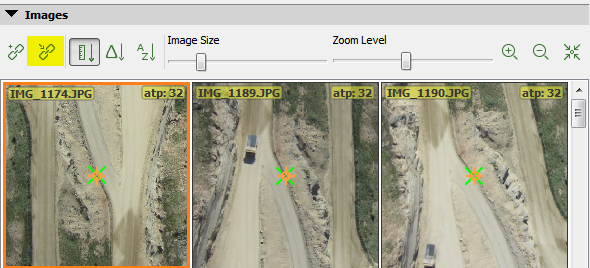
5. Each red and orange cross represents a keypoint and is associated to a 3D point that has a high probability to match it. The section Images displays a list of images where this keypoint could be visible using the associated 3D point. The keypoint is marked using an orange cross with an orange circle. The projection of the 3D point in those images is displayed with a green cross.
If the proposed points in the images correspond to the keypoint in the uncalibrated camera, this keypoint can be matched with those of the images by pressing the button Connect to Τie Point  . This creates a new Manual Tie Point using the marked images.
6. Each time a match is added, the camera position is re-estimated. This new position is used to project existing 3D points into the selected image. If the reprojection error between these projected 3D points and the existing keypoints is low, a keypoint is labeled as being accurate and is called an Inlier. Those inliers are displayed as orange crosses.
7. Connect other existing points  (at least 3) and / or define new Manual Tie Points
  (at least 3).
8. Press Calibrate to calibrate the camera.
- The image has at least 20 inliers.
- All manually marked points (MTPs) are inliers.
10. If the new camera position and orientation are good, click Process > Rematch and Optimize.