This article explains the sections displayed in the Mosaic Editor window in PIX4Dmapper: Menu Bar Entry, Toolbar, Mosaic View, Sidebars, and Status Bar.

- The Mosaic Editor may be used to manually correct artifacts in the Orthomosaic resulting from Step 3. DSM, Orthomosaic and Index to improve its visual aspect.
- The changes applied in the Mosaic Editor affect a local copy, not the mosaic resulting from Step 3. DSM, Orthomosaic and Index.
- In order to obtain the edited mosaic, the mosaic needs to be exported: How to edit the Orthomosaic - PIX4Dmapper. The orthomosaic resulted from Step 3. DSM, Orthomosaic and Index will then be overwritten. The Grid DSM and the different orthomosaic formats (GeoTIFF, Google Maps Tiles, etc.) will be generated if selected in the processing options.
- For more information about the Mosaic Editor processes workflow: Mosaic Editor Workflow.
For step-by-step instructions about how to improve the visual aspect of the orthomosaic:
How to improve the Visual Aspect of Buildings in the Orthomosaic with the Mosaic Editor - PIX4Dmapper (for buildings).
How to improve the Visual Aspect of Bridges in the Orthomosaic with the Mosaic Editor - PIX4Dmapper (for bridges).
The use of the Mosaic Editor is optional, and it can be used to:
- Visualize the DSM (raster GeoTIFF Digital Surface Model).
- Visualize the DTM (raster GeoTIFF Digital Terrain Model).
- Visualize the Mosaic.
- Improve the visual aspect of the orthomosaic.
When selecting the Mosaic Editor view, the following sections are displayed on the Main window:
- Menu Bar Entry: Extra entry displayed on the Menu bar.
- Toolbar: The standard toolbar and some extra buttons specific to the Mosaic Editor.
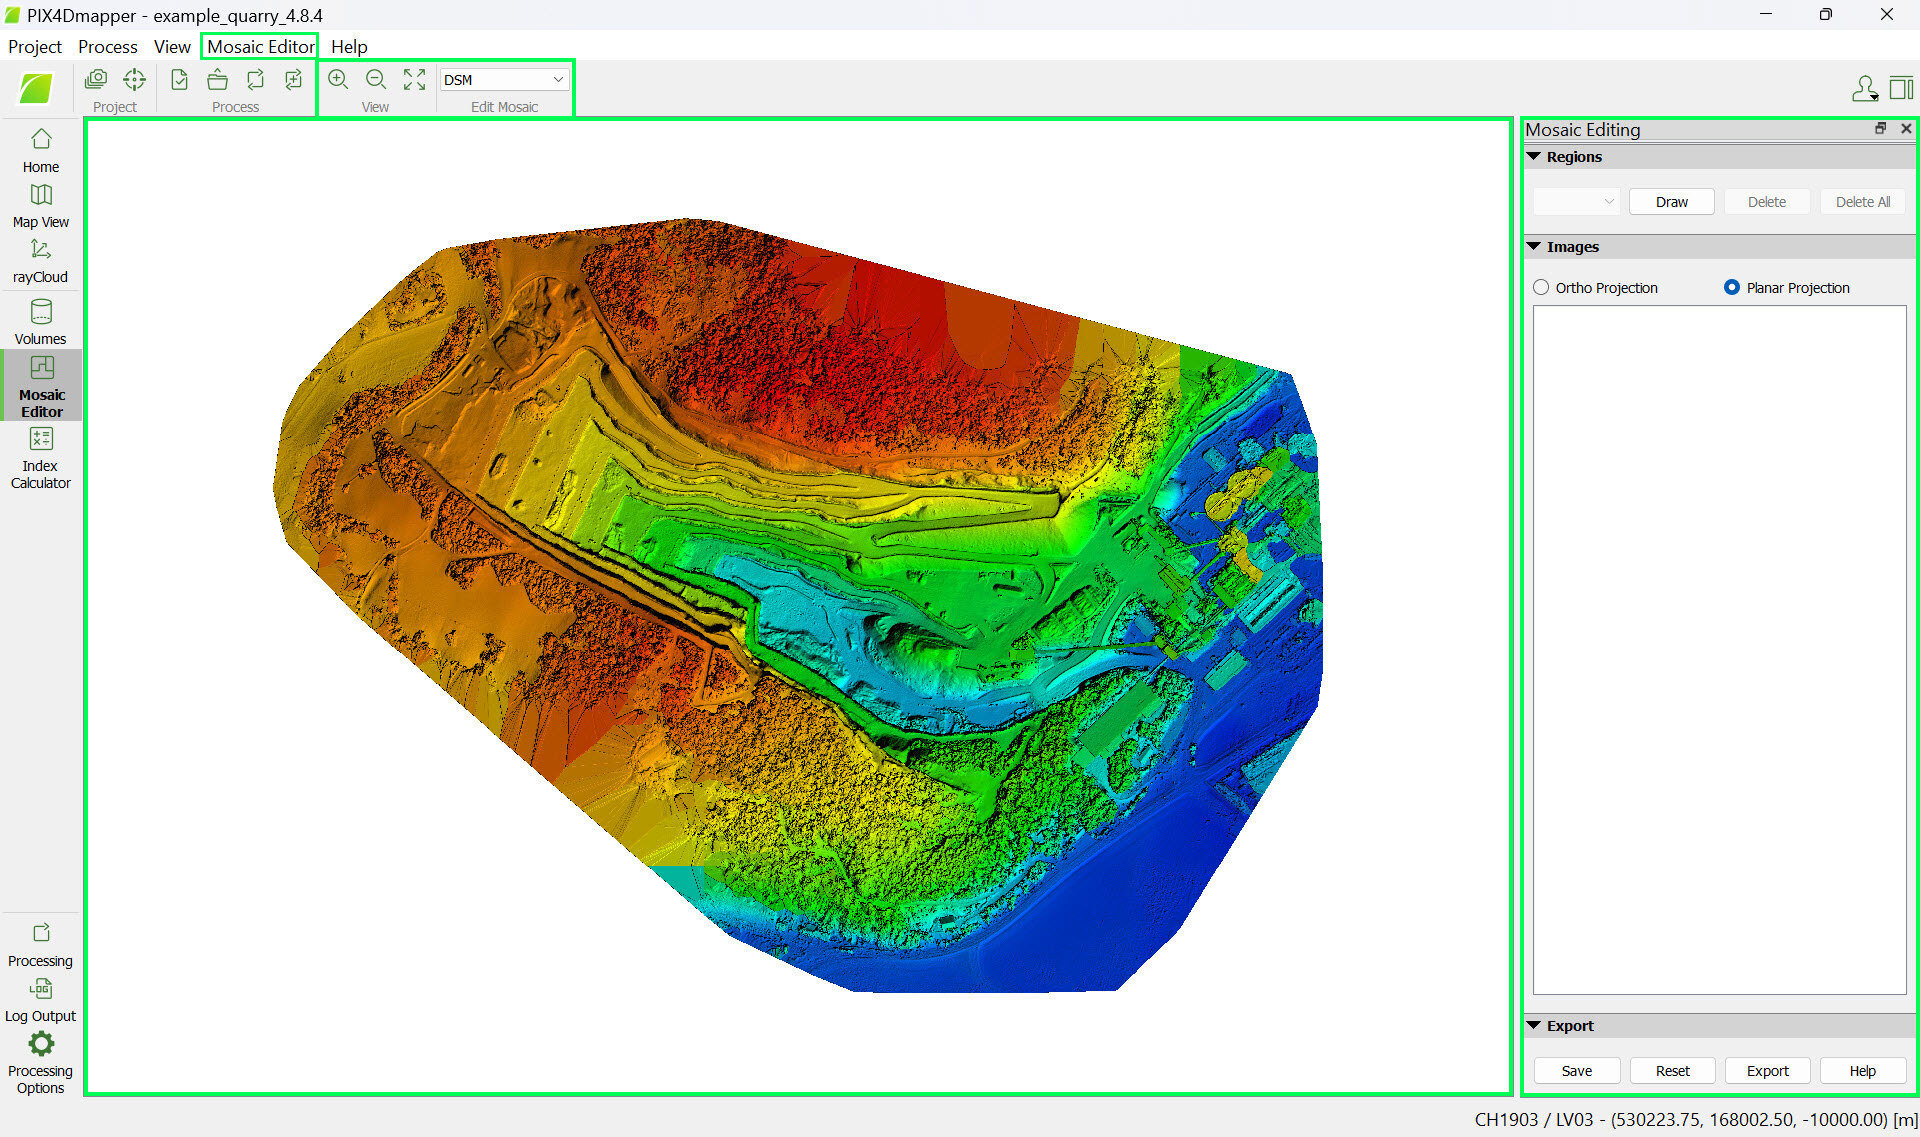
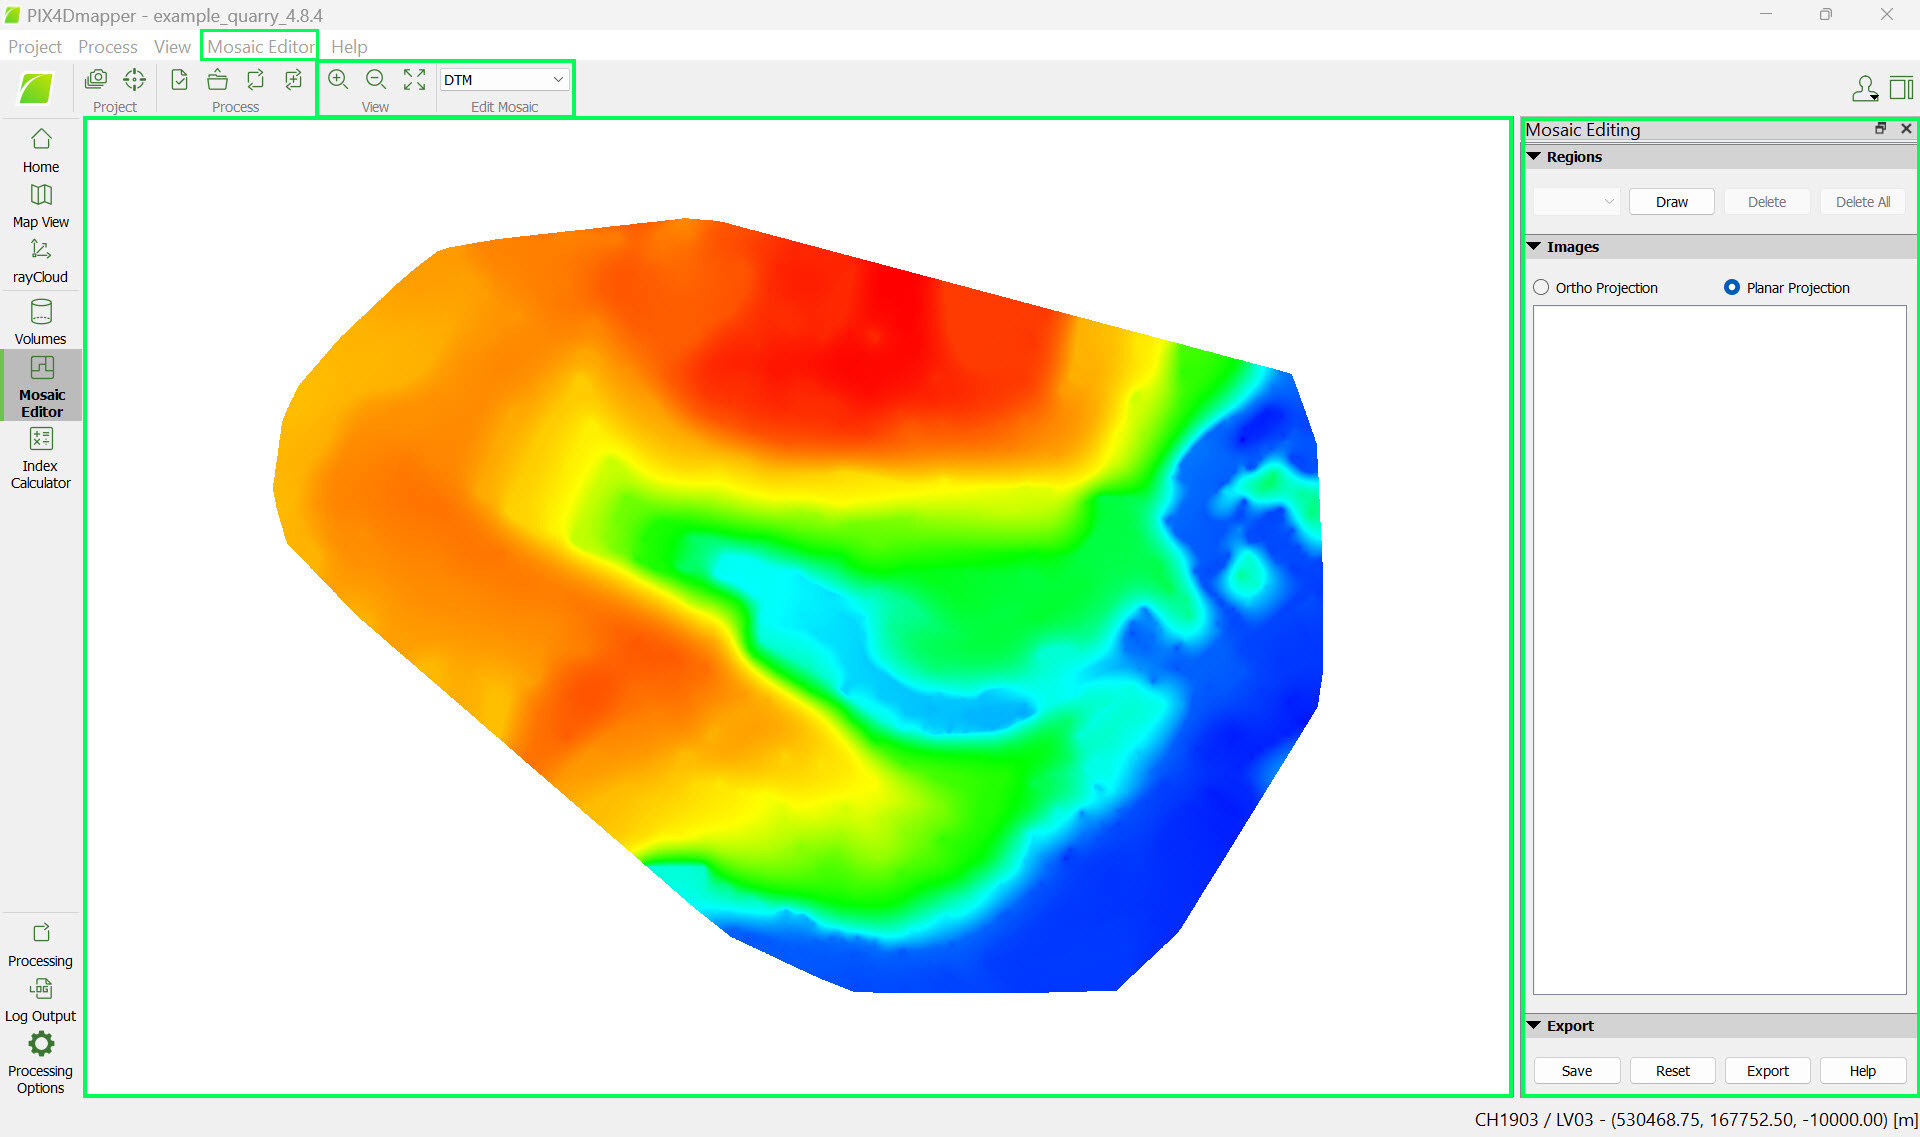
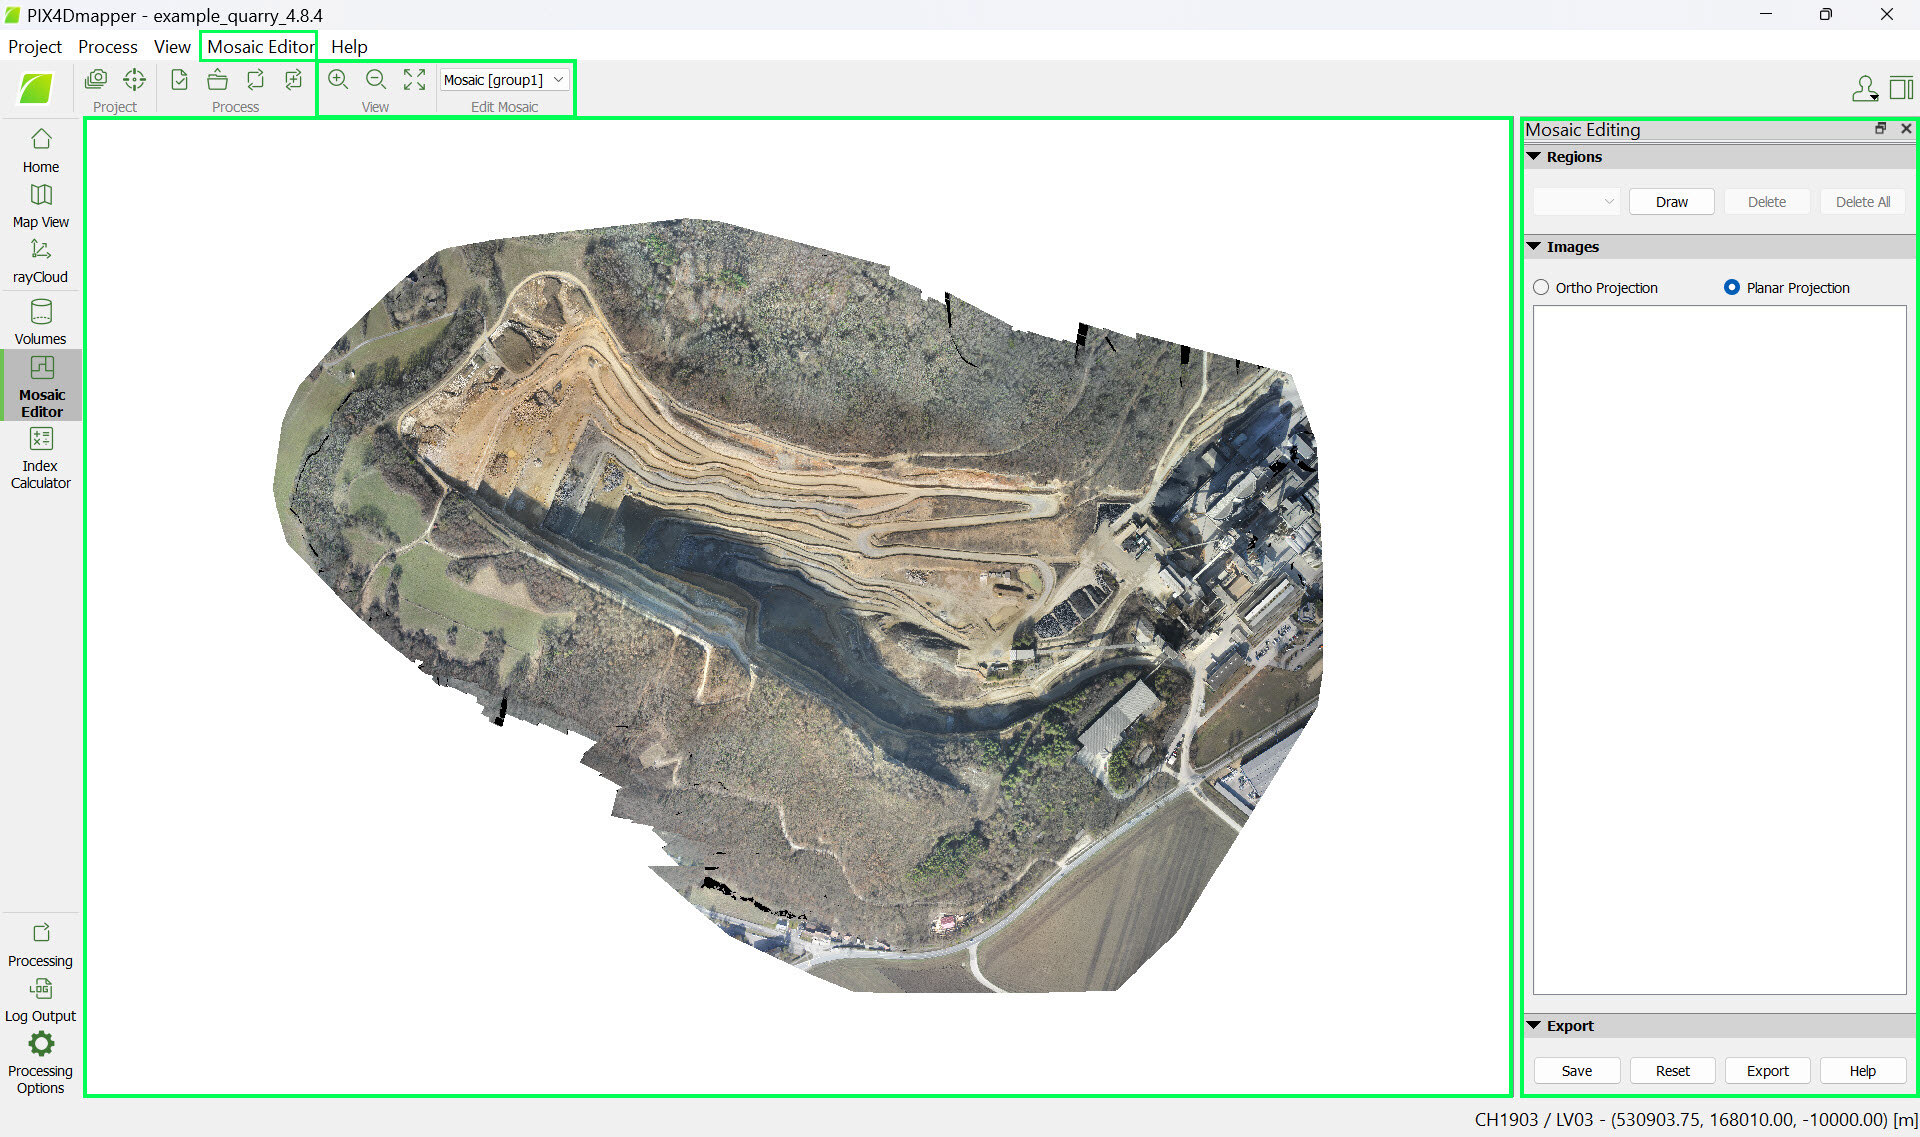
- Mosaic View: Displayed in the main window. By default, the Orthomosaic is displayed. The Mosaic Editor can also be used to visualize the DSM (Elevation).
- Sidebars: Displayed on the right of the Mosaic View. By default, the Mosaic editing sidebar is displayed.
- Status Bar: Displayed on the bottom right of the Mosaic View. Display the coordinates when passing the mouse over the orthomosaic / DSM.
- For step-by-step instructions for using the Mosaic Editor: Using the Mosaic Editor.
On the Menu bar, by clicking Mosaic Editor, the following options are displayed:

- View: Shows the view options of the Mosaic View.
- Mosaic Editing: Opens the Mosaic Editing sidebar.
- Visualization: Opens the Visualization sidebar.

The following Toolbar buttons are displayed:
- Standard Toolbar: For more information: Interface.
- Toolbar extra buttons:
- View
 Zoom In: Zooms in the selected view.
 Zoom Out: Zooms out the selected view.
 View All: Moves the viewpoint in order to fit the model in the Mosaic View.
- Edit Mosaic

Element to be displayed in the Mosaic View, by default, the Mosaic [group1] is displayed. If there is more than one group of images, one Mosaic is generated per group of images. It is possible to display the different generated mosaics, the DSM, and the DTM.
By default, the Mosaic view is selected, and the mosaic is displayed. If the DSM view is selected, the DSM is displayed. If the DTM view is selected, the DTM is displayed.
When passing the mouse over the orthomosaic / DSM / DTM, the Mosaic Status bar displays the coordinates of the hovered point.
The following mouse interactions are available:
- Left-click on the mosaic and move the mouse: Pan the mosaic.
- Left-click on a Region vertex while moving the mouse: Allows to move the vertex of the region.
- Moving the mouse scroll forwards: Zoom in on the mosaic.
- Moving the mouse scroll backward: Zoom out of the mosaic.
There are two sidebars:
- Mosaic editing sidebar: Allows the user to edit the mosaic.
- Visualization sidebar: Allows the user to visualize the mosaic or the DSM.
On the bottom right part of the Mosaic View, the following is displayed:
![]()
- Selected Coordinate System: Displays the selected coordinate system of the point.
- Position: Displays the (X,Y) coordinates in meters / feet of each point of the orthomosaic / DSM / DTM. When passing the mouse over the orthomosaic / DSM / DTM, the coordinates change.
Important: The geographic (ellipsoid) projection coordinates are used in meters/feet instead of geographic (ellipsoid) coordinates in degrees, considering the output coordinate system selected.
By default, the output coordinate system is the same as one of the GCPs if GCPs are used. Otherwise, it is the same as the one of the images. If the coordinates system is WGS84, the output is given in UTM.
If less than 3 images are geolocated, and less than 3 GCPs are defined, then the output coordinates system is "Arbitrary".
Note: The Status Bar displays the position for the whole area covered by the Orthomosaic / DSM / DTM and the area without data. When passing the mouse over areas where there is no data, the no data altitude value -10000 is displayed.