To create a project, follow these steps:
-
Configuring the image properties:
- If the images have geolocation:
Define the coordinate system and import the image geolocation information. - If the software cannot recognize the camera model or it is needed to use different camera parameters:
Edit the camera model.
- If the images have geolocation:
- Selecting the output / GCP coordinate system.
- Selecting the processing options template
Creating a new project
To create a new project:
-
Start PIX4Dmapper.
-
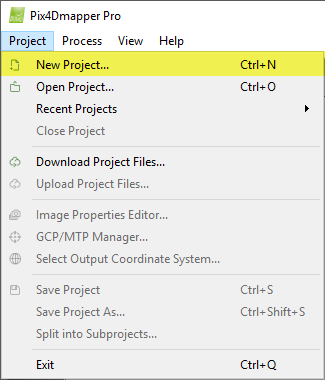
On the Menu bar, click Project > New Project...
- The New Project wizard opens:
- In Name: type a name for the project.
- (optional) In Create in: click Browse... On the Select Project Location pop-up, navigate to select the folder where the project and results will be stored and click Select Folder.
- (optional) Select the check box Use As Default Project Location to save all new projects in the selected folder.
- In Project Type, keep the default option New Project selected.
- Click Next.
Warning: Ensure that:
- The project name DOES NOT use a special character(s).
- The path where the project will be created DOES NOT use a special character(s).
- The project name and the path together contain less than 256 characters.
Note: When the wizard is completed, a folder named after the project will be created in the selected folder and it will store all the results.
Importing the images
On the Select Images window:
-
Click Add Images... to add the images.
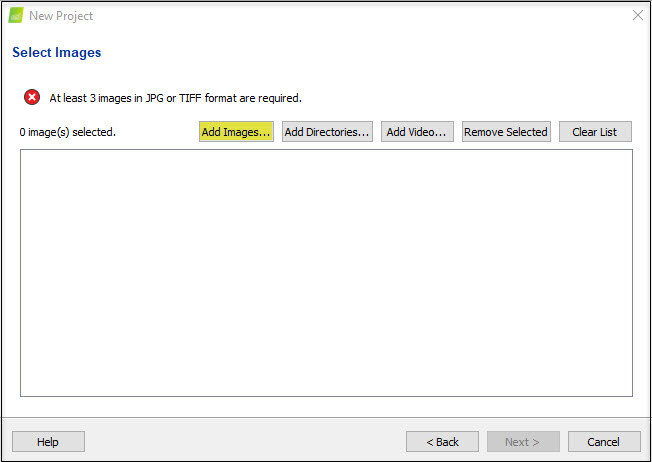
- On the Select Images pop-up, navigate to select the folder where the images are stored, select the images to be imported (it is possible to select multiple images), and click Open.
- (optional) It is possible to remove images by selecting them in the image list (use Ctrl+click or Shift+click for multiple selection) and clicking Remove Selected.
- (optional) It is possible to clear the list of images that have been added by clicking Clear List.
- Click Next.
Note:
- Images can be imported as *.jpg, *.jpeg, *.tif, or *.tiff. By default, all supported image formats can be selected. To filter images according to their format change the input format to JPEG images (*.jpg,*.jpeg) or to TIFF images (*.tif, *.tiff).
- It is possible to select images stored in different folders. Once images are imported from one folder, click Add images... again to add more images from another folder.
Tip:
It is not possible to select multiple folders, but it is possible to import images saved in different folders.
- Click Add Images...
- Navigate to the common location/folder, containing all the folders where you want to select all the images from.
- In the "select images" Windows Explorer window in the top-right corner (search), enter
*.jpg(assuming that your images are in JPG format). This will search for all files with the JPG extension. - Select all relevant results.
- Click the Open button
Configuring the image properties
The New Project wizard displays the Image Properties window which contains 3 sections:
- Image Geolocation:
- Sets the coordinate system to which the image geolocation refers.
- Imports/exports the coordinates and, optionally, the orientation of the images and/or the accuracy of the coordinates.
- Sets the accuracy of the image geolocation.
- Selected Camera Model: Sets and configures the camera model associated with the images.
- Images table: Displays the selected images, as well as the group, position, position accuracy and orientation of each image and if the image is enabled or not (an enabled image will be taken into account for processing).
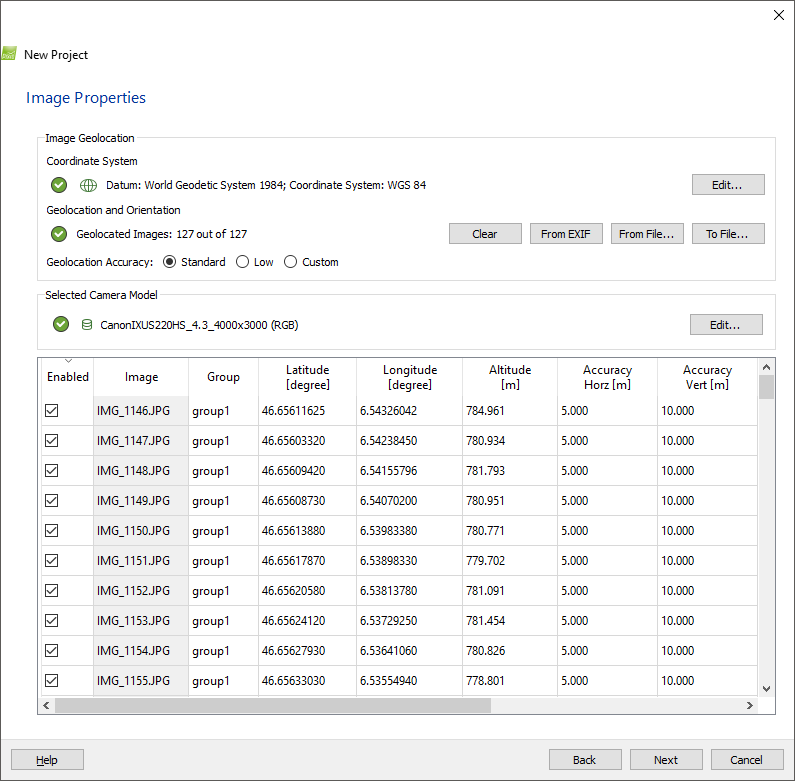
There are 3 optional steps to follow before clicking Next:
a. (optional) Select Image Coordinate System
On Coordinate System, click Edit... if the image geolocation is given in a coordinate system other than WGS84 (default).
For more information and step by step instructions about how to select/change the Image Coordinate System: How to select / change the Image / GCP / Output Coordinate System.
b. (optional, recommended) Import Image Geolocation and Orientation
If the image geolocation (position) information is stored in the EXIF of the images, it will be loaded automatically.
For more information and step by step instructions about how to select/change the Image Geolocation and Orientation: How to select/change the images geolocation and orientation.
- The software considers the Date Taken field of the EXIF to set up the order in which the images are taken.
- Step 1. Initial Processing is faster for projects with image geolocation. In the case of not sufficient overlap, image geolocation helps to calibrate the images.
c. (optional) Edit Selected Camera Model
A camera model needs to be defined in order to run a project in PIX4Dmapper. The parameters of this model depend on the camera that was used to capture the image. Most cameras save their name in the metadata of the image in EXIF format. This field is used to associate a given camera model to all the images captured with this camera.
The Selected Camera Model section, on the Image Properties window, displays the selected camera model. The camera model can be:
 Valid: A green check is displayed if the camera model is valid. A camera model is valid if it already exists in the camera model database of PIX4Dmapper or if there is sufficient information in the EXIF data of the images to create a new camera model that will be saved into the user camera model database. If the camera model is retrieved from the EXIF data, it is recommended to check the camera model parameters and, if needed, to edit them.
 Invalid: A red cross is displayed if the camera model is not valid. A camera model is invalid if it is not in the camera model database of PIX4Dmapper and if there is not enough information in the EXIF data of the images. In this case the camera model needs to be defined manually.
For more information and step by step instructions about how to edit the camera model:
How to use the Editing Camera Model Options.
Note: Grouping the images:
- When the project contains images with different spectral signatures (RGB, NIRGB, etc) usually the images are grouped automatically. In case that they are not grouped by default, group them manually following: How to process Images with different Spectral Signature (RGB, NIRGB, etc).
- In this case, one orthomosaic is generated per group.
Selecting the output/GCP coordinate system
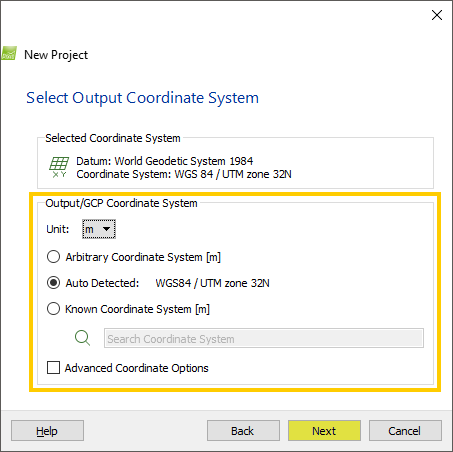
In the Select Output Coordinate System window:
-
(optional) Change the output / GCP coordinate system: How to select / change the Image / GCP / Output Coordinate System.
- Click Next.
Note: For more information about the Output / GCP coordinate System section: Select Image / GCP / Output Coordinate System .
Note:
- By default, the output and GCP coordinates system will be the same. To select a different coordinate system for the outputs: Menu Project > Select Output Coordinate System.... To select different coordinate system for the GCPs: Menu Project > GCP / MTP Manager... > GCP Coordinate System.
- By default, the Unit is m (meters).
- If the images have geolocation, by default, Auto detected is selected, displaying the corresponding UTM or Nad83 zone of the images.
- If the images do not have geolocation, by default, Arbitrary Coordinate System is selected.
Selecting the processing options template
Ιn the window Processing Options Template:
-
Select a processing options template.
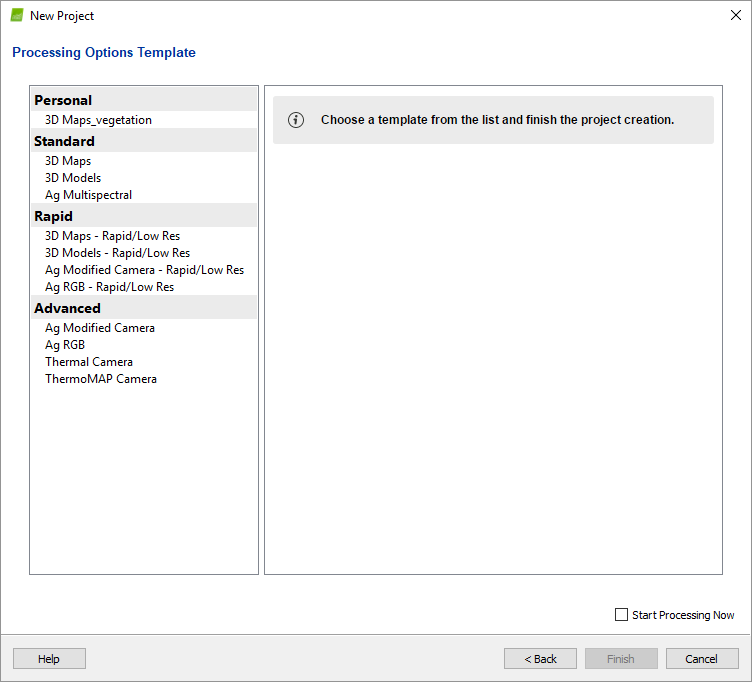
-
(optional) Select the box Start Processing Now to start the processing automatically.
- Click Finish to close the wizard and start the project.
Note: A template has to be chosen in order to open a project, but it can always be modified or changed later.
Note: For more information about the default processing templates, their outputs and their selected processing options: Processing Options Default Templates.
Note: In the window Processing Options Template, the processing options templates are organized into three sections: Standard, Rapid and Advanced. A fourth section titled Personal appears above the others when a new personal template has been created by the user.