
Instructions on obtaining Autotag coordinates:
-
Evenly distributed Autotags across the project area.


-
On the PIX4Dcatch home screen, tap Capture at the bottom.
-
Before starting to capture a project, tap
 the Tools icon in the bottom right corner.
 -
Select Tag Detection
 .
. 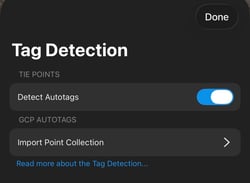
- Turn on Detect Autotags under the Tie Points section. Tap Done.
-
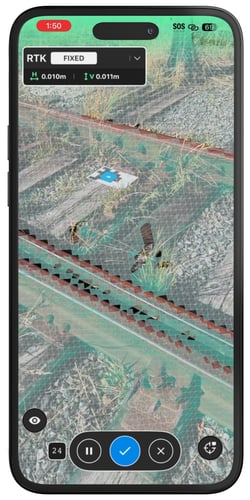
Start capturing. Ensure Autotags are clearly detected in at least three images.
-
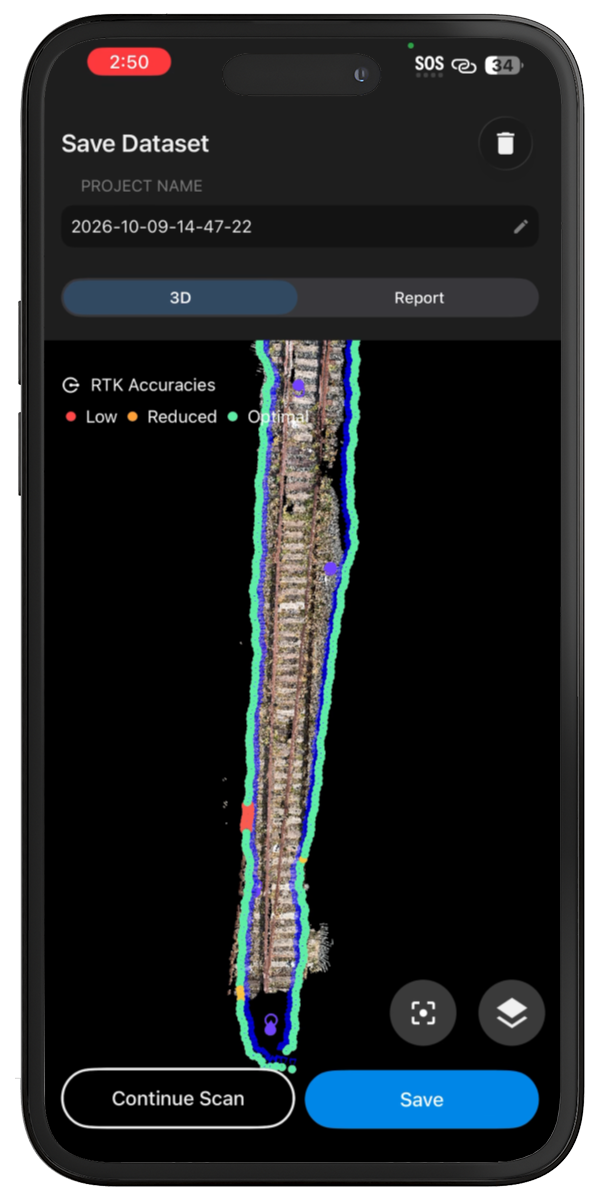
Once the capture is done, save the dataset.
- Open the captured project in the project folder at the bottom.
- Tap the three-dot icon
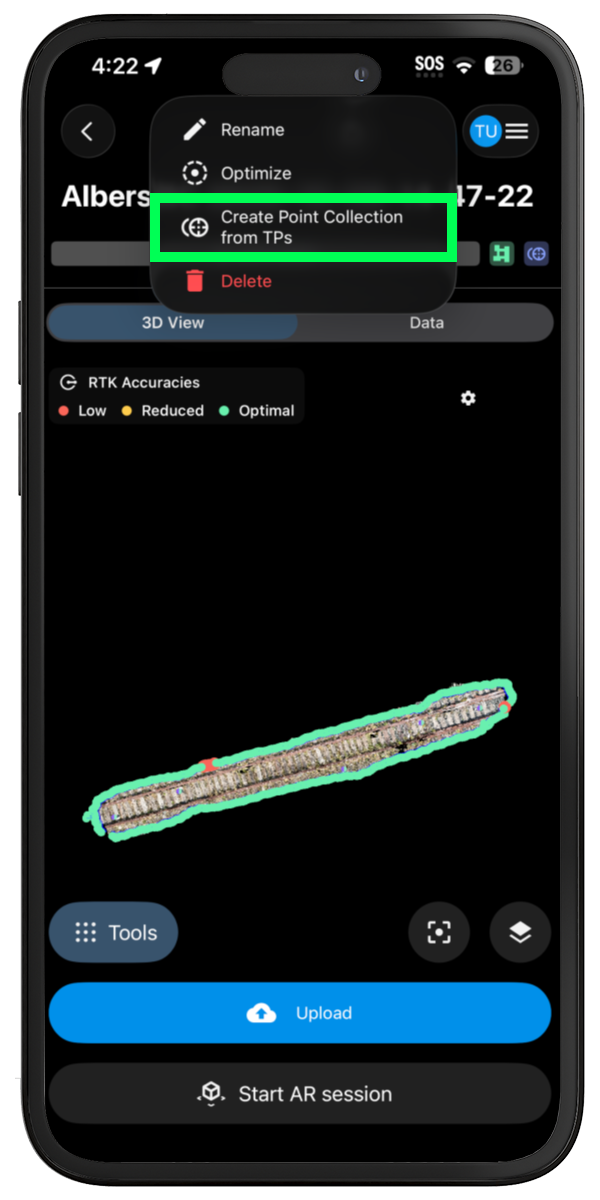
 at the top and select Optimize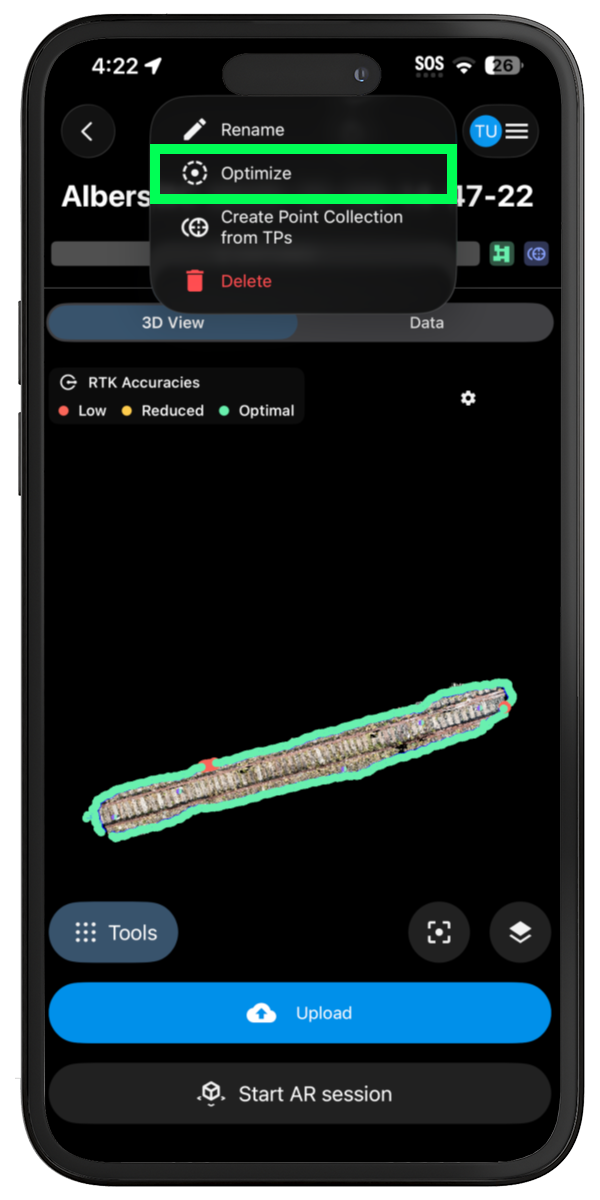
- Once the optimization is finished, tap the three-dot icon
 at the top-right corner.
 -
Select Create Point Collection from Tie Points.
-
Name the point collection. Select the output coordinate reference system.
-
Tap Create in the top right. PIX4Dcatch will display a list of points with their coordinates. To check their geographical distribution, tap the map icon
 in the top-right corner.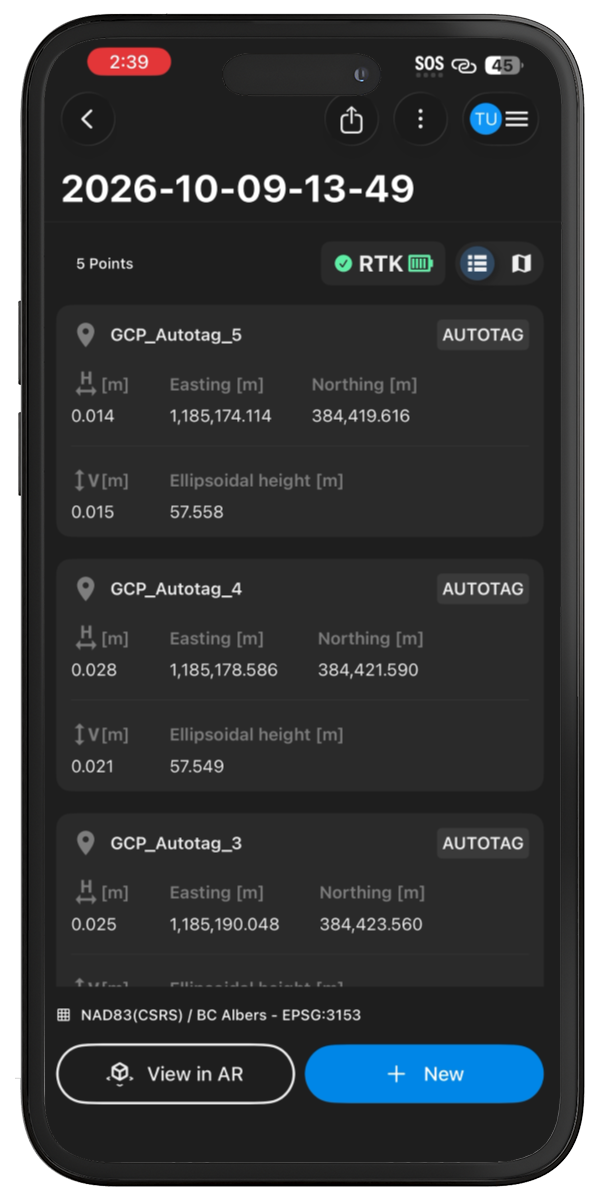
-
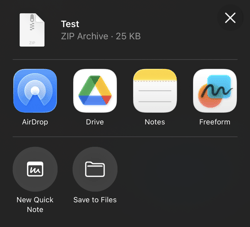
To export coordinate data, tap the export icon on the top. Select the desired export method for the .zip file.

Note: The Tag Detection feature can also be activated post-capture through the Optimize Autotags workflow. The subsequent processing steps remain unchanged.