This article explains how to upload an IFC file and how to visualize and interact with it in the 3D view. This functionality enables the comparison of BIM data with 3D reconstructions, supporting construction monitoring and design verification workflows.
IN THIS ARTICLE
How to upload an IFC file
Visualizing an IFC file in the 3D view
✅Included: PIX4DCloud Pro and PIX4Dcloud Enterprise
❌Not included: PIX4Dcloud Starter
How to upload an IFC file
Warning:
- Roles: Only Owners, Managers, and Editors can import and manage IFC files in a dataset in PIX4Dcloud.
- Same Coordinate System: The IFC file must have the same coordinate system as the project. The IFC file without the coordinate system can't be imported properly.
- Single File: Only one IFC file can be imported per project.
- Replaceable: The IFC file can be replaced or downloaded after upload.
- Types of geometry such as ifcindexedpolycurve are not supported and the IFC file fails to display.
Video tutorial:
Note: Supported IFC schemas
PIX4Dcloud supports IFC files using some schemas, including IFC2X3, IFC4, and IFC4X3. IFC files exported with other schemas, e.g., IFC4X1, may fail to render in PIX4Dcloud’s 3D view. If your IFC file does not display in the 3D view, export a new copy using your preferred BIM software with one of the supported schemas.
To upload an IFC, follow these instructions:
- Access the project on the PIX4Dcloud Drive.
- On the top-right menu, click Files & Reports > Results.
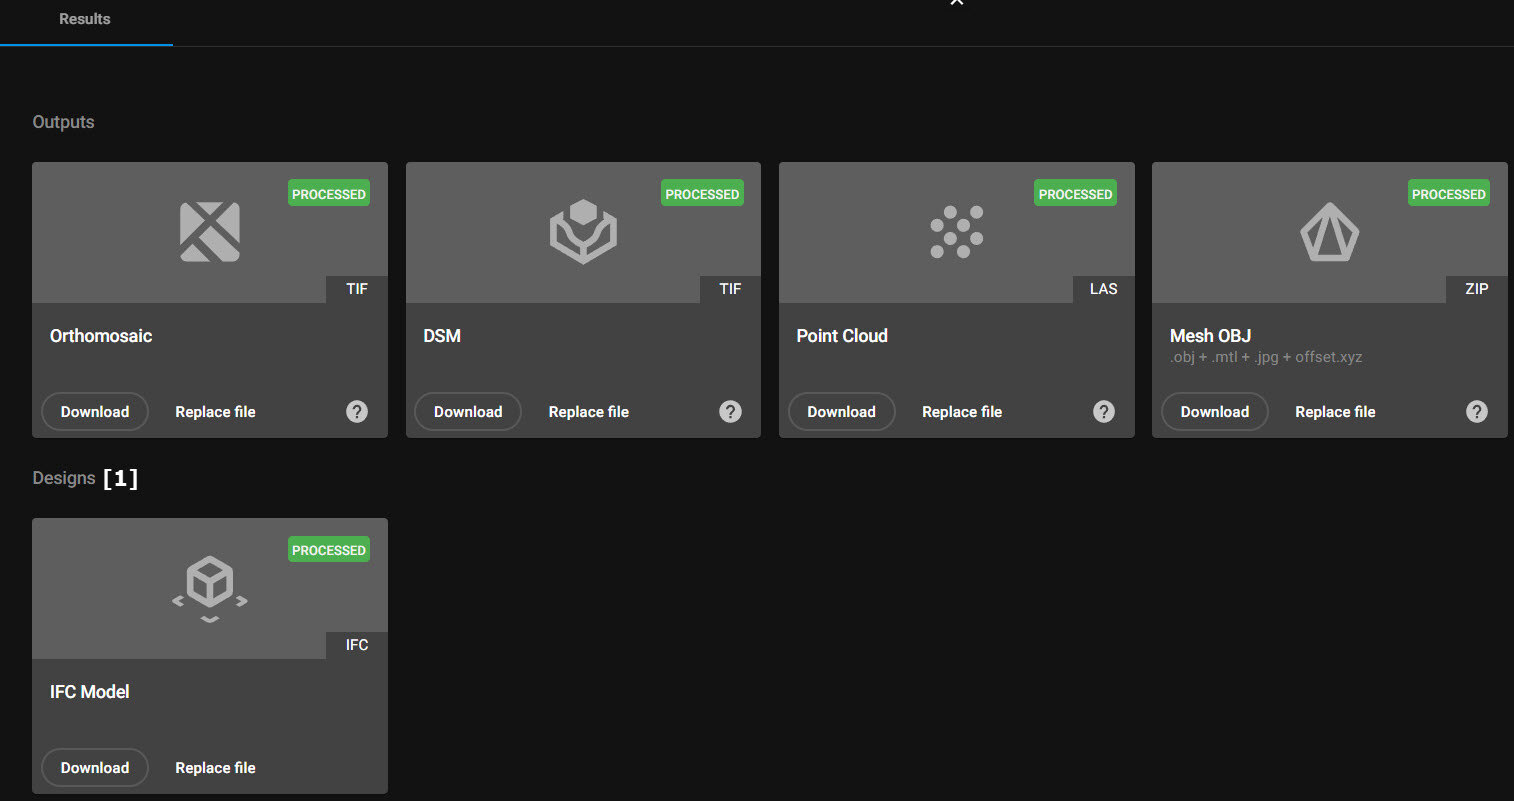
- Under the Designs section, click Upload File.
- Navigate to the IFC file on your local device.
- Click Open.
- (Optional) The IFC file can be downloaded or replaced.
Tip:
-
This workflow requires an existing project.
- The IFC file is available for visualization immediately after upload and does not require additional processing.
- Importing an IFC file into an empty project is also supported and enables visualization in PIX4Dcloud AR, without processing imagery.
Visualizing an IFC file in the 3D
Once the IFC file is uploaded to PIX4Dcloud Pro:
-
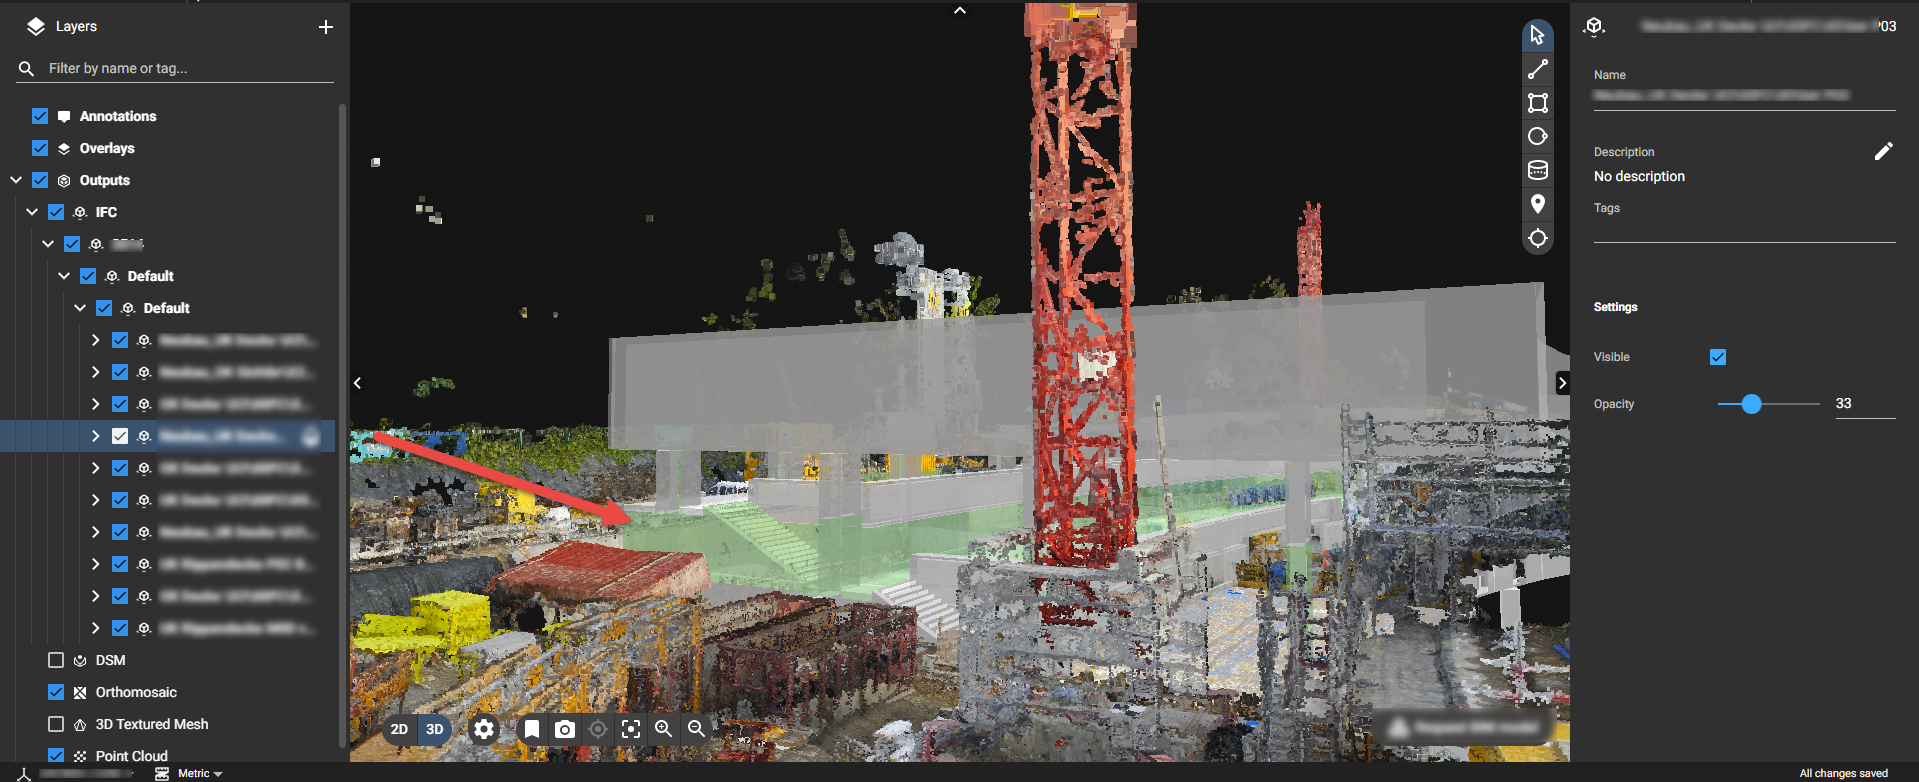
The IFC file appears in the left panel under the Outputs layer.
-
The file is displayed only in the 3D view.
-
Selecting an IFC element in the left panel highlights it in light green in the 3D view.
-
The right panel displays file information and allows users to:
-
Adjust opacity
-
Toggle visibility
-
-
The IFC file is visible only in the project where it was uploaded.
-
If the project belongs to a site, the IFC file is not shared across other projects within that site.