IN THIS ARTICLE
How to create a new volume
How to compute the volume
How to export a volume report
How PIX4Dsurvey calculates the Volume measurement
How to create a new volume
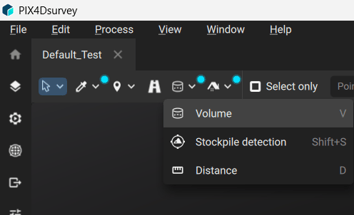
- On the tools bar, select the Volume measurement tool by clicking
 or use the keyboard shortcut V.
- To draw a volume, left-click on points in the 3D view. Right-click or press enter to complete the volume base polygon.
- (Optional) To accurately mark the vertices, select the volume using the simple selection tool
 . The position of each vertex can be corrected in the 3D view, on the images, or using the vertex editor.
 - (Optional) To assign a common elevation to the vertices of the volume base surface, first select the volume using the simple selection tool . Then, in the Properties panel
 , click align vertices
  to choose how to align the vertices.
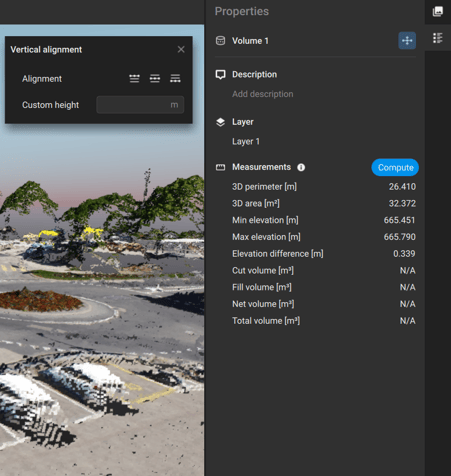
Note: Starting from version 1.85, it is possible to import a LandXML file as a base surface for volume computations.
After drawing the volume, details about the volume measurement are displayed in the Properties panel ![]() . More specifically:
. More specifically:
| Property | Description |
| Name | Name of the Volume that can be edited |
| Description | (Optional) A short description textbox to describe a specific volume |
| Layer | The layer this volume belongs to |
| Measurements |
Basic measurements of this volume include:
|
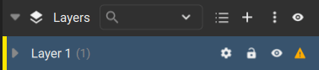
 icon of the volume layers on the left sidebar. The volume can be moved to another volume or vector layer by right-clicking on it.
How to compute the volume
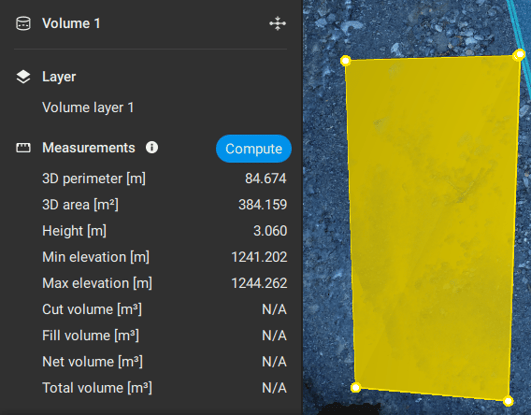
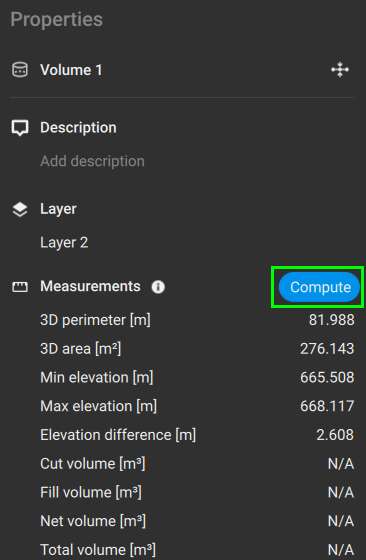
Once the volume is drawn, in the Measurements section of the Properties panel, click Compute to trigger the volume computation.
 |
 |
| After completing the volume measurements, the cut/fill volumes and errors are displayed. | |
More specifically:
- Cut volume [units3]: Volume above the volume base. The volume is measured between the volume base and the surface.
- Fill volume [units3]: Volume below the volume base. The volume is measured between the volume base and the surface.
- Net volume [units3]: The absolute difference between Cut and Fill volume (Cut - Fill volume)
- Total volume [units3]: The total volume (Cut + Fill volume).
How to export a volume or volume report
After computing the (cut/fill) volume measurements, the Volume report, the volume polygon and the 3D volume are available to be exported.
To export the Volume report:
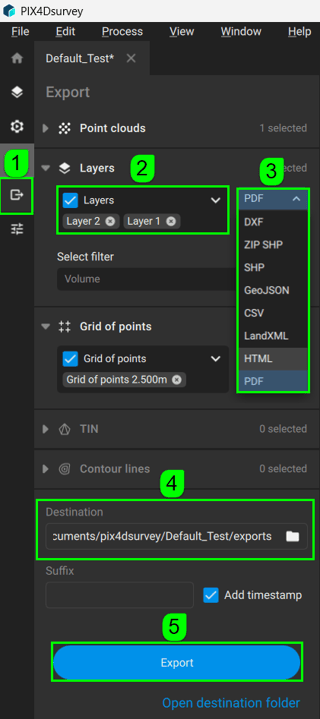
- On the Menu bar, click File, then Export. Alternatively, on the top right, click
 Export. The Export panel opens on the left.
 - (Optional) Unselect the output Volume layers that do not need export.
- In the Export panel, select the output format (PDF, HTML, or CSV for volume reports. LandXML for the 3D volumes. DXF, ZIP SHP, SHP, or GeoJSON for the volume polygon).
- In the Destination section, navigate to the path where the files should be saved.
- Click Export.
How PIX4Dsurvey calculates the Volume measurement
PIX4Dsurvey calculates the volume as follows:
1. A new volume is drawn. For more information on how to draw a volume: How to create a new volume. 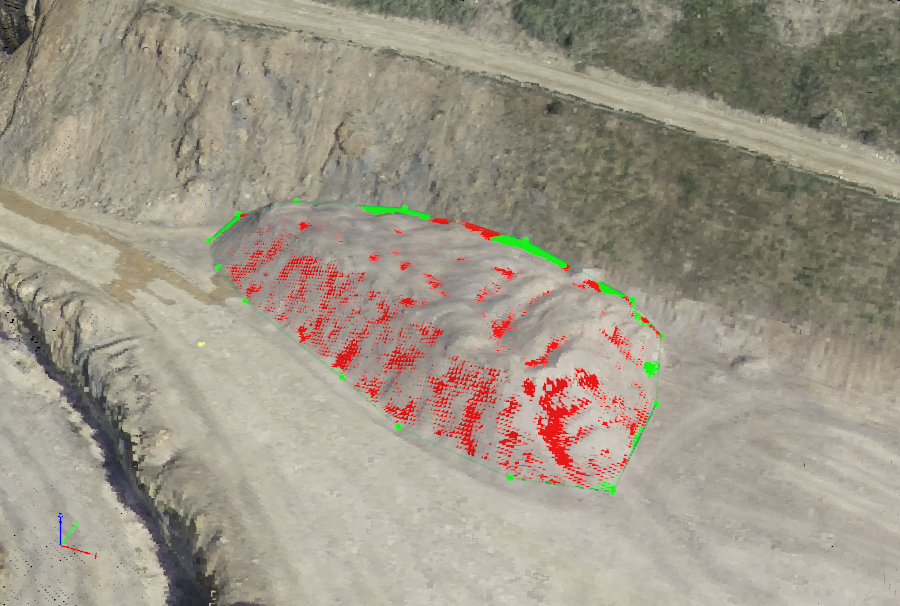
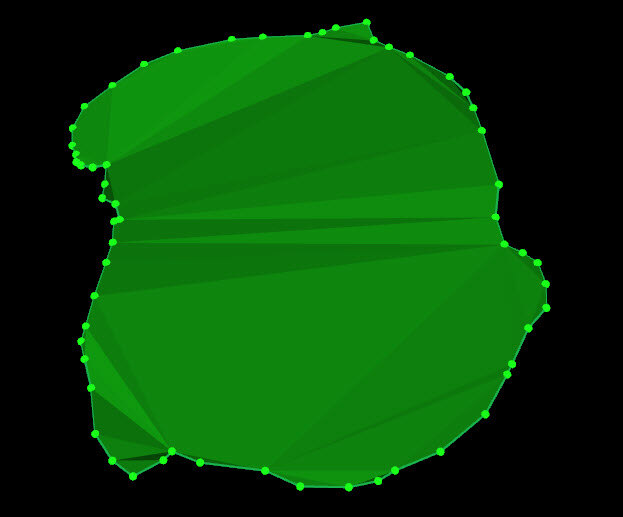
2. PIX4Dsurvey projects a grid with GSD spacing on the base.
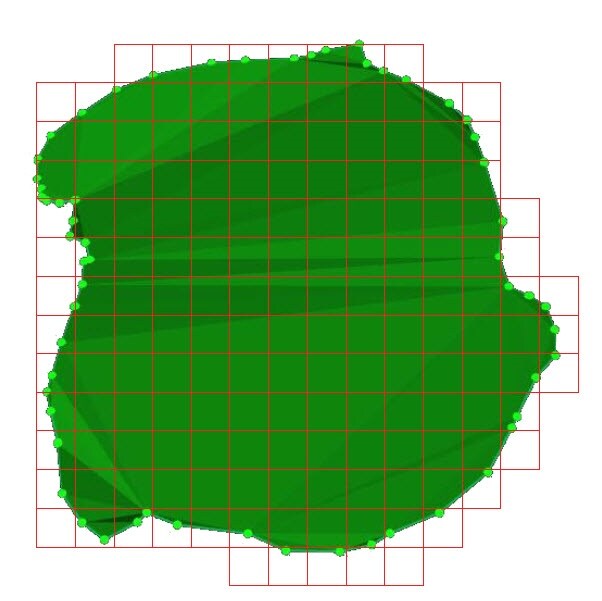
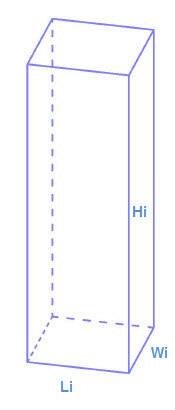
3. For each cell i of the grid, its volume (Vi) is given by:
Vi = Li * Wi * Hi
Where:
Li = the length of the cell.
Wi = the width of the cell.
Hi = the height of the cell.
The Length (Li) and Width (Wi) are equal to the project's GSD.
Li =Wi = GSD
The Height (Hi) is given by:
Hi = ZTi - ZBi
Where:
ZTi = the terrain altitude of each cell at the center of the cell.
ZBi = the base altitude of each cell at the center of the cell.
Therefore, the volume Vi of cell i is given by:
Vi = GSD*GSD* (ZTi - ZBi)
- ZTi is the altitude of the 3D terrain corresponding to the center of the cell i.
- ZBi is the altitude of the base surface of the volume corresponding to the center of the cell i .

4. PIX4Dsurvey calculates 2 volumes:
- The Cut volume Vc is the volume between the base and the 3D terrain when the terrain is higher than the base.
Cut volume = VC = VC1 + VC2 +...VCN
Where:
VC1...N = Cut volume for cell i..N
- The Fill volume VF is the volume between the base and the terrain when the terrain is lower than the base.
Fill volume = VF = VF1 + VF2 +...VFN
Where:
VF1...N = Fill volume for cell i...N.
5. The Total volume is given by:
Total Volume = VT =VC+ VF