How to capture and process data with Parrot ANAFI Thermal - PIX4Dmapper
Learn how to process a thermal dataset in PIX4Dmapper acquired by Parrot ANAFI Thermal. The processing will only work from version 4.5.4. You can update the software from here.
Important:
- The RGB camera and the rig is included in PIX4Dmapper camera database. However, the camera model for the ANAFI Thermal camera is created during project creation, from the EXIF file.
- The ANAFI Thermal is not supported by command line, PIX4Dengine or PIX4Dcloud.
IN THIS ARTICLE
How to capture the thermal dataset
How to process the thermal dataset
How to visualize the thermal mesh
How to capture the thermal dataset
- By default, the sensor for the Anafi Thermal is the Anafi 4K. Select the thermal camera in the drone/camera settings.
- The GSD displayed to the user is from the RGB camera.
How to process the thermal dataset
- Create a new project in PIX4Dmapper. For more information: New project in PIX4Dmapper.
- At the stage of importing the images add Rjpg files to the project.
- In the Processing Options Template, select 3D Maps or 3D Models, not the Thermal Map template as the photogrammetric processing is done using the RGB images.
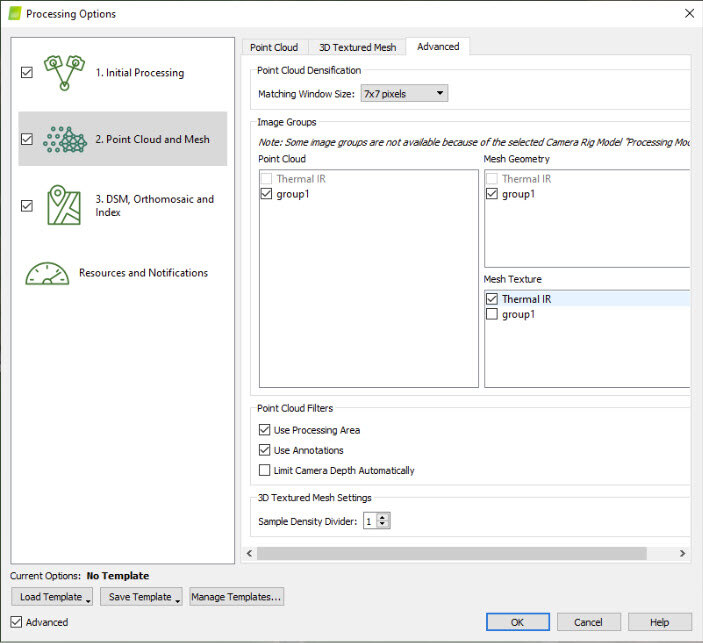
- To generate the thermal 3D Textured Mesh, open Processing Options > 2. Point Cloud and Mesh > Advanced and select Thermal as a source of information for the Mesh Texture.

Note:
- Initial Processing is done using the RGB camera.
- The geometry of 3D Textured Mesh and the dense point cloud is derived from the RGB images.
- The colour and texture of the 3D Texture Mesh and the dense point cloud, respectively, are derived from the thermal camera by projecting the images directly without calibrating them.
How to visualize the thermal mesh
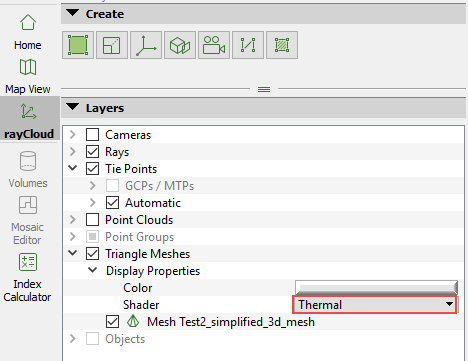
- Click on rayCloud. Go to Triangle Meshes.
- The triangle mesh has a colour and shader dropdown as a part of display properties.
- Select Thermal as the shader.

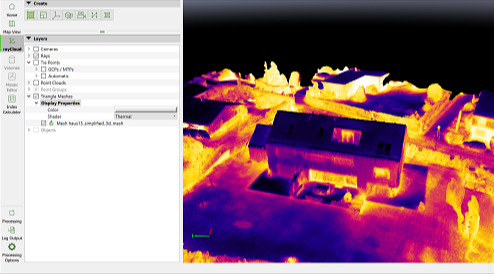
- The mesh will have a thermal texture for visualization.

