This article shows how to process thermal images with PIX4Dengine. Before going ahead, it is recommended to read Processing thermal images where specific information about thermal mapping is given: supported cameras, image formats, how to capture them, etc.
Processing options
Thermal images normally have much lower resolution than RGB ones, and contrast in the images is often low as well. These relatively feature-poor images can thus require specific processing options.
A good starting point for configuring the processing of thermal images are the two currently available thermal templates:
- THERMOMAP_CAMERA for images taken with senseFly's ThermoMAP camera.
- THERMAL_CAMERA for other popular thermal cameras (e.g., FLIR).
In order to calibrate oblique images, the match strategy AutoOblique should be used.
from pix4dengine.options import AlgoOption
project.set_options((AlgoOption.CameraCalibration.MATCH_STRATEGY,"AutoOblique"))
Oblique images are often used to reconstruct a 3D model. Keep in mind, however, that the point cloud and mesh only provide qualitative information on the temperature distribution. Only the thermal reflectance map can be used to obtain quantitative information on relative or absolute temperature.
Fixing hard-to-calibrate projects
Thermal images can sometimes prove hard to calibrate. Here we provide suggestions on some processing options which can help calibrating such a thermal project.
- Thermal images generally have low resolution. Using a high image scale can help mitigating this issue. This implies setting the keypoints image scale to Custom, and using an image scale value of 2.
- Using the Accurate Geolocation and Orientation calibration method can help, if the images geolocation information is accurate. Otherwise the Alternative method should be used.
- Setting a fix number of target key points can give better results than the default for feature-poor thermal images. This implies setting the keypoint selection method to Custom, and a maximum number of keypoints. A value around 10000 usually works best.
- The camera model, focal length and pixel size of thermal cameras is not always correctly reported in the images metadata, and information stored in the EXIF can be ambiguous or incorrect. However, if the focal length and pixel size information is reliable, it is useful to force the internal camera parameters to remain close to the values extracted from image metadata. For doing this, the internal camera optimization option can be set to AllPrior.
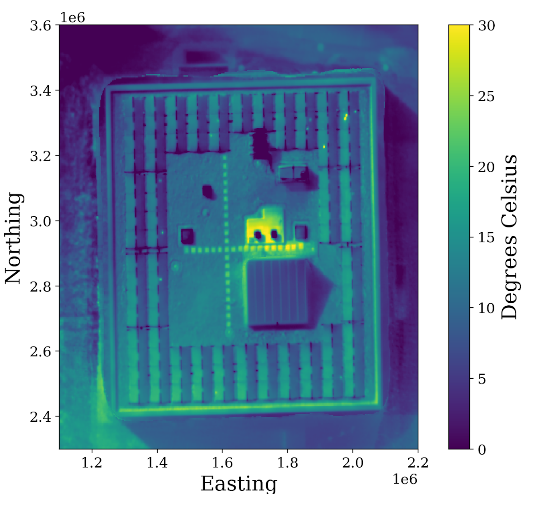
Visualizing thermal maps
The thermal map produced during thermal image processing is a TIFF image containing single-band, floating point values, representing temperature in degrees celsius. Any software capable of loading floating point TIF images can be used to open these files. Below, we show a basic example demonstrating how the Engine SDK can be used to create and process a thermal project, and how the resulting map can be loaded using freely available Python libraries.
from pix4dengine.processing proxyimport Pipeline
from pix4dengine.constants.processing import ProcessingTemplate
from pix4dengine.exports import get_available_output
from pix4dengine.options import ExportOption
import rasterio
import matplotlib.pyplot as plt
import numpy as np
project = create_project("thermal",images_dir=IMG_DIR, template=ProcessingTemplate.THERMAL_CAMERA)
pipeline = Pipeline(project=project)
pipeline.run()
out_path, = get_available_output(project,
"all")[ExportOption.Index.REFLECTANCE]
thermal_tiff = rasterio.open(out_path)
map_data = np.ma.array(thermal_tiff.read(1), mask=thermal_tiff.read(2) == 0)
fig = plt.figure()
axes = fig.add_subplot(111)
axes.set_aspect("equal")
img = axes.imshow(map_data, extent=thermal_tiff.bounds, vmin=0, vmax=30)
colorbar = plt.colorbar(img)
colorbar.set_label("Degrees Celsius")
axes.set_xlabel("Easting")
axes.set_ylabel("Northing")
axes.set_xlim(1.1e6, 2.2e6)
axes.set_ylim(2.3e6, 3.6e6)
plt.show()