How to export the 3D textured mesh - PIX4Dmapper
This article provides step-by-step instructions on exporting the 3D textured mesh in PIX4Dmapper.
1. On the Menu bar, click View > rayCloud.
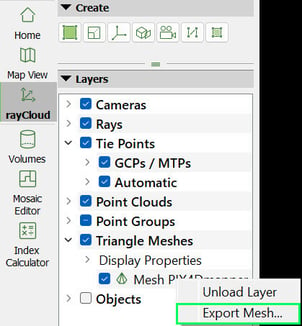
2. On the left sidebar, in the Layers section, expand the Triangle Meshes list and right-click on the triangle mesh to be exported.
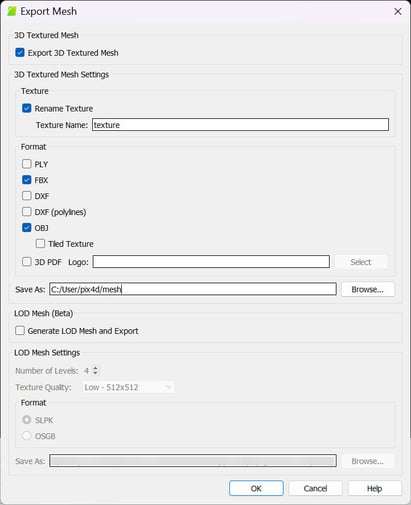
3. Click Export Mesh..., the Export Mesh pop-up will appear:


6. Select the desired format between the following options:
- PLY
- FBX
- DXF
- DXF (polylines)
- OBJ
- 3D PDF
7. (optional) If the OBJ format is selected, select Tiled Texture to tile the texture file of the OBJ file.
8. (optional) If the 3D PDF format is selected, select the Logo that is embedded in the 3D PDF. The logo can be imported in .jpeg or .tiff format.
9. Select Generate LOD Mesh and Export to export the multi-LOD mesh.
10. Select the LOD settings:
- Number of Levels
- Texture Quality
- Export format:
- SLPK
- OSGB
11. Click Browse... to navigate to the path where the textured mesh is saved.
12. On File name, type the desired file name.
13. Click Save.
14. On the Export Mesh window, click OK.
15. When exporting is finished, a notification pop-up will appear. Click OK or Open Folder to open the folder that the triangle mesh is saved.
