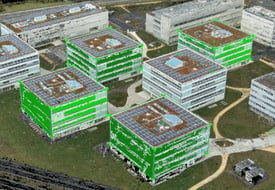
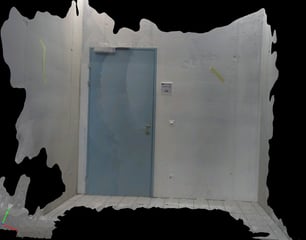
If the project is not complete or the quality of the images is not high, the 3D Textured Mesh generated in PIX4Dmapper may have holes or may not be planar in planar surfaces. It is possible to improve the 3D Textured Mesh by adding surfaces (planar constraint) on a group of points in the point cloud.
This feature can be used on buildings and constructions where natural planes can be found.
Adding a planar constraint can improve and solve issues in the mesh such as:
Improve the planarity of plane surfaces

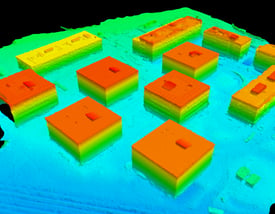
Fill in holes

To improve the 3D Textured Mesh:
1. Draw a New Surface on the planar surfaces of the object using the rayCloud: How to draw a Surface in the rayCloud.
2. In the right sidebar, in the Selection section, select the checkbox Use for DSM and Triangle Mesh. For more information: Menu View > rayCloud > Right sidebar > Objects.
3. Choose the Orientation method by selecting the checkbox Automatic Orientation.
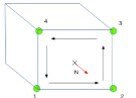
4. Click Apply.
5. (optional) Add more planar constraints following steps 1 to 4.
6. On the Menu bar, click Process > Generate 3D Textured Mesh: Menu Process > Generate 3D Textured Mesh.