This article provides step-by-step instructions on importing a volume into the Volumes window.
Important:
- In order to import a volume into Volumes, the dense point cloud and the digital surface model (DSM) should be computed.
- A volume should contain 3D surfaces to be imported as a shapefile (.shp).
- The shapefile coordinate system and the PIX4Dmapper project's output coordinate system should agree.
To import a volume into the Volumes:
1. On the Menu bar, click View > Volumes.
2. On the sidebar, in the Objects section, click  Import base surface(s).
3. The Import Volume window appears. Navigate to the desired shapefile, in this example, the desired shapefile is named Volume_ToImport_surface.shp.
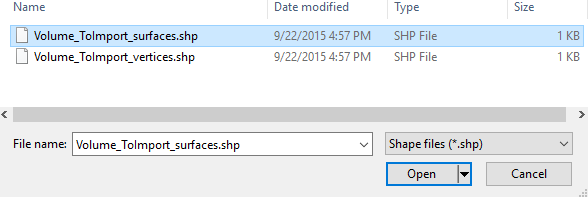
4. Select the file and click Open.
The volume is now imported and selected to be displayed in Volumes.
By default, the volume is called Volume 1, but it can be renamed by double-clicking on the name and typing the new name.