Access: Available once step
1. Initial Processing has been completed.
Note: The
Clipping Box only affects the display, not the results of any outputs of step
1. Initial Processing, the
Densified Point Cloud or step
3. DSM, Orthomosaic and Index.
In order to use the Clipping Box:
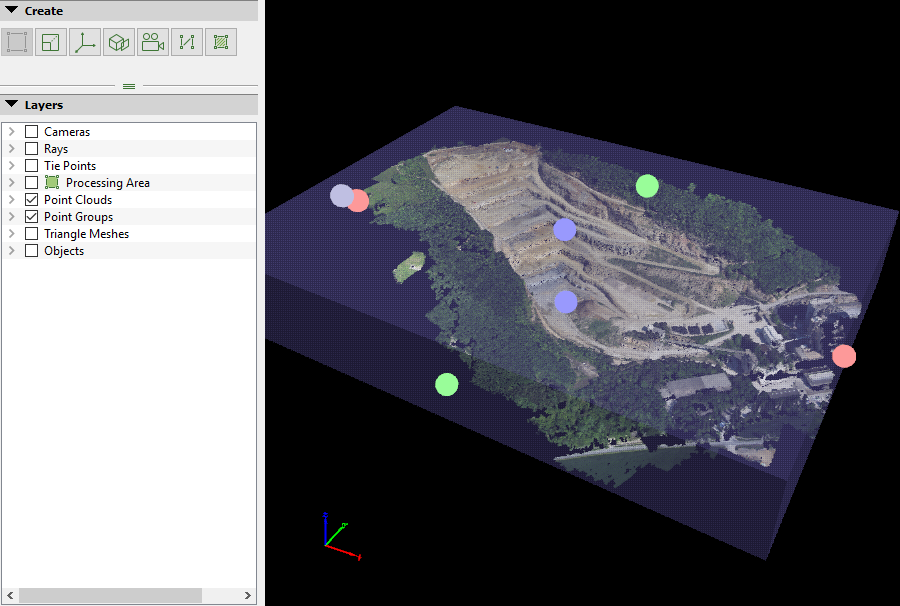
1. In the rayCloud toolbar, on the right, click the icon  to display and edit the Clipping Box.

2. Resize the Clipping Box:
Using the 3D View:
Drag the balls of the Clipping Box to resize it and place it to the desired location. Click the:
- Red balls to resize the X length.
- Green balls to resize the Y length.
- Blue balls to resize the Z length.
- External blue ball to rotate the box.
Using the right sidebar:
Change the values of the different parameters. For more information about the right sidebar parameters: Menu View > rayCloud > Right sidebar > Clipping Box.
3. Click the icon  to hide the Clipping Box.
4. (optional) Click the icon  , to apply the Clipping Box in the 3D View and visualize only the area contained in the Clipping Box.