In order to geolocate images using a GPX file with GeoSetter.
1. Open GeoSetter.
2. On the menu bar click Images > Open Folder and browse for the folder containing the images.
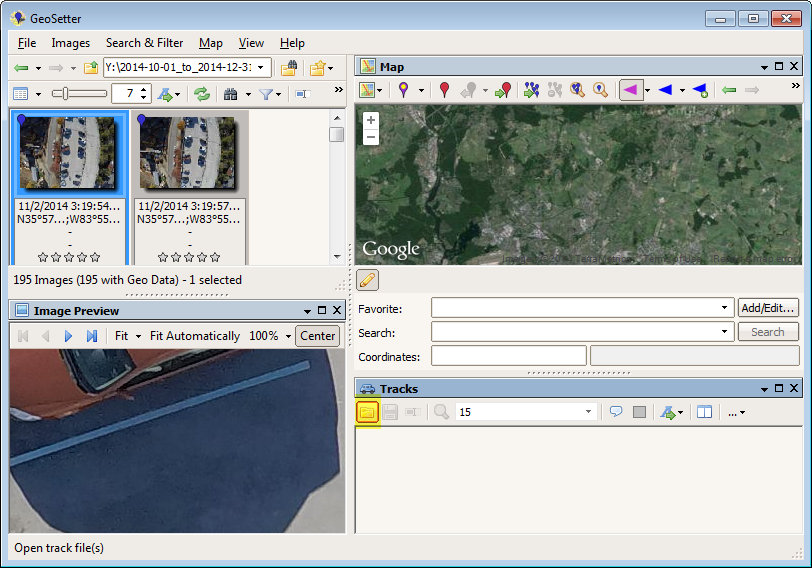
3. On the menu bar click View > Tracks. The tracks window opens at the bottom right of the main window.
4. On the Tracks window, click on the icon Open track file(s).
5. On the Open Track(s) window browse for the GPX file to be imported and open it.
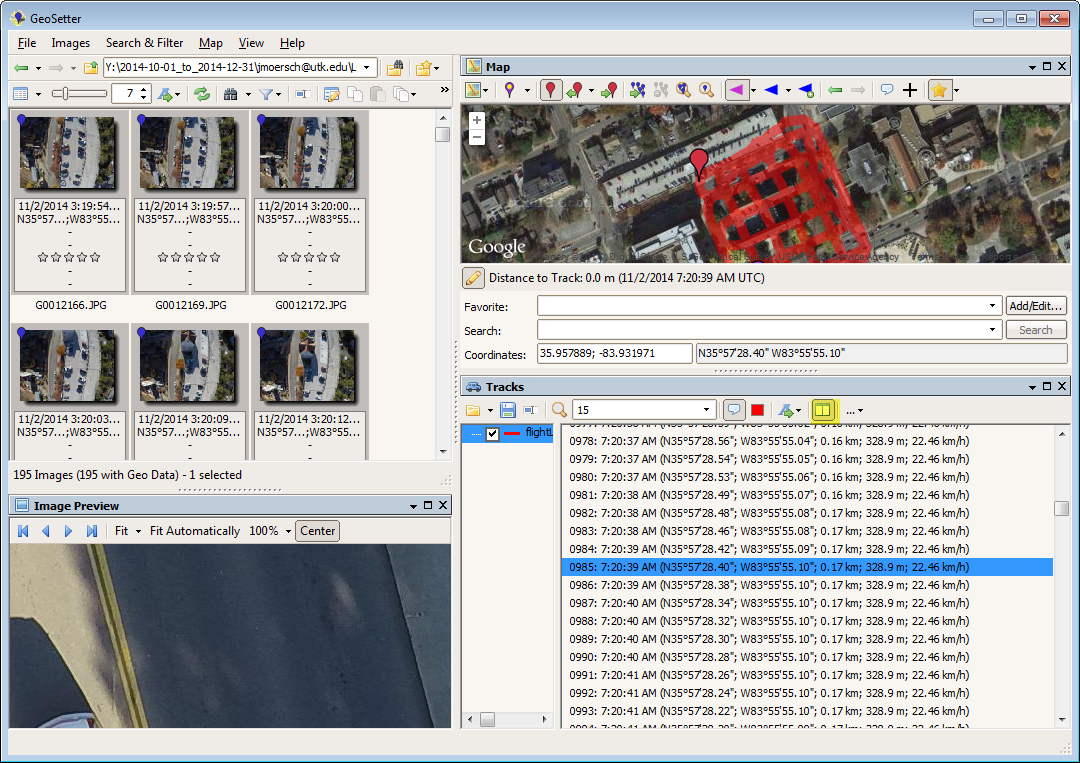
6. On the Tracks window, click on the icon Show list of track points to show the list of tracks.
7. On the Tracks window, on the tracks list, select a track that will be unique and easy to recognize in the set of images. The selected track is shown as a red marker in the Map window displayed on the top right part of the main window.
8. On the top left window, select all the images.
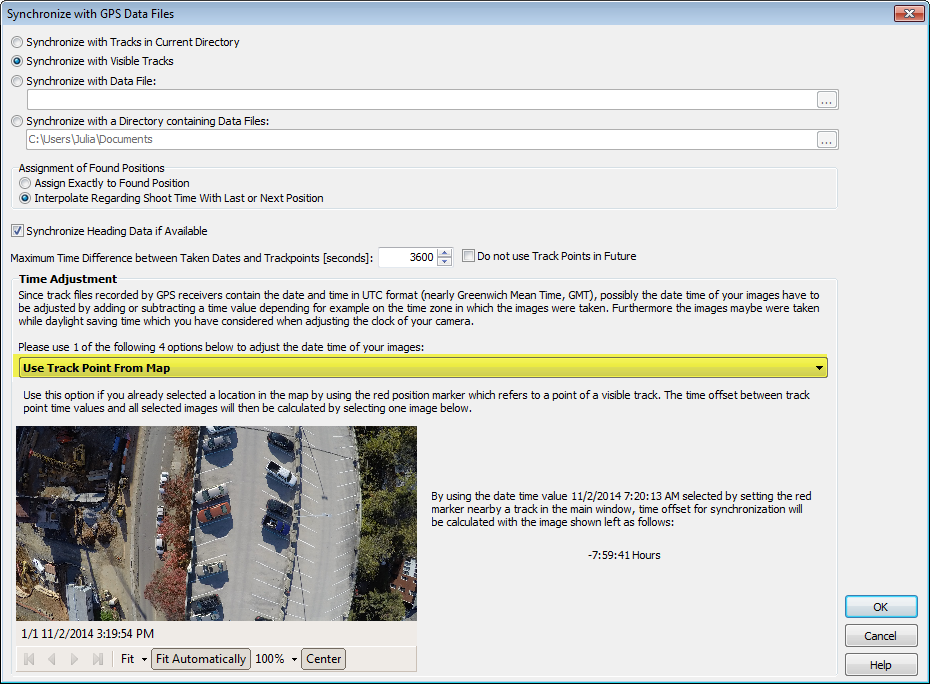
9. On the menu bar select Images > Synchronize with GPS Data Files....
10. On the Synchronize with GPS Data Files window, on the Time Adjustment section, select Use Track Point From Map.
11. On the Synchronize with GPS Data Files window, on the Time Adjustment section, select the image that corresponds to the selected track.
12. Click Ok.
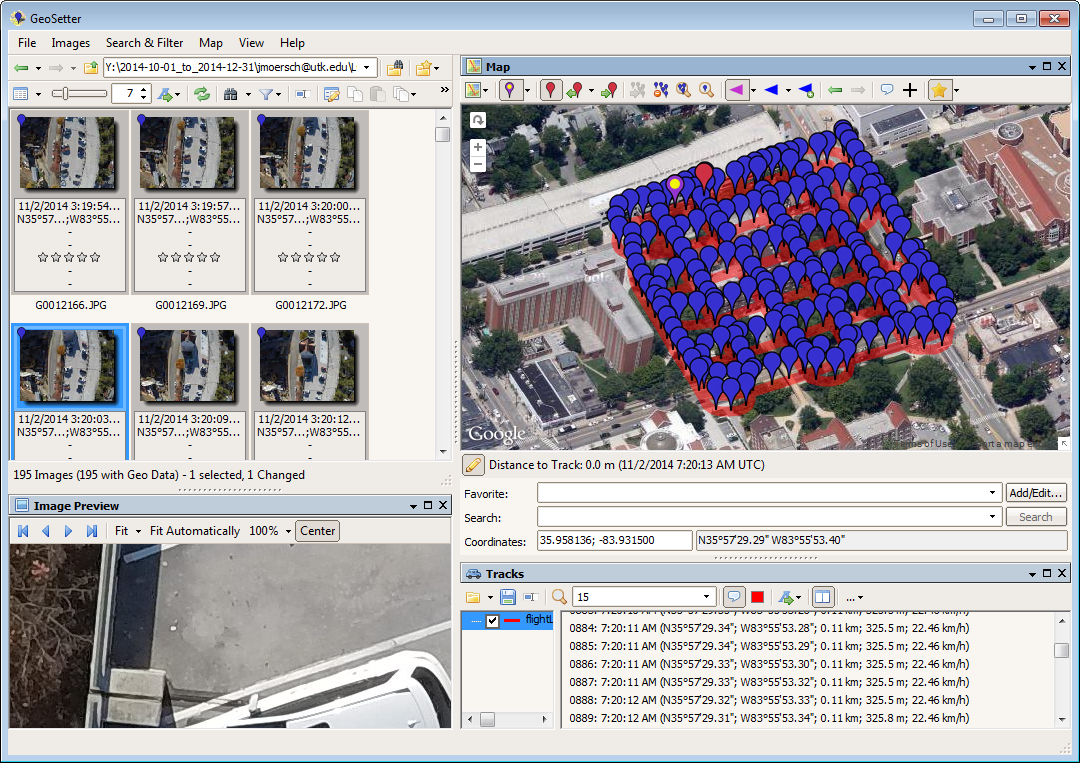
13. Verify the geotagging results by paging through the images and looking at the highlighted location.
14. (Optional) Repeat step 7 to 13 if it is necessary to refine the geotagging.
15. On the menu bar click Images > Save Changes to save the geolocation into the image EXIF data.
Disclaimer: Pix4D publishes this information as a courtesy to its customers. Because this information may not be accurate, Pix4D makes no warranty of any kind, expressed or implied, with respect to its validity.