Important: In order to import an Animation Trajectory ( 3D fly-trough), at least step 1. Initial Processing should be completed.
In order to import a Video Animation Trajectory to the rayCloud:
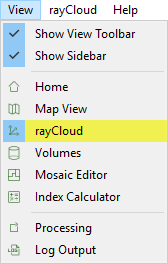
1. Access to the rayCloud: On the Menu bar, click View > rayCloud.
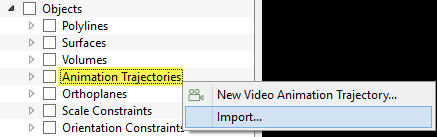
2. On the ection of the left sidebar, under the Objects layer, right click on Animation Trajectories and click Import...
3. The Import Video Animation Trajectory pop-up appears:
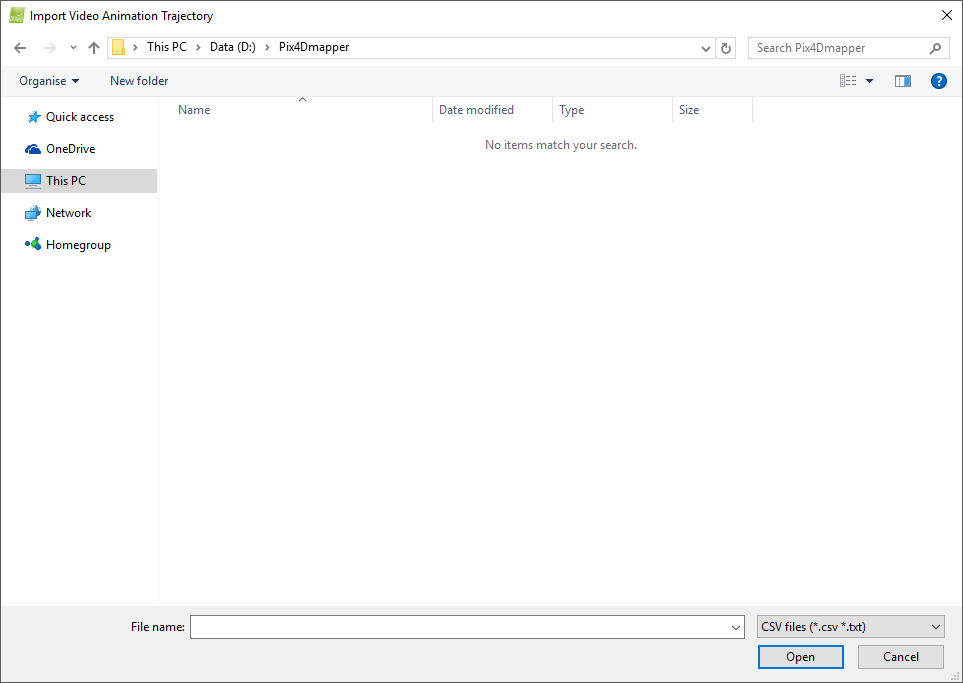
4. On the Import Video Animation Trajectory pop-up, navigate to the Animation Trajectory CSV file to be imported (Animation Trajectories created previously with PIX4Dmapper for the same area of study or created manually) and select it.
Important: Manually created Animation Trajectories must have the same format and extension as files generated when exporting an Animation Trajectory.
5. Click Open.
The Animation Trajectory is imported and selected in the rayCloud.