This article describes how to edit the camera model in the PIX4Dmapper database.
IN THIS ARTICLE
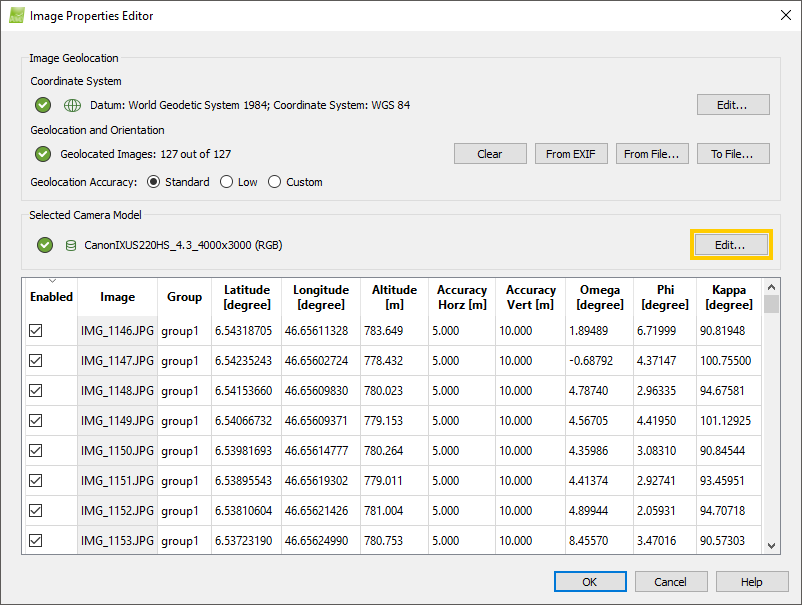
Image Properties Editor
To edit the camera model first go to the Image Properties Editor. This can be accessed by either:
- On the main menu, Project > Image Properties Editor...
- Clicking on the camera icon on the main menu.

- From the New Project wizard when creating a new project, the Image Properties window appears after loading the images.
After opening the Image Properties Editor click on Edit...
Methods to edit a camera model:
- Selecting another camera model from a list of existing camera models
- Editing an existing camera model
- Creating a new camera model
- Resetting
 an edited Camera model to
  Camera model from the database
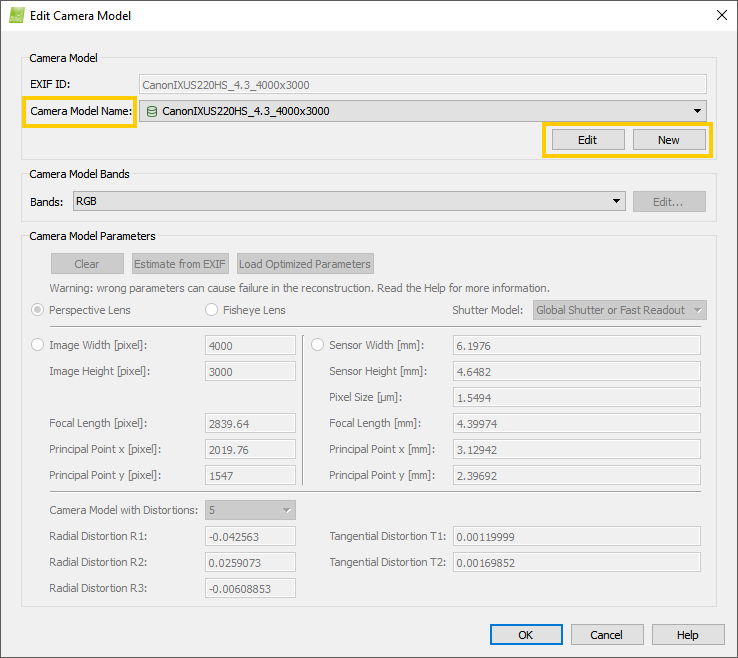
Selecting another camera model
In order to change the camera model to another existing camera model:
1. On the section Camera Model, click the Camera Model Name drop-down list.
2. Use the right scroll bar to navigate among the different camera models available and click the desired camera model.

3. On the section Camera Model Parameters, check the camera internal parameters set up for the selected camera. If the internal camera parameters do not match the camera used, edit the camera model following the instructions below.
 Refers to camera models existing in the software internal camera model database.
 Refers to a camera model existing in the user camera model database.
 Refers to a camera model existing in the software internal camera model database that has been edited by the user.
![]() Refers to a camera model whose parameters have been retrieved from the EXIF data.
Refers to a camera model whose parameters have been retrieved from the EXIF data.
 Refers to a camera model taken from a project file.
Editing an existing camera model
- A project has been processed and if the quality report displays under the Quality Check section, on Camera Optimization, a relative difference between initial and final focal length that is higher than 5%. This is indicated with a yellow check mark. In this event, change the camera initial values to the optimized values. For more information: How to change the Camera Initial Values to the Optimized Values
- Or, when no project has been processed using this camera model but the values of the camera model differ considerably from the known values.
In order to modify an existing camera model:
1. Select the Camera Model to be edited following the instructions above.
2. On the section Camera Model, click Edit.
3. Select the lens type between Perspective Lens or Fisheye Lens.
4. Edit the parameters by changing their values. The parameters can be reset by clicking Clear. If the images have sufficient information about the camera model in the EXIF data, the parameters can be estimated from the EXIF data by clicking Estimate from EXIF.
5. There are two options to save the edited information:
- The camera model can be saved to the camera database by clicking Save to DB (the icon
 will be displayed with the camera model name) and click OK.
 - Or the camera model can be used just for the project and not saved to the database. Simply click OK (the icon
 will be displayed with the camera model name).
camera_name_focal_length_sensor_widthxsensor_height
If the camera model has not been detected or the actual camera model does not meet the specifications of the camera, it is possible to create a new camera model following:
1. On the section Camera Model, click New.
2. Select the lens type between Persepective Lens or Fisheye Lens.
3. Edit the parameters by changing their values. The parameters can be reset by clicking Clear. If the images have enough information about the camera model in the EXIF data, the parameters can be estimated from the EXIF data clicking Estimate from EXIF.
4. There are two options to save the new camera:
- The camera model can be saved to the camera database by clicking Save to DB (the icon
 will be displayed with the camera model name) and click OK.
 - Or, the camera model can be used just for the project and not saved to the database. Simply click OK (the icon
 will be displayed with the camera model name).
camera_name_focal_length_sensor_widthxsensor_height
Resetting  an edited Camera model to
  a database Camera mode
If a camera model taken from the internal camera model database was modified , the change can be reverted following:
1. On the section Camera Model, click the Camera Model Name drop-down list.
2. Select the camera model that needs to be reset.
3. Click Restore.
4. Click OK.