Note: It is recommended to use the optimized values when the percentage of the difference between initial and optimized focal length (
Camera Optimization) is over 5%. For more information:
Quality Report Help.
In order to change the camera model initial values to the optimized values:
1. On the Menu bar, click Project > Image Properties Editor...
2. On the section SelectedCamera Model, click Edit...
3. On the section Camera Model click New.
4. On the Camera Model section, in Camera Model Name, select a new name, for example, adding the suffix "_optimized_for_projectname".
5. On the Camera Model Parameters, click Load Optimized Parameters.

6. Click OK.
7. A pop-up message appears:
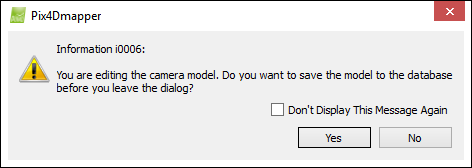
8. Click NO to not create a new camera model.
Note: It is recommended to click
NO,
since other projects may result in different optimized values. If the optimized values are repeated for many projects, then load the optimized camera parameters and save them to the camera database, by clicking
YES.
If YES was clicked, the following pop-up message appears:
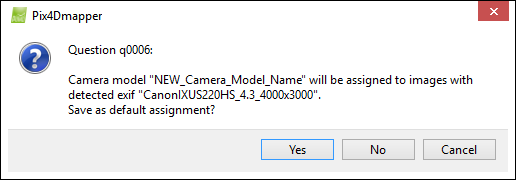
Note: It is recommended to click
NO,
since other projects may result in different optimized values. If the optimized values are repeated for many projects, then assign the camera model to images with the same detected camera ID, by clicking
YES.
9. Click OK.
10. Process Step 1.Initial Processing again.