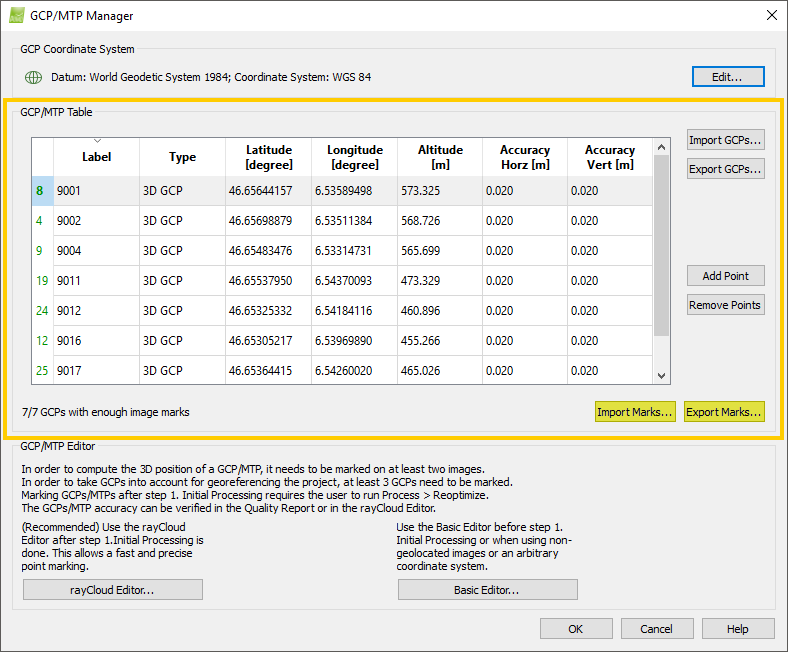
Import Marks...
PIX4Dmapper can import a file with the image coordinates of the GCPs / MTPs. For more information about the file format: Input files.
When clicking Import Marks..., the Select Import Image Marks File pop-up appears:

- Navigation menu, to select the location to store the file.
- On File name, type the name of the file.
- The Save as type displays the file format used to save the file:
- Pix4D marks files (*.txt, *.csv): Input files.
- Bingo text file (*.txt): Input files.
- XML structure (*.xml): Input files.
- Save: Saves the file.
- Cancel: Does not save the file and exits the pop-up.
Export Marks...
Once the GCPs / MTPs are marked on the images, PIX4Dmapper can export the image coordinates of the GCPs / MTPs. This option allows the user to use the same GCPs / MTPs with the same images the next time the project has to be processed (e.g. merging with another project, adding new images to the current project) without having to manually mark the GCPs / MTPs again.
When clicking Export Marks..., the Export Image Marks pop-up appears:
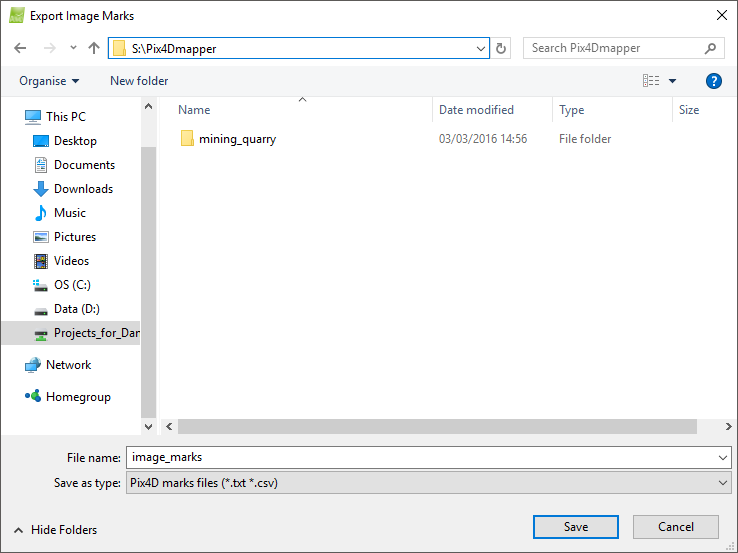
- Navigation menu, to select the location to store the file.
- On File name, type the name of the file.
- The Save as type displays the file format used to save the file:
- Pix4D marks files (*.txt, *.csv): Input files.
- Bingo text file (*.txt): Input files.
- XML structure (*.xml): Input files.
- When Pix4D marks files is selected, the Pix4D Marks File Options pop-up appears:
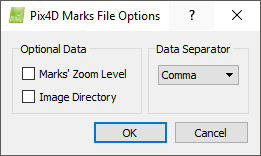
- Marks's Zoom Level check box: Exports the zoom level at which the GCPs / MTPs are marked on the images.
- Image Directory check box: Exports the directory of the images.
- Data Seperator: Sets the character used to separate the values in the file. The drop down list has the following options:
- Comma (default)
- Semicolon
- Tab
- Space
- Save: Saves the file.
- Cancel: Does not save the file and exits the pop-up.
For step by step instructions about how to export the marks of the GCPs / MTPs: How to export the marks of GCPs/Manual Tie Points in the GCP/MTP Manager.