- This layer is also accessible from the Volumes view: On the Menu bar, click View > Volumes to open the Volumes. The Layers section is displayed on the left of the main window. The Volumes view is available when the point cloud and the DSM are generated.
- The Display Properties of the point clouds can be changed in the rayCloud and the Volumes. When they are changed in one view, they will be inherited in the other view.
- The name of a loaded point cloud is displayed in standard format, while the name of point clouds that are not loaded are displayed in italics.
- By clicking on the point cloud's check box, the corresponding point cloud's visibility is toggled in the 3D View.
- Once step 2 is completed, when reopening a project, or when a point cloud has been unloaded:
- The point clouds are not loaded in the rayCloud. The next time that the point cloud's check box is selected, the Information i0014 pop-up message appears:
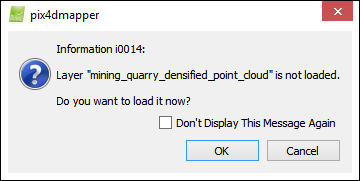
OK: Loads and displays the mentioned layer in the rayCloud.
Cancel: Closes the pop-up message and does not perform any action.
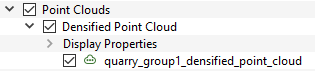
Densified Point Cloud
The Densified Point Cloud layer has a sub-layer that displays the name of the available point cloud(s). If the point cloud has been generated by splitting it into multiple parts, each part is displayed as one layer. On the left of the point cloud name there is an icon indicating that the layer is a point cloud:  .
.
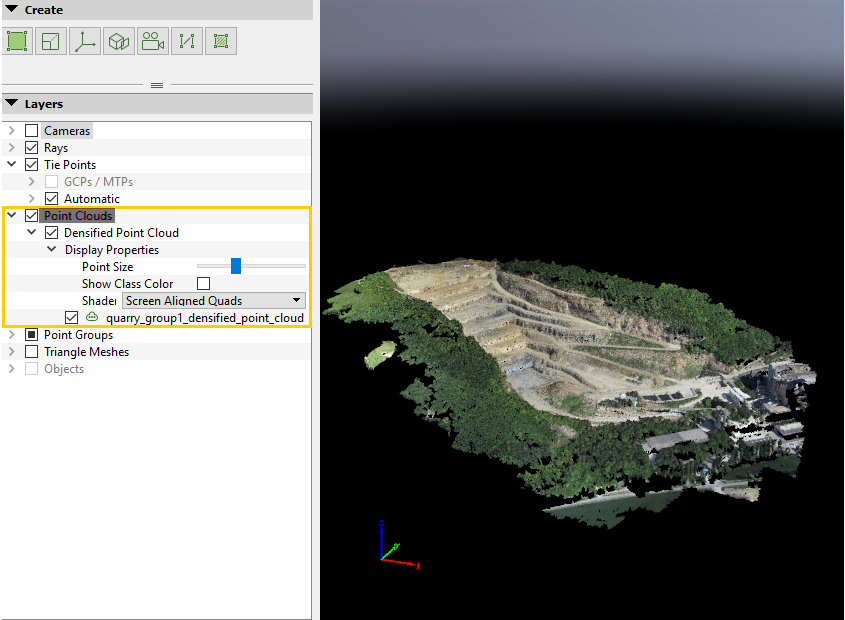
The loaded point cloud layer has the following sub-elements:
- Display Properties: Allows to edit the display properties for the densified point cloud. The following property can be edited:
- Point Size: Size of each point for the densified point cloud in the 3D View.
- Show Class Color: Displays the point cloud classification results. Each point is drawn as a flat square, having a different color according to the predefined point group it belongs. When the point cloud classification is not generated, white color is applied to all the points. White color is also applied to points that belong to a user-defined group.
- Shader: Defines the points shape and color in the 3D View. The different options are:
- Screen Aligned Quads (default): Each point is drawn as a flat square where the point is located. It is the fastest to render but produces many artifacts when changing the viewpoint. The color for each point comes from the reconstruction.
- Spherical Points: Each point is drawn as a non-perspective corrected sphere, for example, an approximated ball. It reduces the artifacts when moving the view but is not correct when the points are very close to the viewpoint. It gives the best compromise between rendering speed and image quality. The color for each point comes from the reconstruction.
- Spherical Points (HD): Each point is drawn as a perspective corrected sphere. This gives the highest image quality but it is very slow to render. The color for each point comes from the reconstruction.
- Screen aligned quads, Altitude (Red,Green,Blue): The same as Screen Aligned Quads but the color for each point is given by the altitude.
- Spherical Points, Altitude (Red,Green,Blue): The same as Spherical Points but the color for each point is given by the altitude.
- Spherical Points (HD), Altitude (Red,Green,Blue): The same as Spherical Points (HD) but the color for each point is given by the altitude.
- Screen aligned quads, Thermal: Useful for thermal project. The same as Screen Aligned Quads but the color for each point is given by the value of the channel in the Ironbow palette.
- Spherical Points, Thermal: Useful for thermal project. The same as Spherical Points but the color for each point is given by the value of the channel in the Ironbow palette.
By clicking on an specific densified point cloud's check box, the corresponding point cloud is shown or hidden in the 3D View.
By right clicking on an specific densified point cloud's name, a context menu with the following action appears:
- Load Layer: Visible if the point cloud is not loaded, loads the point cloud in the rayCloud.
- Unload Layer: Visible if the point cloud is loaded, unloads the point cloud from the rayCloud.
- Export Point Cloud: Allows to export a Densified Point Cloud of all the selected point groups, with the selected properties, in the selected formats and with the desired path / file name.
Useful in cases where:Important: If a Processing Area exists, only points within the processing area are exported. - The point cloud has been modified using the rayCloud (deleted points, changed or created the Processing area).
- The point groups generated during the point cloud classification need to be exported.
- The intent is to export only one/some point groups.
- Some point cloud format files were not generated (not selected in the processing options).
- Change output options: Save/discard colors.
By clicking Export Point Cloud, the Export Point Cloud pop-up appears: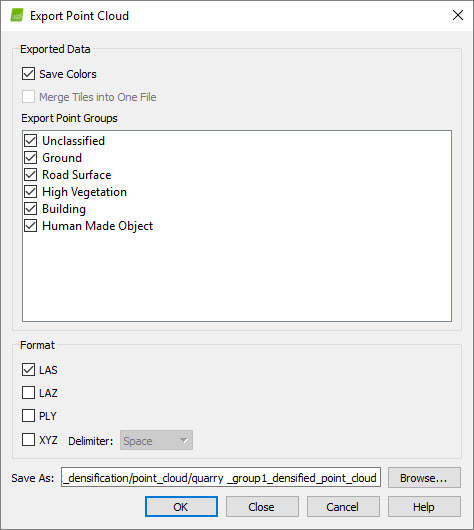
It contains 2 sections: - Exported Data: Allows the user to configure some parameters for the exporting and allows to select the Point Groups to export.
- Save Colors: Selected by default, this saves the color values for each point of the Point Cloud. If not selected, the color will not be exported for the exported point cloud.
- Merge Tiles Into One File: Not selected by default. In case the point cloud output files were divided in parts, this forces to export all parts within the same file by merging the parts.
Warning: When generating the point cloud, if it consists of many points, it is divided into parts.When exporting a point cloud and selecting Merge Tiles Into One file, the software will export one tile for the entire point cloud.
- Export Point Groups: Allows the user to select which point groups will be exported for the Densified Point Cloud. By default, all the point groups are selected. Even when the point cloud classification has not been generated, the predefined point groups appear in the Export Groups section. By selecting the box next to the point group name, the point group will be exported.
- Format: Allows the user to select the different formats in which the point cloud is exported. It is possible to select:
- LAS
- LAZ
- PLY
- XYZ (it is possible to use as a delimiter: Space, Tab, Comma and Semicolon).
And:
- File Name: Displays the path and name where the point cloud will be stored. By default, this is the project folder where the point cloud is stored after step 2. Point Cloud and Mesh.
- Browse...: Allows the user to select the path/name where the exported point cloud will be stored.
Warning: If the exported point cloud file is saved with the same name in the same folder where an existing file exists, it will replace the existing point cloud.
- OK: Saves the project and exports the selected formats with the selected parameters.
- Cancel: Closes the pop-up message and does not perform any action.
External Point Clouds
It is possible to visualize other point clouds by selecting the point cloud file and drag and dropping it into the Point Clouds layer. A new sub-layer is added to the Point Clouds layer with the path to the loaded file as name. The loaded point cloud has the following sub-element:
- Display Properties: Displays properties for the corresponding point cloud.
- Point Size: Size of each point for the corresponding point cloud in the 3D View.
- Shader: Defines the points shape and color in the 3D View. The different options are:
- Screen Aligned Quads (default): Each point is drawn as a flat square where the point is located. It is the fastest to render but produces many artifacts when changing the viewpoint. The color for each point comes from the reconstruction.
- Spherical Points: Each point is drawn as a non-perspective corrected sphere, for example, an approximated ball. It reduces the artifacts when moving the view but is not correct when the points are very close to the viewpoint. It gives the best compromise between rendering speed and image quality. The color for each point comes from the reconstruction
- Spherical Points (HD): Each point is drawn as a perspective corrected sphere. This gives the highest image quality but it is very slow to render. The color for each point comes from the reconstruction.
- Screen aligned quads, Altitude (Red,Green,Blue): The same as Screen Aligned Quads but the color for each point is given by the altitude.
- Spherical Points, Altitude (Red,Green,Blue): The same as Spherical Points but the color for each point is given by the altitude.
- Spherical Points (HD), Altitude (Red,Green,Blue): The same as Spherical Points (HD) but the color for each point is given by the altitude.
The following formats can be loaded:
- .las
- .laz
Loaded point clouds are displayed in the right position if it is a PIX4Dmapper file or an external file using the same coordinate system as the output coordinate system selected in PIX4Dmapper.