Menu Process > Save Undistorted Images - PIX4Dmapper

Follow

Index > Interface > Menu Process  Previous  |  Next 

This article explains how to save undistorted images when using PIX4Dmapper. This feature is activated once Step 1. Initial Processing has been completed.

Access: On the Menu bar, click Process > Save Undistorted Images 

PIX4Dmapper Save Undistorted Images

This process generates an undistorted copy of each original image using the optimized distortion parameters of the selected camera model.

 
Important: 
  • This process is only available when processing images using a perspective lens camera model.
  • The undistorted images will only be generated for the calibrated images. 
 
Information: For more information about camera distortion: Camera distortion.
Original image: The square grid is distorted because of the lens of the camera.
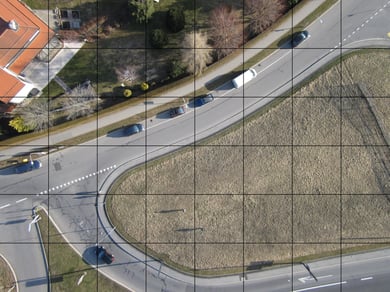
 Undistorted image: The square grid is now perfectly aligned.
Index > Interface > Menu Process  Previous  |  Next 
Was this article helpful?
3 out of 8 found this helpful

Article feedback (for troubleshooting, post here instead)

2 comments

  • Nandhini Udayasuriyan

    When I click the Save undistorted image option, ststus says that is saved. But where is the image saved


  • Avatar
    Beata (Pix4D)

    Hi!

    The Undistorted images are saved in the Result Folder. To find them simply follow this path:
     ...\project_name\1_initial\images\undistorted_images\image.

    If you ever have a problem finding your Pix4D outputs, please have a look at this article. You can find there all paths to each output that you can be generated by Pix4Dmapper. 

    Edited by Beata (Pix4D)
Article is closed for comments.