
To effectively use a PIX4D-supported RTK device with a mobile device, the first step is to configure the setup properly. This involves setting the camera offset between the antenna and the mobile device's camera. This offset needs to be manually measured by the user and is crucial for accurately computing locations captured by PIX4D-supported RTK devices, ensuring precise measurements for scans or ground control points (GCPs).
IN THIS ARTICLE
Mount the PIX4D-supported Trimble RTK rover to the Device
Smartphone model
How to Manually Measure the Camera Offset
Measure the X-axis
Measure the Y-axis
Measure the Z-axis
Enter the Camera Offset Values
Mount the PIX4D-supported Trimble RTK rover to the Device
The PIX4D-supported Trimble GNSS RTK receiver enables PIX4Dcatch to geolocate images captured by your mobile device with centimeter accuracy. The PIX4D-supported Trimble RTK rover can be coupled with mobile phones (iOS) using the SPC+ connector case provided by SP Connect.
Smartphone model
First, insert the phone into its compatible SPC+ case. Then, mount the case to the device by following the instructions provided with the SPC+ case.
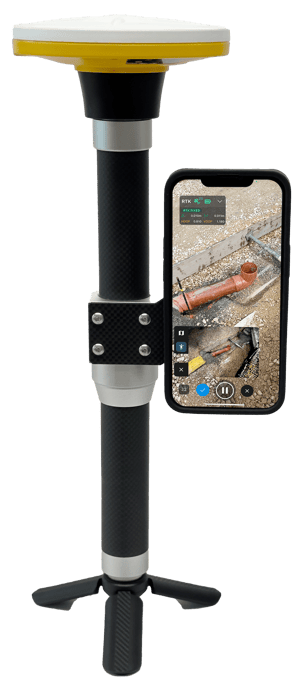
How to connect a Trimble device to PIX4Dcatch
- Launch PIX4Dcatch, tap the three dots
 , and select RTK device via Bluetooth.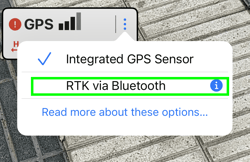
- Tap on the RTK Bluetooth device, and select the Trimble device.
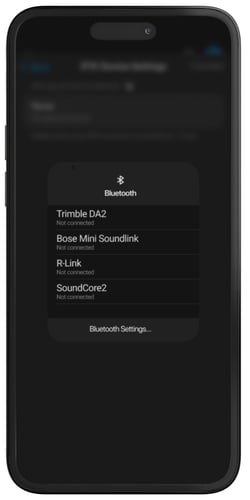
- The app will ask you to configure the Mobile Manager with a configuration file.
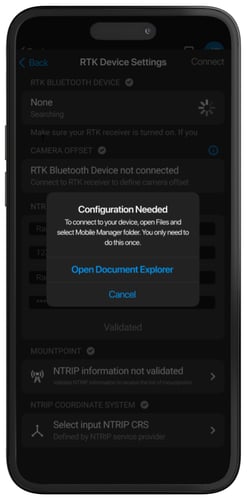
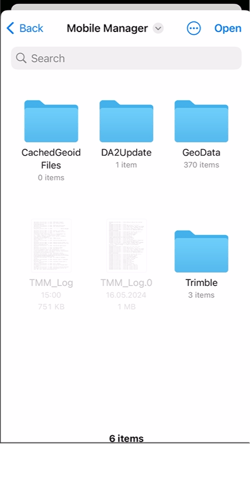
- After the configuration is done, reconnect to the device
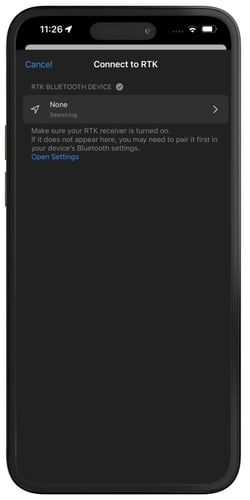
- Once connected, you will receive a message from the Trimble app to select your device.
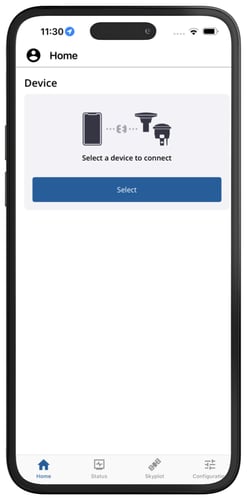
- Within PIX4Dcatch, start using your Trimble device for precise geotagging and image capture.
Note: To use a Trimble device effectively, it is essential to maintain an active subscription that guarantees centimeter-level accuracy. For more information on Trimble licensing options: Trimble Catalyst Subscription. When using a Catalyst on-demand hourly plan, first connect to Trimble Mobile Manager (TMM) and start a new session before connecting it to PIX4Dcatch. This ensures seamless integration among a Trimble device, TMM, and PIX4Dcatch, resulting in accurate positioning during data capture. If TMM disconnects during a capture, restart TMM and re-establish the Bluetooth connection with the Trimble device to resume operations smoothly.
How to Manually Measure the Camera Offset
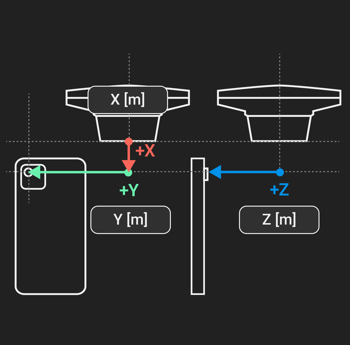
Place the device in portrait mode with the display facing forward. Notate the orientation of the X, Y, and Z axes and how they relate to the point of origin on the antenna to measure from. The point of origin resides in the middle of the screw mount at the base of the antenna. It will also be necessary to determine which lens to measure from for devices with multiple camera lenses.
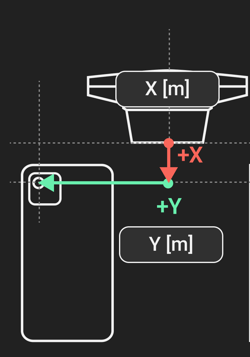
Measure the X and Y-axis
To measure the X-axis offset, measure the X-axis on the vertical axis from the base of the antenna to the point where it intersects the Y-axis. Then measure the distance from the camera lens to the antenna's center.
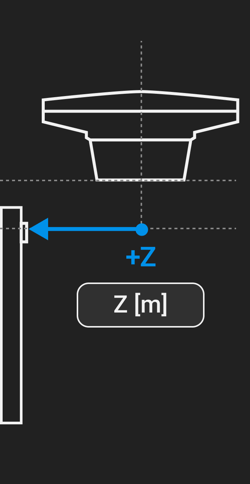
Measure the Z-axis
Measure the depth from the antenna center to the lens center for the Z-axis offset.
Enter the camera offset values
With the camera offsets properly measured and recorded, they can be entered into the appropriate Camera Offset Values field in the RTK Device Settings dialog. Depending on the device's region, centimeters or inches will be displayed as the measurement unit.
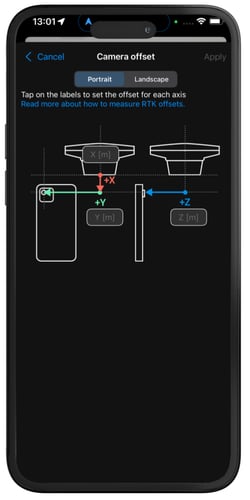
The camera offset is now properly set in the Camera Offset Values X, Y, Z fields. Continue with the RTK Device Settings dialog to complete the PIX4D-supported Trimble RTK connection to the device.
Enter NTRIP provider details.
The NTRIP provider details can be included in the NTRIP Provider Details field of the RTK Device Settings dialog. Depending on the device's region, the required settings may vary.
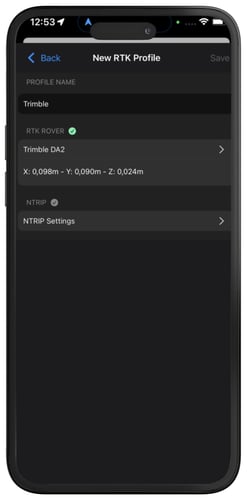
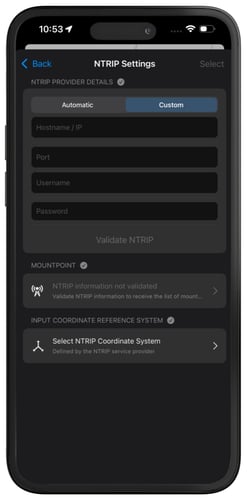
In the settings, you can choose two options:
Custom: The custom RTK setting option allows users to manually configure the RTK device to connect to an external NTRIP caster. This setup is useful when users have access to a specific NTRIP service provider or need to configure unique settings not covered by the other predefined options.
Auto: The auto RTK setting option allows TMM to select the optimal configuration for the RTK device automatically. In this mode, the program will choose the appropriate connection settings and NTRIP source based on the device's location and available services. This setup is ideal for users who want a straightforward experience without manually adjusting settings, ensuring the RTK device connects to the best available service with minimal user intervention.
Note: To get access to the NTRIP Trimble service, you will need to subscribe to Trimble Catalyst (contact sales for more information)
Third-party information disclaimer:
PIX4D provides instructions for third-party platforms and products solely as a helpful guide to unblock your integration. Those companies are independent of PIX4D. We do not maintain, control, or guarantee the performance, accuracy, or reliability of these products.
PIX4D may provide third-party links or contact information to help you find additional information about this topic. This contact information may change without notice. PIX4D does not guarantee the accuracy of third-party documentation or contact details.