This feature is available from PIX4Dmatic version 1.62.0 and above.
What is a Mask?
A mask is a binary segmentation of an image, used to select specific pixels that belong to a particular object or region, such as a car or a pipe in a trench. Masks are automatically generated based on prompts, which are significant points manually selected to indicate inclusion or exclusion from the mask. A group of masks across different images forms a coherent Mask object, represented as a circle in the 3D viewer and listed in the currently active layer.
 |
 |
 |
The image above shows 3 different masks with different colors (yellow, green, and pink).
How to create a Mask
Prerequisite: Run the AI tools processing step with the image embeddings toggle ON to be able to create masks. The AI tools processing step also has a depth maps toggle that must be ON to apply the masks to 3D. This step calculates the image embeddings necessary for producing masks. Pre-processing is a one-time action that is saved with the project.
- Add a Layer (optional): Add a Layer in the Content panel. Customize the layer by choosing a color and providing a name. If no layer is created, the first validated mask will create a new layer automatically.
- Activate Image Mask Tool

- Start Prompting: When at least one mask has been created and validated a “Mask” entry is added to the active layer. Click Measure in 3D to create a marker in 3D. This marker will be displayed together with the selection of the point cloud. The dimensions of the object will be calculated and added to the property panel. They will also be visible in the 3D viewer in the form of a measurement box and labels on the edges.
- Multiple Viewpoints: To achieve a more accurate 3D selection, create masks from different viewpoints on a sufficient number of images. Consider using the Auto-mask tool to speed up the mask creation.

How to Create Masks on Images: Prompting
To create masks on images, use prompts:
- Positive Prompts: Single left mouse button clicks to highlight areas to include (represented with green circles).
- Negative Prompts: SHIFT + left mouse button to exclude areas (represented with red circles).
- Validate Mask: When the mask is satisfactory, press the ENTER key to validate it. Note that starting to prompt a new image, disabling the image mask tool, or applying the mask to 3D will also automatically validate the previous mask.
Prompts help indicate which parts of a larger object should be included or excluded. In the example below, we aim to select only the front part of the car. After two positive prompts, the selection is too large. By adding a negative prompt, we achieve the desired selection.
Note: While prompting, apply the usual Undo/Redo shortcuts or the application Edit menu entry to Undo or Redo the prompts. This allows for easy estimation if a prompt improves the mask or not.

Creating Multiple Masks in the Same Image
You can create multiple separate masks within the same image. This is useful for representing disjoint components of a larger object. For instance, to select all the glass parts of a car (windshield and headlights), start with positive prompts. If the selection is too large, undo the last prompt using the Undo shortcut or the Edit>Undo application menu entry, validate the first mask (headlights) with ENTER, and then create a new separate mask for the windshield.
Keyboard shortcuts and Mouse controls:
- Left Mouse Button: Add a positive prompt to the current image mask.
- SHIFT + Left Mouse Button: Add a negative prompt to the current image mask.
- ESC: Clear all the prompts.
- Undo shortcut/Undo menu: Undo the last prompt, possible until no prompt is displayed.
- Redo shortcut/Redo menu: Redo the last undone prompt, possible until no prompt to add again.
- ENTER: Validate the current image mask. Starting to prompt a new image has the same effect.
Note: Clicking Measure in 3D and the Auto-mask buttons has the same effect.
How to create Masks on Images: Automasking
The Auto-mask feature allows for partially automated mask creation by propagating existing image masks to other unmasked images. This process requires calibration data to generate new masks. The prerequisites for the Automasking are:
- Ensure AI tools processing step is run with the Image Embeddings toggle enabled.
- Run Calibration before automasking.
- If Auto-mask is used on existing masks, ensure those masks are created with PIX4Dmatic version 1.67 or newer.
Basic workflow
- Manually create one or more masks for the object you want to mask (see How to Create Masks on Images: Prompting).
- Click the Auto-mask button on top of the image viewer

- New masks are automatically added to the selected Mask.
Note: Auto-mask never modifies existing masks; it only adds new ones.
Tip: Choose an image with a clear view of the object in context.
Advanced Workflow
- Mask Propagation: Auto-mask uses all existing image masks as inputs.
- If propagation stops before covering all desired images, re-run Auto-mask to extend coverage. The algorithm will include previously created masks in subsequent runs.
Important: Inspect masks after each run to avoid propagating incorrect masks, which may reduce mask quality.
- If propagation stops before covering all desired images, re-run Auto-mask to extend coverage. The algorithm will include previously created masks in subsequent runs.
- Handling Perspective Differences:
- Auto-mask may struggle with images showing extreme perspective differences. In such cases, manually create additional masks in those images to enable propagation from new image groups.
Warning: Be cautious when running Auto-mask multiple times on the same Mask. Incorrect masks may propagate errors, affecting mask quality.
How to use Masks
Once image masks have been created, the Measure in 3D button can be used to create a selection in 3D, highlighted with a Mask object. The Mask object can be utilized in various ways:
-
Measure an Object
The dimensions (length, width, and depth) of the 3D object are automatically measured and added to the object's properties when Measure in 3D is performed. An existing Mask can be updated to improve the 3D selection.
Measurements are performed using points from visible and enabled point clouds. The following point clouds are considered for measurements: Dense point clouds, Depth point clouds, and fused point clouds. Automatic Tie Points (ATPs) are not used for measurements.
If no visible and enabled point clouds are available, or if only disabled points are present, the Measure in 3D operation will fail. Ensure that the appropriate point clouds are visible and enabled before performing measurements.
Note:
- The measurements are performed using the points from visible points that aren’t disabled. If there are no visible point clouds usable for measurements, or only disabled points, the “Apply to 3D” will fail.
- The dimensions can be visualized in the properties panel, or in the 3D viewer, where a measurement box is displayed when the mask is hovered or selected. This measurement box also has labels on 3 edges showing the dimension values. These labels can be hidden via a toggle in the settings panel.
- This measurement box can have different orientations: Object-aligned or Z-axis-aligned. The orientation can be picked from the geometry menu in the content panel (cog icon), or in the properties panel.
- When the orientation is Object aligned, the measurement box tries to fit the masked object best, calculating the true dimensions of the object. When the orientation is Z-axis aligned, the measurement box is constrained to have one of its axes aligned with the Z-axis. This orientation is useful to measure the footprint of the masked object.

The available presets help the algorithm to take accurate measurements of masked objects:
- Standard: best suited for drone projects
- PIX4Dcatch: best suited for PIX4Dcatch projects
- Precision: creates tighter measurements from a sparser selection. Use this preset if the other two presets don’t work.

-
Classify or Clean a Point Cloud
Clicking Measure in 3D with one or more image masks creates a 3D selection, similar to other selection tools. You can refine it with other tools, disable points, or assign an ASPRS class. These actions are available from the context menu. This method offers more refined control compared to the Object Selection Tool.
-
Improve Dense Point Cloud and Mesh
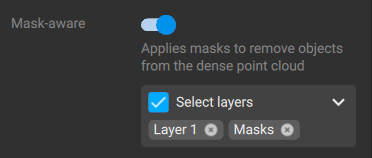
Masks can enhance the quality of dense point clouds and meshes by removing selected elements from the scene, effectively hiding them from 3D. Specify the layers to be used in the Dense point cloud and Mesh steps under the Mask-aware setting.
Improve DSM and Orthomosaic
Masks can be used to remove cluttering and non-relevant information from the DSM and orthomosaic. In scenes with layered structures (bridge with road beneath, tree canopies and terrain), the use of masks allows to shift the focus to the area of interest.
Important: for the DSM and Orthomosaic to properly remove elements, those must be fully annotated on all available images. Failure to do so will result in artifacts of the elements remaining.
Specify the layers to be used in DSM and Orthomosaic as shown below:
| DSM processing steps | Orthomosaic processing steps |
 |
 |
Example: Masking and removing support beams from a trench project
| Non mask-aware | Mask-aware | |
| DSM |  |
 |
| Orthomosaic |  |
 |
FAQ
-
What is the difference between the 3D Object Selection Tool and Mask workflows?
The Mask workflow offers more precise control over selection, particularly for objects viewed from multiple angles, such as statues. The 3D Object Selection Tool may not provide satisfactory results in such cases, whereas mask workflows enable precise 3D selections from different viewpoints.
-
What is the minimum number of Masks needed to create a 3D Mask marker?
The number of image masks needed depends on their intended use. For documentation, point cloud cleaning, or classification, a single image mask may suffice. For reliable object dimension measurements, multiple viewpoints of the same object are recommended. For dense and mesh applications, create image masks in all images where the object appears.
-
I created a Mask marker, then added/edited/deleted more masks, but nothing happened in 3D. Why?
After adding, removing, or changing image masks, you need to click Measure in 3D again to apply the changes.
-
How can I improve the precision of a Mask?
Use multiple prompts to refine a mask. A single positive prompt (green circle) highlights one component of an object. Add more positive prompts for additional components or use negative prompts to exclude unwanted parts.
-
How do I mask several disjoint objects in the same image (e.g., all windows of a facade)?
Create multiple masks, one for each object. Use positive prompts to select the first object, validate the mask with ENTER, and then proceed to annotate the other objects similarly.
-
Why is the quality of the masked Dense point cloud and Mesh not as good as expected?
For best results, ensure that all images where the object appears are masked. This workflow will be simplified in future updates.
-
Why do some objects propagate more easily than others?
- Calibration limitations: Objects outside the calibrated area may not propagate effectively (e.g., background elements).
- Object characteristics: Loosely defined or partially visible objects (e.g., the ground) are harder for Auto-mask to handle compared to well-defined, bounded objects.
-
Why doesn't adding more manual masks improve existing Automasks?
Auto-mask doesn’t modify existing masks. If a mask is unsatisfactory:
- Remove it (Right-click -> Remove image mask) and replace it with a manual mask.
- Re-run Auto-mask with additional inputs to refine the result.
-
Why does a low-quality mask keep getting generated?
This may occur if there isn’t enough overlapping information between the masked images and the problematic image. The Solution is:
- Create masks in views similar to the problematic image and re-run Auto-mask, create masks manually for the problematic images.