
IN THIS ARTICLE
What are annotations?
Requirements
Adding an annotation while capturing a dataset
Adding an annotation after capturing a dataset
Edit an annotation
What are annotations?
Annotations allow users to add more information directly to a PIX4Dcatch project. Each annotation allows users to add a title, description, and an image. Currently, the annotation available in PIX4Dcatch is markers. These annotations are georeferenced and automatically linked with the project. This new feature allows users to create an annotation both during and after a capture.
Requirements
- iPhone Pro models with LIDAR sensors.
- A valid PIX4Dcatch Professional license.
Adding an annotation while capturing a dataset
- On the PIX4Dcatch home screen, tap Capture at the bottom.
- Tap the record button
 to begin capturing a project.
 - Before creating an annotation, tap the pause button first
 . Be sure to stay at the same location. This will ensure the project has sufficient overlap when capturing resumes.
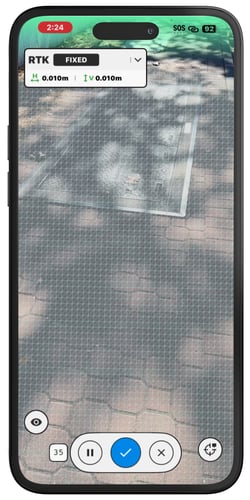
 - At the bottom right, tap the annotation tool button
 .
. 
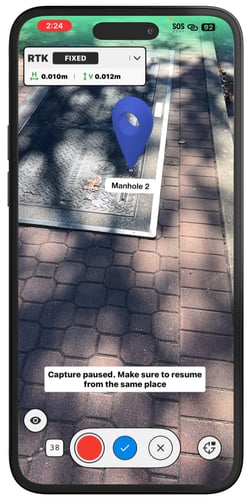
- A circle will appear on the screen. Tap it to place a point at its center.
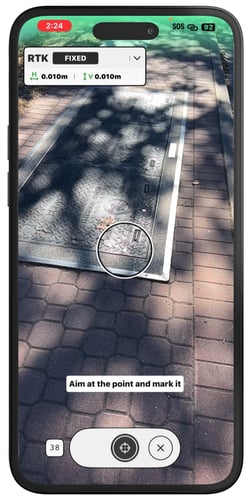
- Tap the target button
 to mark in a closer view.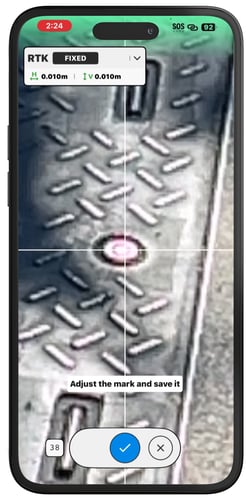
- Adjust the mark if needed.
- Tap
 to save the annotation.
 - Give an easily identifiable name and description for the annotation and tap Confirm.
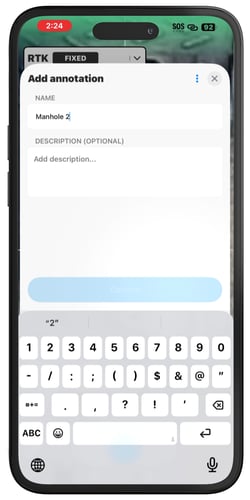
-
The annotations will show as blue markers.
-
Tap the record button
to continue capturing the project. When finished, tap the save button .png?width=25&height=25&name=Button%20(2).png) to save the project.
to save the project.
Adding an annotation after capturing a dataset
Note: It is recommended to add annotations before uploading the project to PIX4Dcloud for processing. Annotations added after the project has been uploaded to PIX4Dcloud will not be synced automatically to the processed project in PIX4Dcloud.
To include annotations after the project has been uploaded and processed in PIX4Dcloud, tap the three-dot icon  at the top right. Select Re-upload as a new project. In the included layers section, ensure annotations are included. This action requires re-processing and will consume processing credits.
- Open PIX4Dcatch and tap Projects at the bottom.
- Select the project for adding an annotation.
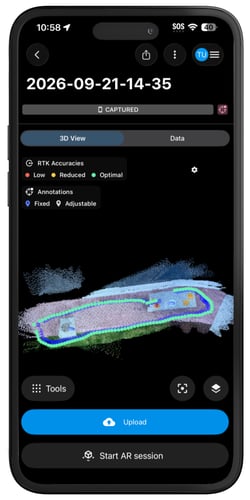
- In the bottom left corner, tap
 the Tools icon.
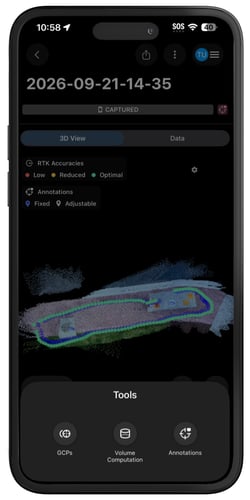
 - Select Annotations .
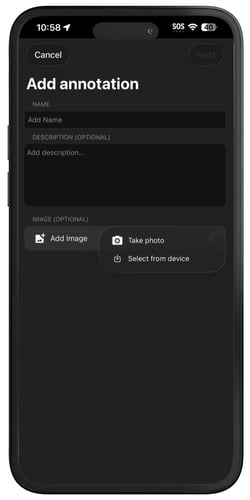
- Fill in the annotation details and tap Next in the top-right corner.
- Name: Give the annotation a clear and concise name.
- Description (optional): Add relevant notes, observations, or contextual details.
- Image (optional): Take a new photo or select one from the device.
- Mark the point position in the project and tap Confirm.
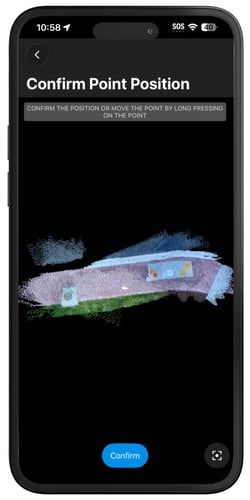
- The saved annotation will be saved and linked to the project. The annotations added after the project has been captured will appear as white. Annotations added while capturing the project will apear as blue.
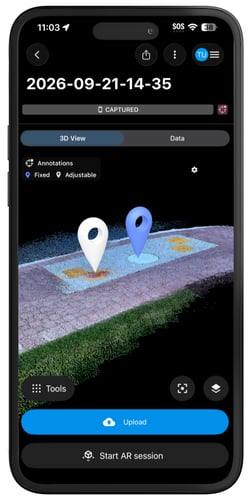
- When uploading the project to PIX4Dcloud, all annotations created in PIX4Dcatch will be automatically included. Annotations can be viewed and accessed alongside the project’s spatial data.
Edit Annotations
It is possible to edit an annotation added after the project was saved. Annotations added during a capture can still be edited (name, description, and image), but not their point position.
- Open a project containing the annotations to be edited.
- Tap on the annotation marker for editing.
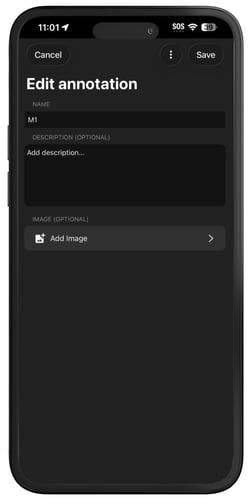
- Change the details (name, description, and image) of the annotation.
- Delete the current image and select a new one if needed.
- To delete the annotation, tap the three-dot icon
 on the top right and select Delete.
 - To edit point position, tap the three-dot icon on the top right and select Edit point position.
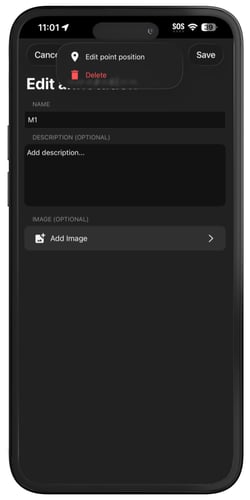
- Once the annotation is edited, tap Save in the top-right corner.