AI boundary, obstacle, and area selection - PIX4Dfields
PIX4Dfields 2.10 introduces Artificial Intelligence-assisted boundary, obstacle, and area selection.
IN THIS ARTICLE
Introduction
AI Boundary selection
AI Obstacle selection
AI Area annotation detection
Troubleshooting
Introduction
PIX4Dfields 2.10 introduces Artificial Intelligence-assisted boundary and obstacle selection, an intuitive interface to select, refine, and buffer agricultural field boundaries, obstacles, and area annotations via mouse clicks.
AI Boundary detection
This tool is designed for rapid field boundary detection and may require manual refinement to ensure optimal quality. To create an AI-assisted boundary:
- Select the desired layer to initiate boundary selection.
- Navigate to Boundaries.
- Select AI Boundary.

- Wait for the model to load.
Important: The model will be applied to the entire area displayed on the screen. Therefore, the first step when drawing a boundary is to adjust the zoom to cover the entire field where the boundary should be detected.
- Once the model is ready, the toolbox menu will appear.

-
- LEFT CLICK: Adds an object to the selection. In this case, click inside the field boundary to be detected. Ensure the field is visible on the entire screen; do not zoom in.
- RIGHT CLICK: Click outside the boundary on areas to be discarded.
- TAB: Only press Tab when saving the current boundary and a new boundary needs to be created.
- CTRL + Z: Undo the last step.
- 1: Enlarges the boundary area that is being created.
- 2: Reduces the boundary area that is being created.
- Adjust the slider to make the boundary more or less detailed.


Note: If two boundaries intersect and Tab is pressed, they will automatically merge into a single boundary.
AI obstacle selection
To create an AI-assisted obstacle:
- Select the desired layer to initiate obstacle detection.
- Navigate to Boundaries.
- Select AI Obstacle.

- Wait for the model to load. The toolbox menu will then appear.
- Left-click on one obstacle.
- If necessary, continue left-clicking on additional parts of the obstacle and right-clicking on the surrounding areas to refine the detection.
- Once detection is successful, press "TAB."

Important: After each obstacle (e.g., tree, pole) is detected, press TAB .This ensures the model works correctly and each obstacle is created as a distinct object.
- Proceed left-clicking other objects and pressing TAB.
- Press 1 and maintain it to enlarge the obstacle further.

- Click the Accept icon to save the obstacle.
AI Area selection
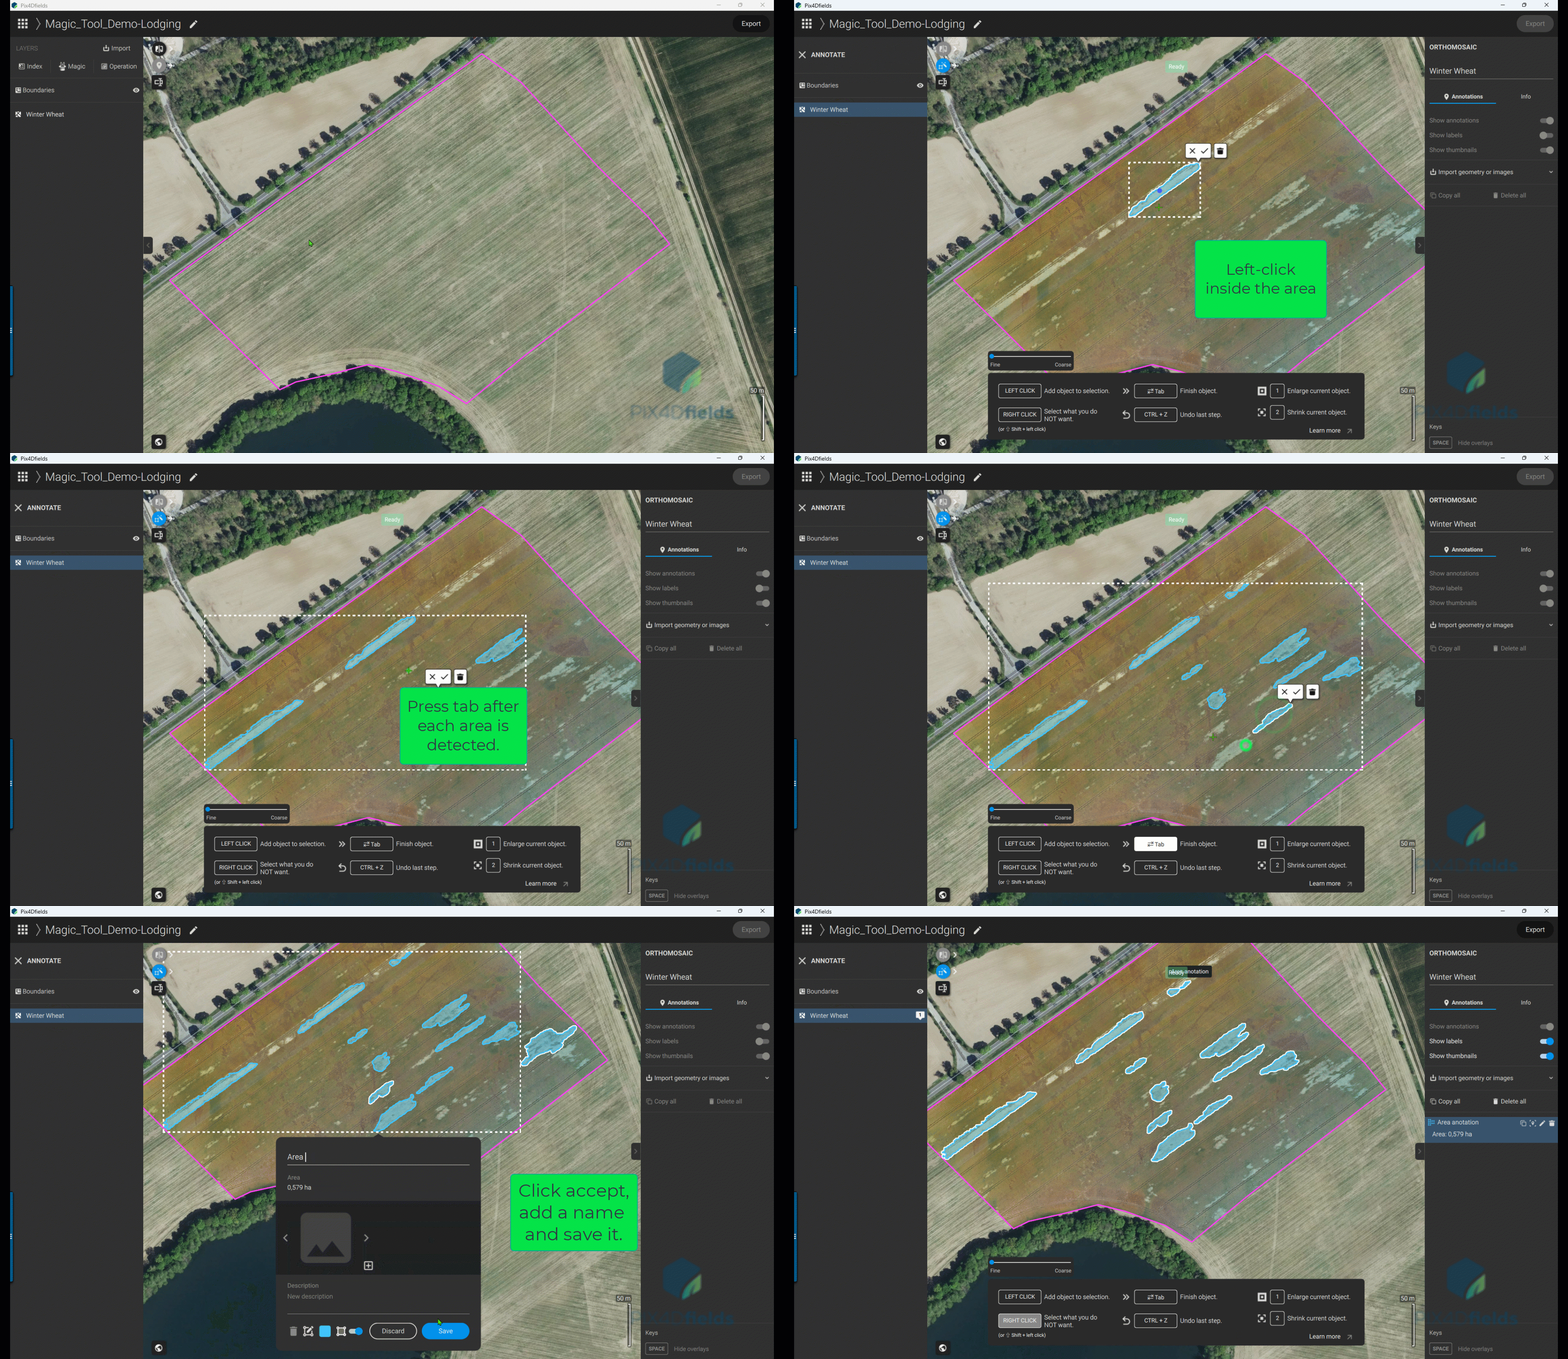
AI Area annotation selection follows the same process as AI Boundary. In this case, it produces an annotation that is displayed as an overlay on the selected layer, not intended to be used as a Boundary.
- Select the desired layer to initiate area detection.
- Click on the Annotations icon.
- Click AI Area.

- Wait for the model to load.
- Left-click on the area to be detected.
- Right-click areas that should not be detected.
- Press Tab when saving the current detection and a new area needs to be created.
- Click the Accept icon to save the annotation.

Troubleshooting
- If the area or obstacles are not displayed after the first click, then the GPU driver might need to be updated, for example:

Please visit: Update Graphics card drivers .
