When the area of interest is very big and the amount of data large, multiple PIX4Dmapper projects can be created for one area. To merge .tif files that are generated from the multiple projects, use an external GIS software like Global Mapper.
In order to merge the different GeoTIFF orthomosaic files in Global Mapper:
1. メニューバーで、[ ] をクリックします File > Create New Map Catalog.
2. ウィンドウ内で Save As, choose where the new Global Mapper Project will be saved and click Save.
3. In the window Modify Map Catalog、クリック Add files to choose the files to merge.
4. A message appears about how many maps have been added to the map catalog. Click 了解.
5. In the window Modify Map Catalog、クリック 了解.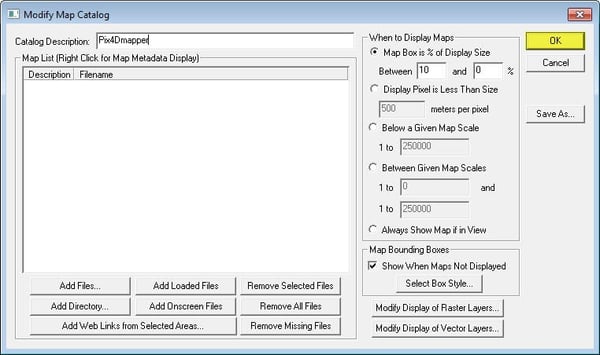
6. On the menu bar, click File > Export > Export Raster Image Format.
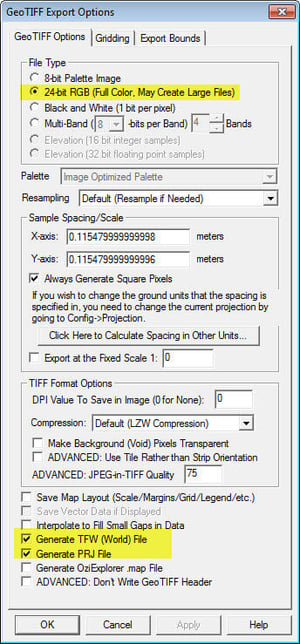
7. On the pop-up Select Export Format、選択 GeoTIFF そしてクリック 了解.
8. In the window GeoTIFF Export Options, select the following options:
PIX4Dmapper can generate contour lines. For more information: Menu Process > Generate Contour Lines. However, it is also possible to extract contour lines using the DSM or DTM generated by PIX4Dmapper.
1. Drag and drop the .tif file onto the main view of Global Mapper.
2. On the menu bar, click Analysis > Generate contours...
3. In the window Contour Generation Options, check the settings and click OK.
To improve the visual aspect, it is possible to delete small lines and to smooth the contour lines.
Delete small lines
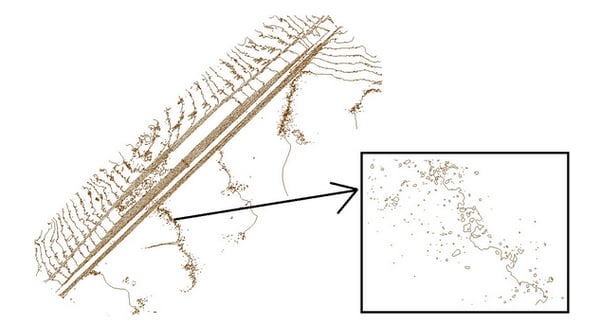
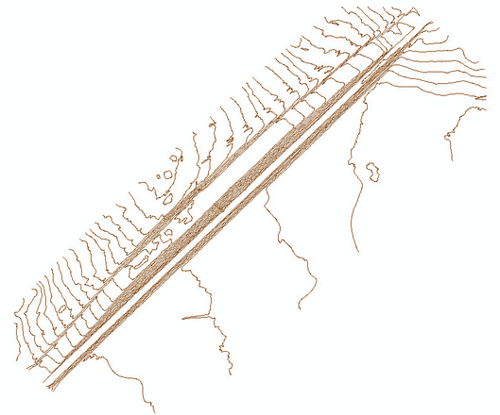
Depending on the area and its elevation, some tiny contours might be generated (see picture below).
1. メニューバーで、[ ] をクリックします Edit > Select All Features with Digitizer Tool.
2. After all features are selected automatically, click the Digitizer Tool ![]() .
.
3. Right click on the main view and click Attribute/Style Functions > Add/Update the Measure Attributes of selected Feature(s).
4. メニューバーで、[ ] をクリックします Search > Search by Attributes, Name and Description.
5. In the window Search Vector Data, in the section Searh Criteria、選択 LENGTH from the drop-down list under Attributre/Item. Enter a Compare Value. All the contours that have length below this value will be selected.
6クリック Delete Selected.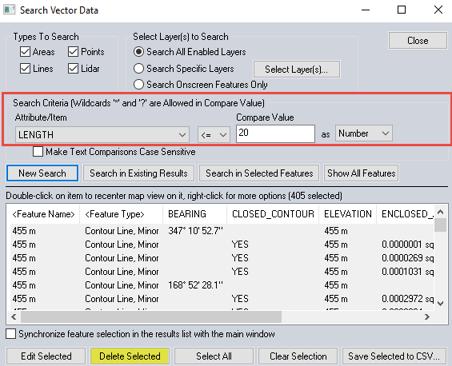
Smooth contour lines
Contour lines are often sharp and need to be smoothed.
1. メニューバーで、[ ] をクリックします 編集.
2クリック Select All Features with Digitizer Tool.
3. After all features are selected automatically, click ![]() .
.
4. Right-click on the main view and click Move/Reshape feature(s) > SMOOTH - Smooth Selected Line/Area Feature(s).
The USGS DEM standard is a geospatial file format for storing a raster-based digital elevation model. PIX4Dmapper generates the raster DSM / DTM as GeoTIFF. To convert it to DEM:
1. Drag and drop the GeoTIFF file onto the main view of Global Mapper.
2. From the menu bar, click File > Export > Export Elevation Grid Format.
3. Select the DEM format.
For more information: Global Mapper help.
1. Open the contour lines file in Global Mapper.
2. メニューバーで、[ ] をクリックします File > Export > Export Vector Format そして選択する XYZ (Simple ASCII) Text File.
3. In the window ASCII Export Options, check the box Export Elevations for Each Vertex、そしてクリックして 了解.
4. Open a new Global Mapper project (workspace).
5. On the menu bar, click File > Open Generic ASCII Text File(s).
6. In the window that opens, select the file previously exported (step 3).
7. In the window 一般的なASCIIテキストファイルのインポートオプション、クリック Select Coordinate Offset/Scale and check the box Point, Line, and Area Features.
8. In the window Select Coordinate Offset/Scale, set the Z vertical offset value (in this example 30 meters) and click 了解.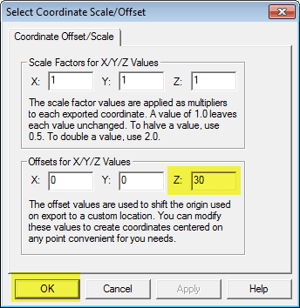
The contour lines now have been vertically offset. To change their labels to the new altitude values:
1. メニューバーで、[ ] をクリックします Tools > Control Center.
2. Right-click on the contour lines layer.
3クリック CALC ATTR - Calculate/Copy Attribute value.
4. In the window Attribute Calculation Setup, type the new attribute name.
5. In the field Source Attribute、選択 標高.
6. In the field Operation、選択 追加.
7. In the field Used Fixed Value, set the offset (in this example 30 meters).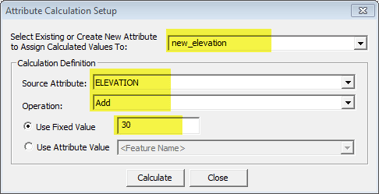
8クリック Calculate.
9. On the menu bar, click Tools > Control Center.
10. Select the contour lines layer and click Options...
11. In the window Vector Options、選択 Use Selected Attribute Value for Name option and from the drop down list, select the new attribute previously created (step 4).
12. Check the box Display Labels for Layer if any Shown.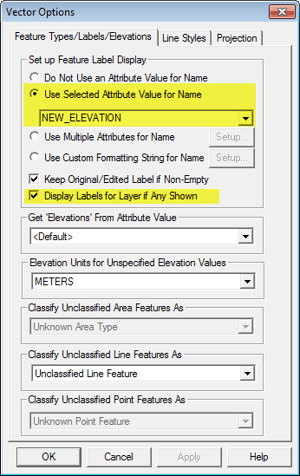
免責事項:Pix4Dは、お客様へのサービスの一環としてこの情報を提供しています。Pix4Dは、このコンテンツの有効性または正確性について、明示的か黙示的かを問わず、いかなる保証もいたしません。